Innov-is 4000D/4000
FAQs & Troubleshooting |
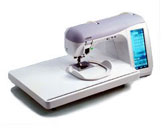
Innov-is 4000D/4000
Date: 13/04/2016 ID: faqh00000437_000
How do I wind the bobbin?
This section describes how to wind thread onto a bobbin. With this machine, you can use the supplemental spool pin to wind the bobbin while sewing using the main spool pin.
The included bobbin was designed specifically for this sewing machine. If bobbins from other models are used, the machine will not operate correctly. Use only the included bobbin or bobbins of the same type (part code: SA156, SFB).
|
|
(A) This model |

Using the Supplemental Spool Pin
With this machine, you can wind the bobbin without unthreading the machine. While using the main spool pin to sew, you can conveniently wind the bobbin using the supplemental spool pin.
|
|
|

-
Turn the main power to ON and open the top cover.
-
Align the groove in the bobbin with the spring on the bobbin winder shaft, and set the bobbin on the shaft.

(1) Groove of the bobbin
(2) Spring on the shaft -
Set the supplemental spool pin in the "up" position.

(1) Supplemental spool pin
-
Place the spool of thread on the supplemental spool pin, so that thread unrolls from the front. Then push the spool cap onto the spool pin as far as possible to secure the thread spool.

(1) Spool pin
(2) Spool cap
(3) Thread spool- If the thread spool and/or spool cap are set incorrectly, the thread may tangle on the spool pin and cause the needle to break.
- Use the spool cap (large, medium, or small) that is closest in size to the thread spool. If a spool cap smaller than the thread spool is used, the thread may become caught in the slit on the end of the spool and cause the needle to break.
When sewing with fine, cross-wound thread, use the small spool cap, and leave a small space between the cap and the thread spool.

(1) Spool cap (small)
(2) Thread spool (cross-wound thread)
(3) Space -
With your right hand, hold the thread near the thread spool. With your left hand, hold the end of the thread, and use both hands to pass the thread through the thread guide.

(1) Thread guide
-
Pass the thread under the pin, and pass the thread around the pretension disk making sure that the thread is under the pretension disk.

(1) Pin
(2) Pretension diskMake sure that the thread passes under the pre-tention disk.
-
Wind the thread clockwise around the bobbin five or six times.

-
Pass the end of the thread through the guide slit in the bobbin winder seat, and pull the thread to the right to cut the thread with the cutter.

(1) Guide slit (with built-in cutter)
(2) Bobbin winder seatBe sure to follow the process described. If the thread is not cut with the cutter, and the bobbin is wound, when the thread runs low it may tangle around the bobbin and cause the needle to break.
-
Set the bobbin holder to the left, until it clicks into place.

(1) Bobbin holder (switch)
When the bobbin holder is set to the left, it works as a switch to make the bobbin wind automatically.
- The bobbin starts winding automatically and stops rotating when it is done winding. The bobbin holder will return to the original position.
-
Cut the thread with the scissors and remove the bobbin.

When removing the bobbin, do not pull on the bobbin winder seat. Doing so could loosen or remove the bobbin winder seat, and could result in damage to the machine.
Setting the bobbin improperly may cause the thread tension to loosen, breaking the needle and possibly resulting in injury.

Using the Main Spool Pin
You can use the main spool pin to wind the bobbin before sewing. You cannot use this spool pin to wind the bobbin while sewing.
|
|
|

-
Turn the main power to ON and open the top cover.
-
Align the groove in the bobbin with the spring on the bobbin winder shaft, and set the bobbin on the shaft.

(1) Groove of the bobbin
(2) Spring on the shaft -
Pivot the spool pin so that it angles upward. Set the thread spool on the spool pin so that the thread unwinds from the front of the spool.

(1) Spool pin
(2) Spool cap
(3) Thread spool- If the thread spool and/or spool cap are set incorrectly, the thread may tangle on the spool pin and cause the needle to break.
- Use the spool cap (large, medium, or small) that is closest in size to the thread spool. If a spool cap smaller than the thread spool is used, the thread may become caught in the slit on the end of the spool and cause the needle to break.
When sewing with fine, cross-wound thread, use the small spool cap, and leave a small space between the cap and the thread spool.

(1) Spool cap (small)
(2) Thread spool (cross-wound thread)
(3) Space -
Holding the thread with your hands, slide the thread into the grooves on the thread guide plate.

(1) Thread guide plate
-
Pass the thread through the thread guide.

(1) Thread guide
-
Pass the thread under the pin. Then pass the thread around the pretension disk making sure that the thread is under the pretension disk.

(1) Thread guide
(2) Pin
(3) Pretension diskMake sure that the thread passes under the pre-tention disk.
-
Wind the thread clockwise around the bobbin five or six times.

-
Pass the end of the thread through the guide slit in the bobbin winder seat, and pull the thread to the right to cut the thread with the cutter.

(1) Guide slit (with built-in cutter)
(2) Bobbin winder seatBe sure to follow the process described. If the thread is not cut with the cutter, and the bobbin is wound, when the thread runs low it may tangle around the bobbin and cause the needle to break.
-
Set the bobbin holder to the left, until it clicks into place.

(1) Bobbin holder (switch)
When the bobbin holder is set to the left, it works as a switch to make the bobbin wind automatically.
- The bobbin starts winding automatically and stops rotating when it is done winding. The bobbin holder will return to the original position.
-
Cut the thread with the scissors and remove the bobbin.

When removing the bobbin, do not pull on the bobbin winder seat. Doing so could loosen or remove the bobbin winder seat, and could result in damage to the machine.
Setting the bobbin improperly may cause the thread tension to loosen, breaking the needle and possibly resulting in injury.

Innov-is 1500D/1500, Innov-is 2200, Innov-is 4000D/4000, Innov-is 5000, NX-2000, QC-1000
If you need further assistance, please contact Brother customer service:
Content Feedback
Please note this form is used for feedback only.