Innov-is XP3
FAQs & Troubleshooting |
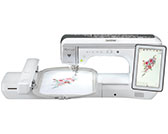
Innov-is XP3
Date: 12/02/2024 ID: faqh00100273_007
How do I adjust a stitch width or length?
When you select a stitch, your machine automatically selects the appropriate stitch width, stitch length, and upper thread tension. However, if needed, you can change any of the individual settings.
-
Settings for some stitches cannot be changed.
(refer to “STITCH SETTING CHART” on the Operation Manual (Sewing)). - If you turn off the machine or select another stitch without saving stitch setting changes , the stitch settings will return to their default settings.
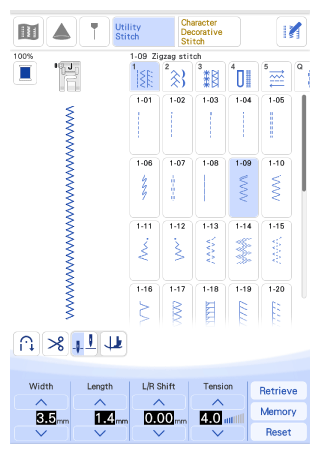
Setting the Stitch Width
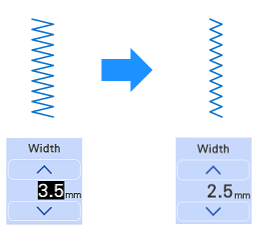
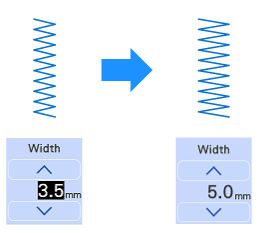
Follow the steps below when you want to change the stitch pattern width.

Example
| Touch |
|
Touch |
 |
 |
|
|
>> The value in the display gets smaller. |
>> The value in the display gets bigger. |
-
Touch
 to save the stitch settings.
 -
Touch
 to check changes made to the stitch.
 -
Touch
 to return the stitch width to the original setting.
After adjusting the stitch width, slowly rotate the handwheel toward you (counterclockwise) and check that the needle does not touch the presser foot. If the needle hits the presser foot, the needle may bend or break.
Setting the Stitch Length
Follow the steps below when you want to change the stitch pattern length.

Example
| Touch |
|
Touch |
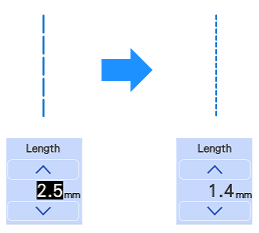 |
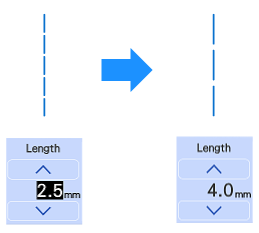 |
|
|
>> The value in the display gets smaller. |
>> The value in the display gets bigger. |
-
Touch
 to save the stitch settings.
 -
Touch
 to check changes made to the stitch.
 -
Touch
 to return the stitch width to the original setting.
If the stitches get bunched together, lengthen the stitch length and continue sewing. Do not continue sewing without lengthening the stitch length. Otherwise, the needle may bend or break.
Setting the “L/R Shift”
Follow the steps below when you want to change the placement of the stitch pattern by moving it left and right.

Example
| Touch |
|
Touch |
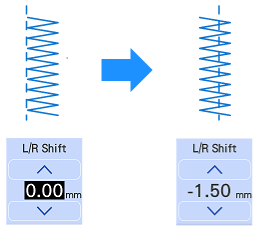 |
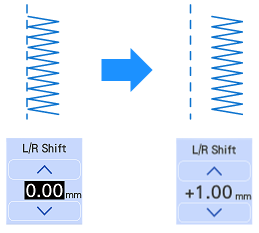 |
|
|
>> The value in the display appears with a minus sign. |
>> The value in the display appears with a plus sign. |
-
Touch
 to save the stitch settings.
 -
Touch
 to check changes made to the stitch.
 -
Touchs
 to return the stitch width to the original setting.
After adjusting the L/R Shift, slowly rotate the handwheel toward you (counterclockwise) and check that the needle does not touch the presser foot.
Innov-is XP1, Innov-is XP2, Innov-is XP3
If you need further assistance, please contact Brother customer service:
Content Feedback
Please note this form is used for feedback only.