Innov-is XJ1
FAQs & Troubleshooting |
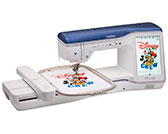
Innov-is XJ1
Date: 07/29/2019 ID: faqh00000636_003
How do I attach the Embroidery foot “W+” with LED pointer or “W”?
-
When attaching an embroidery foot, always press
 on the screen. You may accidentally press the [Start/Stop] button and possibly cause injury.
 - Be sure to use embroidery foot W+ with LED pointer when doing embroidery. Using another embroidery foot may cause the needle to strike the embroidery foot, causing the needle to bend or break and possibly cause injury.
-
Press
 (Needle position button) to raise the needle.
-
Press to lock all keys and buttons.
If the message [OK to automatically lower the presser foot?] appears on the LCD screen, press [OK] to continue.
-
Raise the presser foot lever.
-
Press the black button on the presser foot holder and remove the presser foot.

(1) Black button
(2) Presser foot holder
-
Position the embroidery foot W+ with LED pointer on the presser foot bar by aligning the notch of the presser foot to the large screw.
Side view

-
Hold the embroidery foot in place with your right hand, and then use the disc-shaped screwdriver to securely tighten the presser foot holder screw.

(1) Presser foot holder screw Use the disc-shaped screwdriver to firmly tighten the presser foot holder screw. If the screw is loose, the needle may strike the embroidery foot and possibly cause injury.
-
Plug the connector of the embroidery foot W+ with LED pointer into the jack on the back left side of your machine.

-
Press to unlock all keys and buttons.
>> All keys and operation buttons are unlocked, and the previous screen is displayed.
Innov-is XJ1, Innov-is XJ2
If you need further assistance, please contact Brother customer service:
Content Feedback
To help us improve our support, please provide your feedback below.
Step 1: How does the information on this page help you?
Step 2: Are there any comments you would like to add?
Please note this form is used for feedback only.