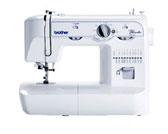
PS-21
FAQs & Troubleshooting |

PS-21
Date: 02/25/2009 ID: faqh00000008_000
Lower bobbin threading

- Turn the power switch to "o".
- Raise the needle to its highest position by turning the balance wheel towards you (anti-clockwise) and raise the presser foot lever.
- Open the shuttle cover behind the extension table on the the front of the machine and remove the bobbin case by pulling its latch towards you and pulling it out of the shuttle race. (fig A).
- Unwind about 10cm (4") of the thread from a full bobbin and insert it into the bobbin case. (see fig B-1). Pull the trailing thread into the slot then down and to the left, as shown in fig B-2, until it enters the delivery eye under the tension spring (fig B-3).
- Holding the bobbin case by the latch, fully insert the bobbin case into the shuttle race and release the latch. Make sure the bobbin case finger fits into the notch at the top of the race as shown in fig C.
If the bobbin case is not properly placed back into the machine, it will fall out of the shuttle immediately after starting to sew.
- Make sure bobbin thread unrolls in the correct direction when installing the bobbin into bobbin case. [fig. B-1]
- Check that you encounter some resistance when pulling the thread. [fig. B-3]
- Make sue the bobbin case finger fits into the notch at the top of the race. [fig. C]
MOVING PARTS
Disconnect from power supply before servicing, always replace the cover.
LS-1217, LS-1520, LS-1717, LS-2000, LS-2020, LS-2125/2125i/2129, LS-30, LX-3125/3125E, PS-21, XL-5130/5232/5340, XL-5500, XL-5600, XL-5700
If you need further assistance, please contact Brother customer service:
Content Feedback
To help us improve our support, please provide your feedback below.
Step 1: How does the information on this page help you?
Step 2: Are there any comments you would like to add?
Please note this form is used for feedback only.