PR670E / PR670EC
FAQs & Troubleshooting |
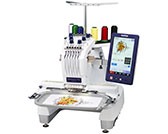
PR670E / PR670EC
Date: 25/08/2017 ID: faqh00100238_002
How do I attach or remove the embroidery frame ?
Attaching the embroidery frame
After hooping the fabric in the embroidery frame, attach the frame to the embroidery machine. Embroidery frame holders A and B are included accessories with this machine. Install embroidery frame holder A when an included embroidery frame is to be used.
- If the embroidery frame is not correctly attached it may hit the presser foot and damage the machine, or cause injury to the user.
- When attaching the embroidery frame, make sure that the "start/stop" button is lit in red. If the "start/stop" button is flashing in green, the embroidery machine may start sewing. If the embroidery machine accidentally starts operating, injuries may result.
- When attaching the embroidery frame, make sure that the embroidery frame does not hit any other part of the embroidery machine.
Adjust the width of the embroidery frame holder to the size of the embroidery frame, and then attach the embroidery frame to the machine. As an example, the procedure for attaching the small embroidery frame is described below.
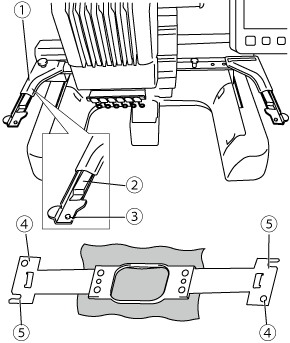 |
(1) Left arm of embroidery frame holder
(2) Clip on embroidery frame holder
(3) Positioning pin
(4) Holes
(5) Positioning slots |
-
Loosen the two thumb screws on the embroidery frame holder.
If the screw is too tight, please use the included discshaped screwdriver.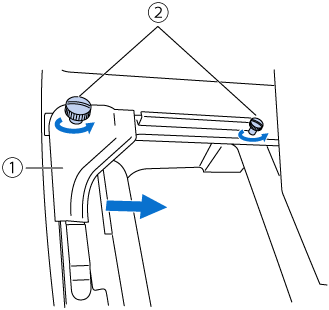
(1) Left arm
(2) Thumb screws>> The left arm of the embroidery frame holder can be moved.
Only loosen the thumb screws a maximum of 2 turns counterclockwise. Do not remove the screw.
-
Move the left arm to align the screw on the right side with the mark for the embroidery frame to be installed, and then tighten the thumb screws.
For this example, align with mark 4.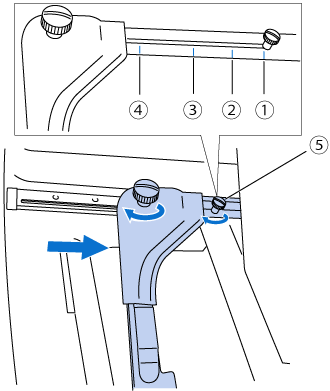
(1) Mark for extra-large embroidery frame
(2) Mark for large embroidery frame
(3) Mark for medium embroidery frame
(4) Mark for small embroidery frame
(5) Align the screw with the mark.Please firmly tighten the two thumb screws with included disc-shaped screwdriver.
If the thumbscrews are not tightened, any of the following problems may occur.- The machine will detect the embroidery frame size incorrectly.
- The starting position for the embroidery frame is misaligned.
- The embroidery pattern is misaligned.
>> The embroidery frame holder is ready for the embroidery frame to be attached.
-
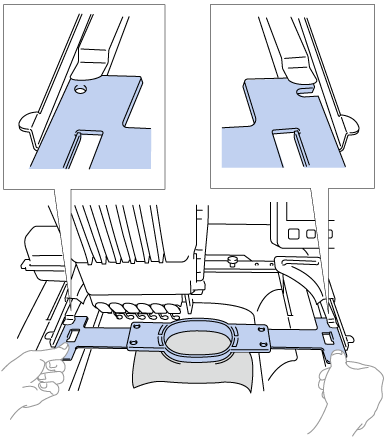
Hold the embroidery frame level, and then simultaneously align both the left and right mounts with the embroidery frame holder clips.
The inner frame should be on top.
-
Attach the embroidery frame to place the needle plate under the embroidering area otherwise the embroidery frame hits the needle plate.
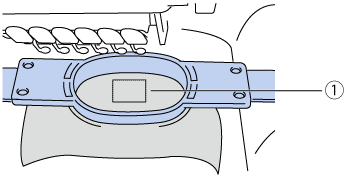
(1) Needle plate -
If the outer frame is on top, as shown below, the embroidery frame is incorrectly attached.
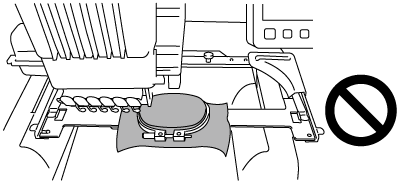
-
Attach the embroidery frame to place the needle plate under the embroidering area otherwise the embroidery frame hits the needle plate.
-
Insert the embroidery frame until it snaps into place.
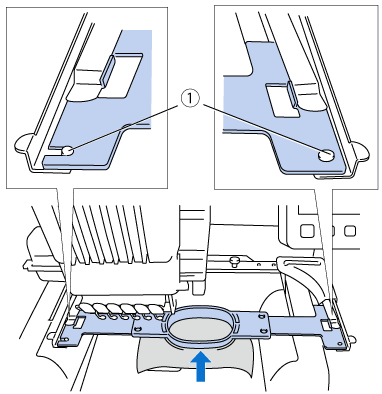 (1) Make sure that the pins on the left and right arms of the embroidery frame holder fit into the positioning slot and hole on the embroidery frame.
Removing the embroidery frame
After sewing is finished, remove the embroidery frame, and then remove the fabric from the frame.
- When removing the embroidery frame, make sure that the "start/stop" button is lit in red. If the "start/stop" button is flashing in green, the machine may start sewing. If the machine accidentally starts operating, injuries may result.
- When removing the embroidery frame, be careful that the embroidery frame does not hit any other part of the machine.
- Do not lift up the embroidery frame holder with extreme force, otherwise it may be damaged.
-
With both hands, grab the left and right sides of the arms of the embroidery frame holder, and then slightly lift up the frame. The pins on the arms of the embroidery frame holder should come out of the holes in the sides of embroidery frame.
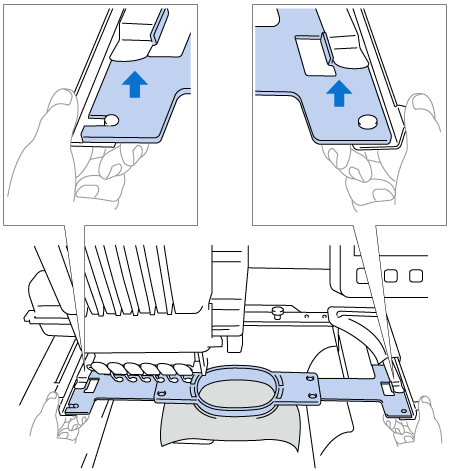
-
Pull off the embroidery frame toward you.
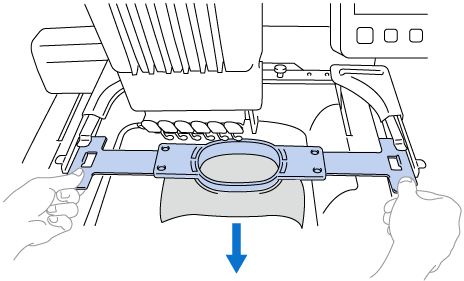
Removing the fabric
-
Loosen the outer frame screw.
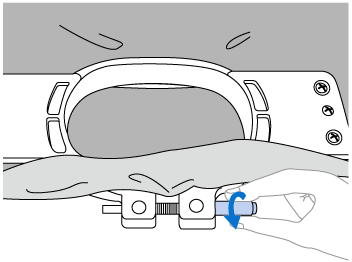
>> If the screw was tightened using a disc-shaped screwdriver, use the included disc-shaped screwdriver to loosen it.
-
Remove the outer frame, and then remove the fabric.
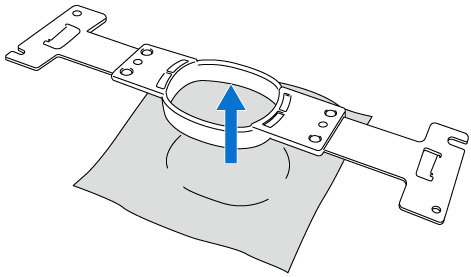
PR670E / PR670EC
If you need further assistance, please contact Brother customer service:
Content Feedback
Please note this form is used for feedback only.