VC-500W
FAQs & Troubleshooting |
VC-500W
Date: 18/10/2023 ID: faqp00100017_005
How do I connect the printer to my computer via Wi-Fi®?
When the printer is part of an Infrastructure mode network, it receives all print jobs via a wireless router/access point.
1. Set up the printer on your computer
2. Connect the printer to your computer in Infrastructure mode using Web Based Management
1. Set up the printer on your computer
- Turn on the printer.
- Make sure your wireless router/access point is connected to the Internet.
- Download the Software/Document Installer from the [Downloads] section of this website and then start the installer.
-
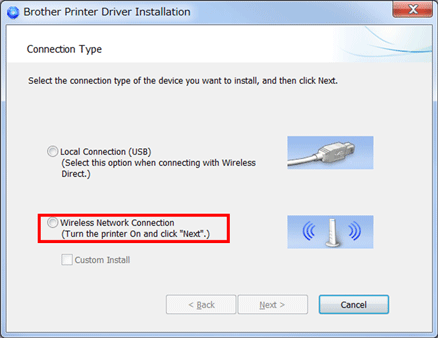
When the printer driver installation starts and the [Connection Type] dialog box appears, select [Wireless Network Connection], and then click [Next].
-
When the following screen appears, open a web browser.
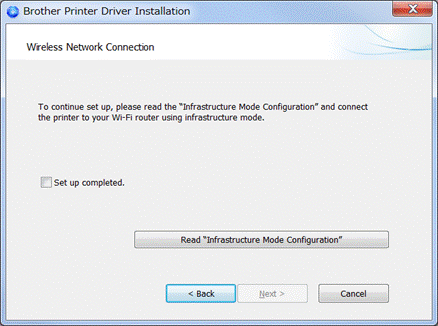
- In your web browser's address bar, type http://brvc-500w-[the last four digits of the serial number], and then press the [Enter] key.
- Go to section 2 Connect the printer to your computer in Infrastructure mode using Web Based Management.
- Turn on the printer.
- Make sure your wireless router/access point is connected to the Internet.
-
Check the printer's Wi-Fi LED:
- Lit in blue: Infrastructure mode is already enabled. Go to Step 7.
- Lit in white: Infrastructure mode is not enabled. Go to Step 4.
- Off: The printer's Wi-Fi function is off. Press and hold the [Wi-Fi] button for two seconds until it lights in blue, and then press the [Wi-Fi] button for two seconds until it lights in white. When finished, go to Step 4. - From the Apple menu, open [System Settings]/[System Preferences] - [Network] - [Wi-Fi] and select your printer from the Wi-Fi list.
- Go to [System Settings]/[System Preferences] - [Printers & Scanners].
-
The [Printers & Scanners] window opens. Click [Add Printer, Scanner, or Fax] or the “+” button, and then add “Brother VC-500W”.
Your printer is now temporarily connected directly to your computer without the wireless router/access point (Wireless Direct mode). -
In the [Printers & Scanners] window, click [Options & Supplies].
-
Click [Show Printer Web Page].
If the printer Web Based Management page does not open, type http://vc-500w[the last four digits of the serial number].local in your web browser's address bar, and then press the [Enter] key.
Go to section 2 Connect the printer to your computer in Infrastructure mode using Web Based Management.
2. Connect the printer to your computer in Infrastructure mode using Web Based Management
-
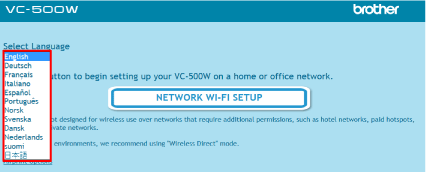
The printer's Web Based Management page opens. Select your language.
-
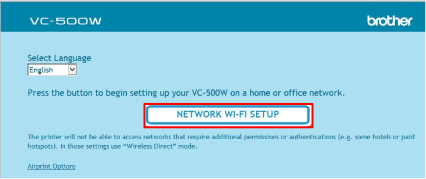
Click [NETWORK WI-FI SETUP].
-
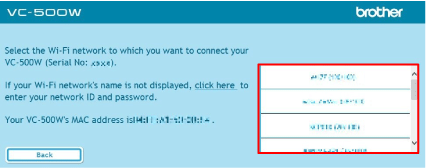
Select your Wi-Fi network name from the list.
-
Enter the password of your Wi-Fi network, and then click [Connect].

-
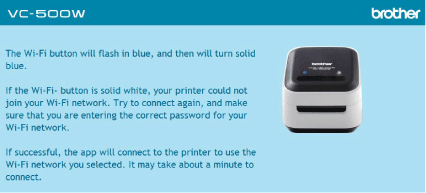
When the following screen appears, Infrastructure mode is configured. Close this window and continue with the printer driver installation.
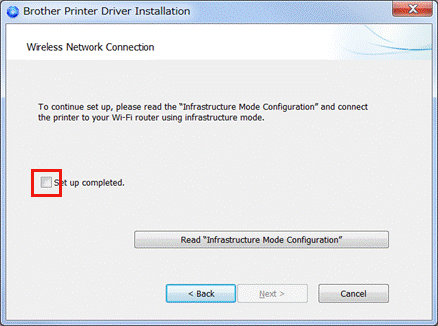
For Windows:
When finished, check the [Set up completed.] check box, and then click [Next].
VC-500W
If you need further assistance, please contact Brother customer service:
Content Feedback
Please note this form is used for feedback only.