Innov-is XV
FAQs & Troubleshooting |
Innov-is XV
Date: 27/08/2014 ID: faqh00100043_000
How do I sew edge of the fabric (Using the built-in camera).
Using the built-in camera, the width of the area from the edge of the fabric to the stitching line can be measured and set for edge sewing. This function can be used when the edge of the fabric is straight or a gentle curve.
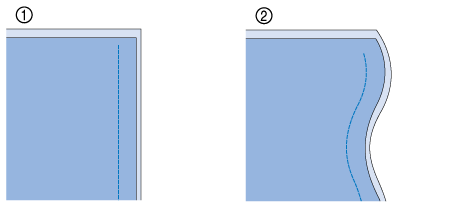
(1) Straight
(2) Curved
-
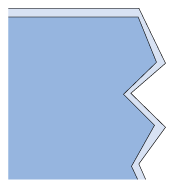
Clean stitching cannot be sewn if this function is used when the edge of the fabric has corners as shown below.
- When edge sewing using the built-in camera, make sure that the room is evenly lit. If the brightness in the room changes while edge sewing, the built-in camera may not be able to detect the edge of the fabric.
-
The built-in camera detects the contrast between the fabric and the background.
Therefore, observe the following precautions.
– If the edge of the fabric is fraying, cut off any excess fabric threads.– If the fabric has a complicated pattern, is sheer or is glossy, such as a vinyl material, the built-in camera may not be able to detect it correctly.
-
For best results, iron the fold when folding the edge of the fabric for edge sewing.
-
When “Width Control” on page 1/8 of the settings screen is set to “ON” or when
“Needle Position – Stitch Placement” on page 3/8 is set to “ON”, the built-in camera cannot be used with edge sewing. If either of these parameters are set to “ON”, appears gray and cannot be selected. Before using the built-in camera for edge sewing, set “Width Control” and “Needle Position – Stitch Placement” in the settings screen to “OFF”.

-
Select a stitch.
Edge sewing using the built-in camera cannot be used with patterns where
 appears in gray when the pattern is selected.
 -
Attach the vertical stitch alignment foot “V”.
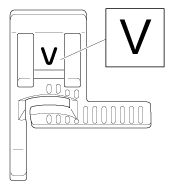
When edge sewing with the built-in camera, be sure to use the vertical stitch alignment foot “V”. In order to maintain a fixed distance from the edge of the fabric, the needle will slightly move to either side, even when sewing with a straight stitch. If a different presser foot is used, it may be hit by the needle, causing the needle to break or resulting in injuries.
-
Peel off the transparent sheet of the edge sewing sheet.
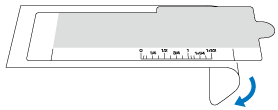
-
Place the edge sewing sheet on top of the needle plate cover.
Align the guides on the edge sewing sheet with the sides of the needle plate cover, and then adjust the position of the edge sewing sheet so that its cutout aligns with the edges of the opening for the feed dogs.
Position the edge sewing sheet so that there is no gap between it and the edges of the opening for the feed dogs.
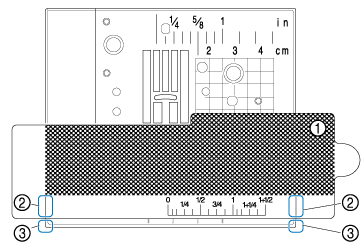
(1) Edge sewing sheet
(2) Guides on edge sewing sheet
(3) Sides of needle plate cover
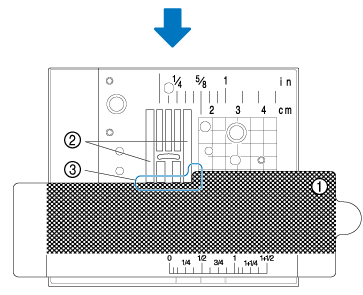
(1) Edge sewing sheet(2) Feed dogs
(3) Between the feed dogs and the edge sewing shee
-
If the metal needle plate is visible between the feed dogs and the edge sewing sheet, the fabric may be incorrectly detected by the built-in camera.
-
Before using the edge sewing sheet, peel off the transparent sheet. After use, affix the edge sewing sheet to the transparent sheet to prevent it from collecting dust.

(1) Transparent sheet
- Be sure to install a fully wound bobbin before starting to use the edge sewing feature and built-in camera. If you need to change the bobbin while edge sewing, remove the edge sewing sheet carefully and place it again after changing the bobbin.
-
If the metal needle plate is visible between the feed dogs and the edge sewing sheet, the fabric may be incorrectly detected by the built-in camera.
-
Press
 .
.
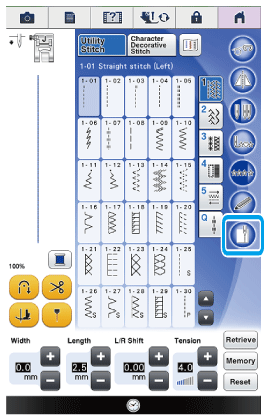
→ Depending on the stitch, the straight stitch with the middle (center) needle position is selected, regardless of the preset stitch width.Regardless of the setting selected in the machine settings screen, the brightness of the light changes to “5”.
-
After
 is pressed, the stitch width and stitch length cannot be changed. Change the stitch width and stitch length before pressing
  .
. - Some decorative stitches will function with the edge sewing. When selecting a stitch, if it is not applicable to this function, an error message will appear.
-
After
-
When the message shown below appears, check that the vertical stitch alignment foot “V” is attached and that the edge sewing sheet is positioned, and then press "OK" .
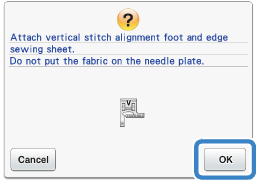
→ Then the edge sewing window appears.-
Before pressing "OK", install the vertical stitch alignment foot “V” and position the edge sewing sheet; otherwise, the built-in camera cannot detect the fabric.
If "OK" is pressed before the edge sewing sheet is positioned, the message shown in step 6 f appears again. - After pressing "OK" , do not place your hands or any other object near the needle plate until the message “Recognizing...” disappears.
-
Before pressing "OK", install the vertical stitch alignment foot “V” and position the edge sewing sheet; otherwise, the built-in camera cannot detect the fabric.
-
Place the fabric under the presser foot.
-
Move the fabric to the desired position for edge sewing. Position the fabric so that its edge is as straight as possible.
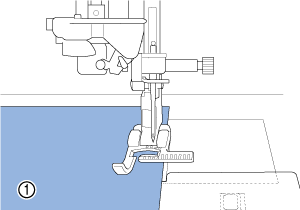
(1) FabricWhen pinning the fabric, insert the pins as shown below. If the head of the pin extends off the edge of the fabric, the fabric may not be correctly detected.
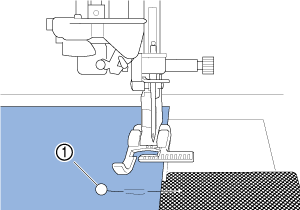
(1) Basting pin -
Check that the built-in camera is correctly detecting the fabric.
Press
 to change the colors of the fabric edge indicator line and starting point according to the color of the fabric.
Each press of this key changes the color of the fabric edge indicator line to red (with a blue starting point), blue (with a black starting point) or black (with a red starting point).
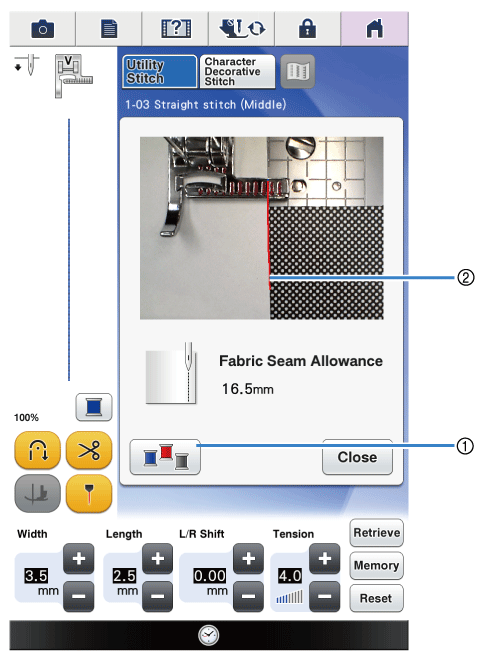
(1) Key for changing the color of the fabric edge indicator line
(2) Fabric edge indicator line
--- When the Built-In Camera Can Detect the Edge of the Fabric ---
The fabric edge indicator line appears correctly
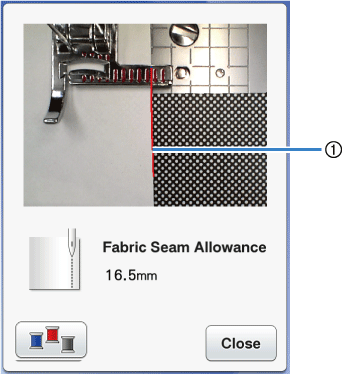
(1) Fabric edge indicator line
--- When the Fabric Edge Indicator Line Does Not Appear ---
The built-in camera cannot detect the edge of the fabric.
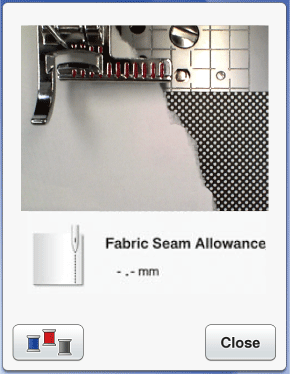
Press Close, and then perform the procedure again starting with step 1.
--- When the Fabric Edge Indicator Line Is Not Aligned With the Edge of the Fabric ---
The fabric edge indicator line that appears is not aligned with the edge of the fabric. The fabric at the beginning of sewing is not straight.
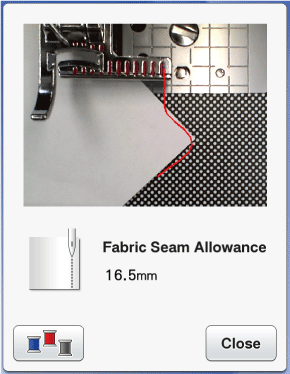
Try to straighten the edge of the fabric at the beginning of sewing (so it is parallel with the edge of the presser foot).
If a straight part of fabric edge indicator line (shown below) does not follow the edge of the fabric, edge sewing cannot be sewn correctly.
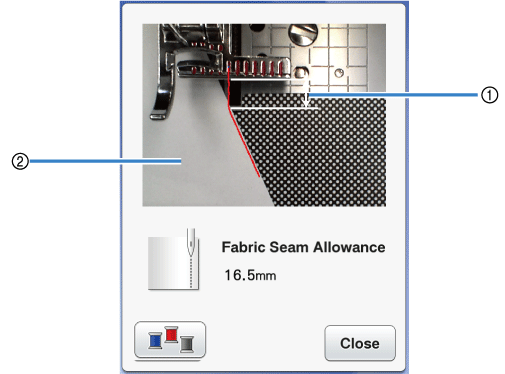
(1) Straight part(2) Fabric
-
While checking the screen for the distance from the fabric edge to the edge sewing position, move the fabric to the desired position.
The starting point of the fabric edge indicator line shows the position for the start of sewing. The actual position for the start of sewing is directly below the needle and parallel to the starting point.
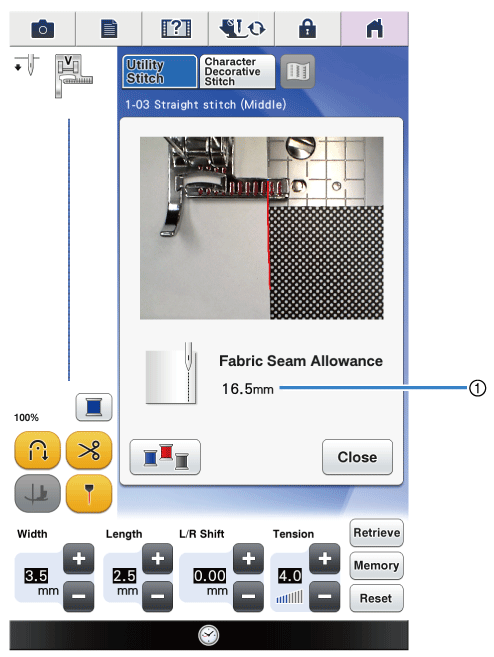
(1) Distance from edge of fabric
Example: When a straight stitch is selected (example: )
)
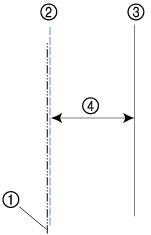
(1) Middle needle position
(2) Stitching
(3) Edge of fabric
(4) Width of edge sewing- Distances between 1.5 mm (about 1/16 inch) and 38.5 mm (about 1-1/2 inches) can be measured. The distance is displayed in the screen in 0.5 mm (about 1/64 inch) increments.
- The distance is displayed in millimeters. However, depending on the measurement setting, it can also be displayed in inches.
- If “-_- mm” appears as the distance and no inch measurement is displayed, the built-in camera is not able to detect the edge of the fabric.
-
When a straight stitch is selected, use the scale on the edge sewing sheet as a guide for positioning the fabric for edge sewing.
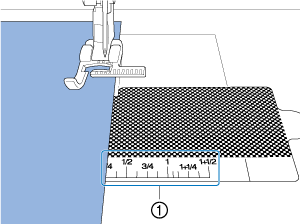
(1) Scale on the edge sewing sheet
-
Lower the presser foot.
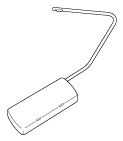
→ The distance from the edge of the fabric to the seam is set.If the knee lifter is used to lower the presser foot, the fabric can be held in place with both hands so the fabric does not move when the presser foot is lowered.
-
Press the “Start/Stop” button to start edge sewing.
→ Sewing starts with the set distance to the edge of the fabric maintained.- While sewing, use the red scale marks on the vertical stitch alignment foot “V” as a guide to keep a fixed distance from the edge of the fabric.
- When sewing starts, a still image from the built-in camera is displayed.
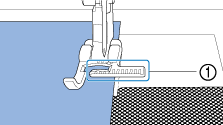
(1) Red scale marksWhile sewing, do not place anything, including your hands, within 2 mm (about 1/16 inch) from the edge of the fabric, otherwise the edge of the fabric cannot be detected correctly. When guiding the fabric with your hands, place them outside of the object-free area and more than 2 mm (about 1/16 inch) from the edge of the fabric.
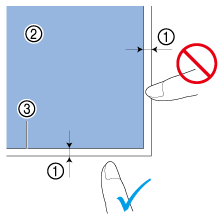
(1) Approximately 2 mm (about 1/16 inch)
(2) Fabric
(3) Edge of fabric -
When sewing is between 10 and 20 mm (about 3/8 and 3/4 inch) from the edge of the fabric, sewing stops automatically and the following message appears. To stop sewing, press "Close".
→ When this message appears, edge sewing (with the seam wizard function) is canceled.
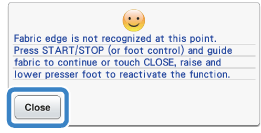
To continue sewing to the edge of the fabric, do not press "OK" when the message shown above appears. With the above message displayed, press the “Start/Stop” button to sew.
When edge sewing is finished, store the edge sewing sheet affixed to the transparent sheet in order to prevent it from collecting dust.
Related FAQs
Innov-is XV, Innov-is XV8500D, Innov-is XV8550D
If you need further assistance, please contact Brother customer service:
Content Feedback
Please note this form is used for feedback only.