FS70
FAQs & Troubleshooting |

FS70
Date: 28/09/2016 ID: faqh00100040_004
How do I remove or attach the presser foot holder?
Remove the presser foot holder when cleaning the sewing machine or when installing a presser foot that does not use the presser foot holder, such as the quilting foot. Use the disc-shaped screwdriver to remove the presser foot holder.
-
Remove the presser foot.
For details, refer to How do I remove or attach the presser foot? -
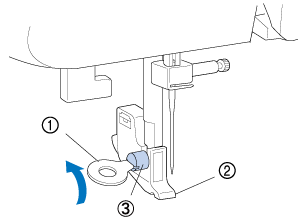
Use the disc-shaped screwdriver to loosen the presser foot holder screw.
Turn the screw toward the back of the machine (counterclockwise).
(1) Disc-shaped screwdriver (2) Presser foot holder
(3) Presser foot holder screw
-
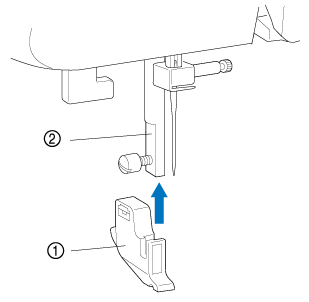
Remove the presser foot holder.
-
Align the presser foot holder with the lower-left side of the presser bar.

(1) Presser foot holder (2) Presser bar
-
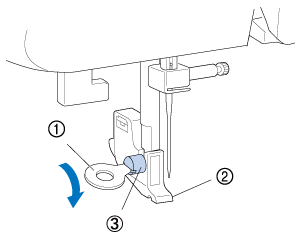
Hold the presser foot holder in place with your right hand, and then tighten the screw using the screwdriver in your left hand.
Turn the screw toward you (clockwise).
(1) Disc-shaped screwdriver (2) Presser foot holder
(3) Presser foot holder screw
Be sure to securely tighten the presser foot holder screw, otherwise the presser foot holder may fall off and the needle may strike it, causing the needle to bend or break.
If the presser foot holder is not correctly installed, the thread tension will be incorrect.
Related FAQs
DS-120, DS-140, FS155, FS70
If you need further assistance, please contact Brother customer service:
Content Feedback
Please note this form is used for feedback only.