How do I connect the printer to my computer via Wi-Fi® using an access point?
To connect the printer to your computer via Wi-Fi® using an access point, follow the procedure below:
Before installing the software, make sure that your computer is connected to the Wireless access point/router.
- Turn on the printer.
-
Download Software/Document Installer from the [Downloads] section of this website and then start the installer.
P-touch Editor, Printer Setting Tool, and other software are installed in addition to the printer driver. -
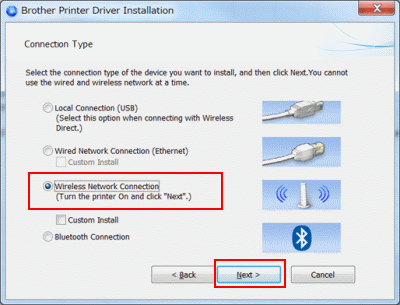
When the dialog box for selecting the connection method is displayed after the Software installation starts, select [Wireless Network Connection] and click [Next].
-
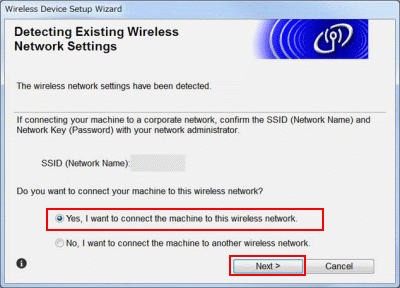
This screen will be displayed. Select [Yes, I want to connect the machine to this wireless network.] and follow the instructions.
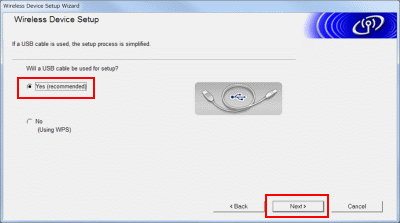
If the screen below is displayed instead, select [Yes (recommended)] and follow the instructions.
- Turn on the printer.
- Download Full Software Package from the [Downloads] section of this website, double-click the file, and then start the installer from [Start Here Mac].
-
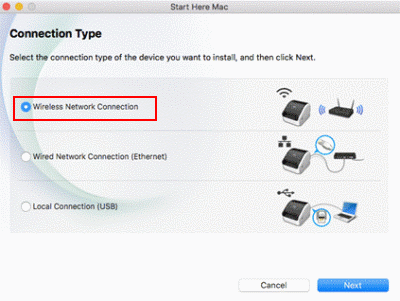
When the dialog box for selecting the connection method is displayed after the printer driver installation starts, select [Wireless Network Connection].
-
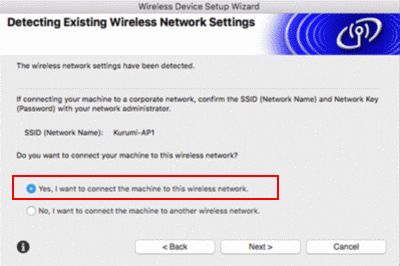
This screen will be displayed. Select [Yes, I want to connect the machine to this wireless network.] and follow the instructions.
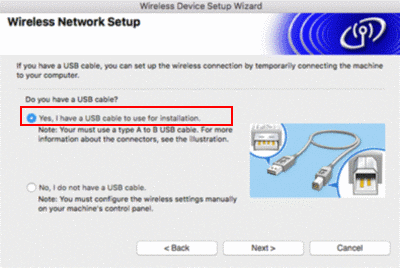
If the screen below is displayed instead, select [Yes, I have a USB cable to use for installation] and follow the instructions.
