CV3440
FAQs & Troubleshooting |
The different type of the cover stitches and a general guideline for thread tension settings.
Triple cover stitch
The thread tension dial settings listed below are based on a stitch length of 3 and a differential feed ratio of 1.0.
Since the settings may differ depending on the types of fabric and thread used, be sure to check the thread tension.
| Type of stitch | Number of needles | Number of threads | Thread tension dial | Stitch | |||
|---|---|---|---|---|---|---|---|
| Left needle | Center needle | Right needle | Looper thread | ||||
| Triple cover stitch | 3 | 4 | 2 - 5 | 2 - 5 | 2 - 5 | 2 - 5 |  |
 |
Stitching direction |
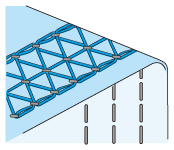
Balanced tension The needle thread sews a straight seam on the surface of the fabric, and the looper thread forms loops on the back. |
|---|---|---|
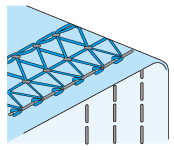 |
Needle thread is too loose. Turn the needle thread tension dial to a higher number to increase the tension, or turn the looper thread tension dial to a lower number to decrease the tension. |
|
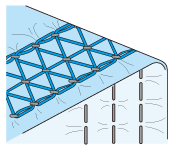 |
Needle thread is too tight. Turn the needle thread tension dial to a lower number to decrease the tension, or turn the looper thread tension dial to a higher number to increase the tension. |
Cover stitch (Wide/Narrow)
The thread tension dial settings listed below are based on a stitch length of 3 and a differential feed ratio of 1.0.
Since the settings may differ depending on the types of fabric and thread used, be sure to check the thread tension.
| Type of stitch | Number of needles | Number of threads | Thread tension dial | Stitch | |||
|---|---|---|---|---|---|---|---|
| Left needle | Center needle | Right needle | Looper thread | ||||
| Cover stitch (Wide) | 2 | 3 | 3 - 5 | - | 3 - 5 | 2 - 5 |  |
| Cover stitch (Narrow) | 2 | 3 | - | 3 - 5 | 3 - 5 | 2 - 5 |  |
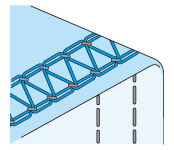 |
Stitching direction |
Balanced tension The needle thread sews a straight seam on the surface of the fabric, and the looper thread forms loops on the back. |
|---|---|---|
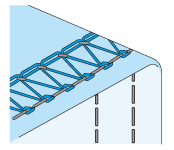 |
Needle thread is too loose. Turn the needle thread tension dial to a higher number to increase the tension, or turn the looper thread tension dial to a lower number to decrease the tension. |
|
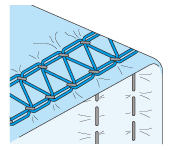 |
Needle thread is too tight. Turn the needle thread tension dial to a lower number to decrease the tension, or turn the looper thread tension dial to a higher number to increase the tension. |
Chain stitch
The thread tension dial settings listed below are based on a stitch length of 3 and a differential feed ratio of 1.0.
Since the settings may differ depending on the types of fabric and thread used, be sure to check the thread tension.
| Type of stitch | Number of needles | Number of threads | Thread tension dial | Stitch | |||
|---|---|---|---|---|---|---|---|
| Left needle | Center needle | Right needle | Looper thread | ||||
| Chain stitch | 1 | 2 | - | 2 - 5 | - | 2 - 5 |  |
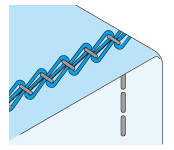 |
Stitching direction |
Balanced tension The needle thread sews a straight seam on the surface of the fabric, and the looper thread forms loops on the back. |
|---|---|---|
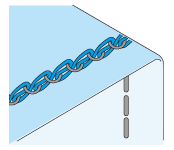 |
Needle thread is too loose. Turn the needle thread tension dial to a higher number to increase the tension, or turn the looper thread tension dial to a lower number to decrease the tension. |
|
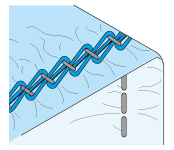 |
Needle thread is too tight. Turn the needle thread tension dial to a lower number to decrease the tension, or turn the looper thread tension dial to a higher number to increase the tension. |
