HL-4200CN
FAQs & Troubleshooting |
How do I replace the Print Head Cartridge?
Follow the procedure below to replace the print head cartridge.

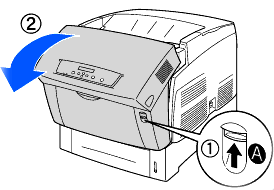
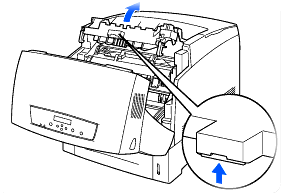
Push up button A (1) and fully open the front cover (2).
Push the button as shown and open the paper outlet cover.
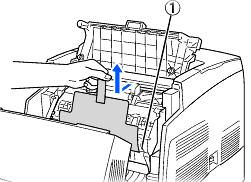
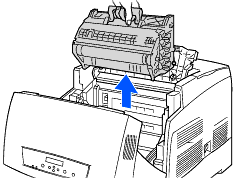
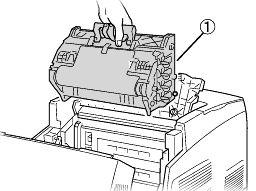
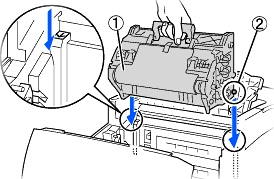
Grip the handle on top of the print head cartridge and gently lift it out of the printer.
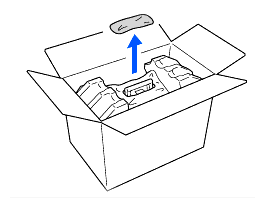
Open the top of the new print head cartridge box and pull of the top part of the aluminum package.
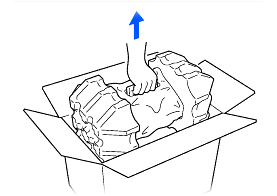
Grip the handle on top of the print head cartridge and gently lift it. Place the cartridge onto a flat surface.
- Lift the print head cartridge by the handle. Do not allow the cartridge to touch anything when removing it from the box.
- When setting the print head cartridge, do not shake or tilt it.
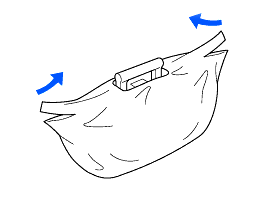
Remove the polystyrene packing and open the top of the aluminum package from the left and right.
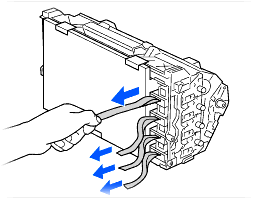
Take the new print head cartridge out of its package and pull each of the 4 seals one at a time to remove them. Pull the seals straight out.
- Keep the print head cartridge polystyrene packing, aluminum package, and box in case you need to transport the printer over long distances in the future.
- If there is no circle on the end of the seal, you can not use this print head cartridge. Contact your dealer or Brother Customer Service for assistance.
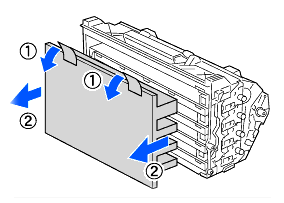
Remove the tape from the top of the cartridge (1), hold the protective cover on both sides and remove it from the print head cartridge (2).
Grip the handle on top of the print head cartridge and face the flat part towards the back of the printer.
1.Flat part facing to the back.
With the flat part of the cartridge facing the back, align the orange rollers on both sides of the print head cartridge with the slots in front of the arrows on the printer, and gently lower the cartridge into the printer.
1)Protective sheet
2)Orange rollers- Lowering the cartridge into the printer without correctly aligning the roll with the slots can damage the cartridge.
- Do not allow the surface covered with a protective sheet to come into contact with anything.
Pull the protective sheet on the cartridge straight up to remove it, as illustrated.
1.Do not touch the transfer roll.
Close the paper outlet cover.
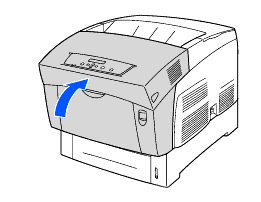
Close the front cover.
Hold the print head cartridge by its handle to prevent it from falling.
Remove the sheet by working inward from the two notches.
Do not touch the transfer roll (black part). Make sure that nothing touches or scratches the roll surface. Scratches, dirt or oil from your hands onto the roll deteriorates print quality.