Innov-is XV
GYIK és hibaelhárítás |
How do I adjust a stitch width or length?
When you select a stitch, your machine automatically selects the appropriate stitch width, stitch length, and upper thread tension. However, if needed, you can change any of the individual settings.
- Settings for some stitches cannot be changed.
- If you turn off the machine or select another stitch without saving stitch setting changes, the stitch settings will return to their default settings.
Setting the Stitch Width
Follow the steps below when you want to change the zigzag stitch pattern width.

Example:
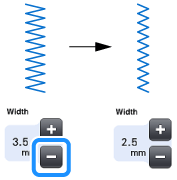
■ Press ![]() to narrow the zigzag stitch pattern width.
to narrow the zigzag stitch pattern width.
 |
|
| >> The value in the display gets smaller. |
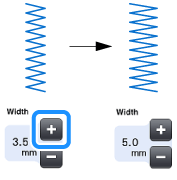
■ Press ![]() to widen the zigzag stitch pattern width.
to widen the zigzag stitch pattern width.
 |
|
| >> The value in the display gets bigger. |
-
Press
 to save the stitch settings.
 -
Press
 to check changes made to the stitch.
 -
Press
 to return the stitch width to the original setting.
After adjusting the stitch width, slowly rotate the handwheel toward you (counterclockwise) and check that the needle does not touch the presser foot. If the needle hits the presser foot, the needle may bend or break.
Setting the Stitch Length
Follow the steps below when you want to change the stitch pattern length.

Example:
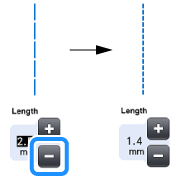
■ Press ![]() to shorten the stitch length.
to shorten the stitch length.
 |
|
| >> The value in the display gets smaller. |
■ Press ![]() to lengthen the stitch length.
to lengthen the stitch length.
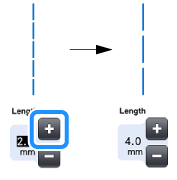 |
|
| >> The value in the display gets bigger. |
-
Press
 to save the stitch settings.
 -
Press
 to check changes made to the stitch.
 -
Press
 to return the stitch length to the original setting.
If the stitches get bunched together, lengthen the stitch length and continue sewing. Do not continue sewing without lengthening the stitch length. Otherwise, the needle may break and cause injury.
Setting the “L/R Shift”
Follow the steps below when you want to change the placement of the zigzag stitch pattern by moving it left and right.

Example:
■ Press ![]() to shift the pattern to the left.
to shift the pattern to the left.
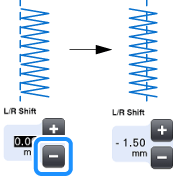 |
|
| >> The value in the display appears with a minus sign. |
■ Press ![]() to shift the pattern to the right side of the left needle position.
to shift the pattern to the right side of the left needle position.
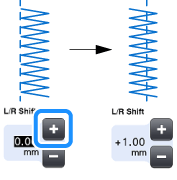 |
|
| >> The value in the display appears with a plus sign. |
-
Press
 to save the stitch settings.
 -
Press
 to check changes made to the stitch.
 -
Press
 to return to the original setting.
After adjusting the L/R Shift , slowly rotate the handwheel toward you (counterclockwise) and check that the needle does not touch the presser foot. If the needle hits the presser foot, the needle may bend or break.
