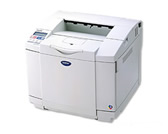
HL-2700CN
常見問題&故障排除 |
How do I replace the fusing unit?
The fusing unit and the parts around it are hot! Be sure to wait until the fusing unit has cooled down sufficiently before replacing the fusing unit. If you touch the hot parts, you might get injured.

-
Turn off the printer power switch. To avoid injury, wait until the printer has cooled down sufficiently before you replace the fusing unit.
-
Open the back cover of the printer.

-
To release the fusing unit from the printer, release the lock levers that are on both sides of the fusing unit as shown below.

-
Hold the handles on both sides as you take the fusing unit out of the printer.

-
Put the new fusing unit into the printer. Be sure to insert the fusing unit completely into the printer.

-
Secure the fusing unit with the two lock levers that are on both sides of the fusing unit.

-
Move the fusing unit pressure release levers to the Set position.

-
Close the back cover.
-
Turn the printer power switch back on.
-
Press any of the Menu buttons (+, –, Set or Back) to take the printer off line.
-
Press + or – until RESET MENU appears.
-
Press Set to proceed to the next menu level, and then press + or – until PARTS LIFE appears.
-
Press Set, and then press + until FUSER UNIT appears.
-
Press Set. The printer is now in the READY state.
Please be careful when replacing the fusing unit. Do not put pressure on the fusing unit; it should go in easily. If it does not, make sure the fusing unit connector is free to move.
Do not apply force! It could damage both the fusing unit and the printer.
