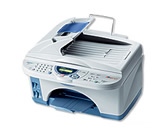
MFC-890
Nejčastější dotazy a pokyny pro odstraňování potíží |
How can I improve poor print quality?
Cleaning the four color print heads (black, cyan, magenta and yellow), adjusting the vertical alignment and/or replacing the ink cartridges may improve the print quality. To identify which print heads need to be cleaned and if the alignment needs to be set, print the Print Quality Test Sheet by following the steps listed below:
- Press the Menu/Set key.
- Press the up or down navigation key until TEST PRINT appears on the LCD.
- Press Fax Start, Black (Mono) Fax Start or Color (Colour) Fax Start. The FAX/MFC begins printing the Print Quality Test Sheet.
- By reviewing this Test Sheet, you can determine if the print quality or alignment needs improvement or adjustment.
StepA - Checking the print quality:
-
The display will read "IS STEP "A" OK?" 1.YES 2. NO.
Before choosing YES or NO, closely examine the print quality of the four color blocks that are formed by short diagonal lines on the Test Sheet.
If all lines are clear and visible, press 1 (YES) and proceed to StepB. If you can see missing short lines, press 2 (NO).
-
The display will then ask you if the print quality is OK for each color. Press 2(NO) for any color with the problem.
-
The display will then show START CLEANING? 1.YES 2. NO.
Press 1(YES) and the FAX/MFC will start cleaning the color ink cartridges.
-
After the cleaning is finished, press Fax Start, Black (Mono) Fax Start or Color (Colour) Fax Start. The FAX/MFC will print another Print Quality Test Sheet.
- If you can see missing short lines in any of the four color blocks press 2 (NO) and repea the quality check and cleaning process. Repeat this procedure at least 5 times if print quality remains a problem. If short lines are still missing after the fifth cleaning and test print, replace the necessary ink cartridges. If the print quality of the 4 color blocks is OK, press 1 (YES).
StepB - Setting the Alignment:
-
The display will then read "IS STEP "B" OK?".
-
Examine the 600 DPI and 1200 DPI test prints on the Print Quality Test Sheet. If the number 5 sample of both the 600 DPI and 1200 DPI most closely matches the 0 sample, press 1(YES).
If one of the other samples is a better match for the 0 sample, press 2 (NO). The display will then prompt you to select the sample that most closely matches the 0 sample for 600 DPI and then 1200 DPI.
-
Print another Print Quality Test Sheet by following the steps provided at the top of this page and check it.
- Press Stop/Exit.
For instructions on replacing the ink cartridges, please click here.
StepC - Cleaning the print head:
Do NOT clean the print head by touching it with your hand or a cloth.
- Press Ink key on the control panel.
- Press 1 to choose 1.CLEANING.
- Press the up or bottom navigation key (keys located above and below the Menu/Set key) to choose the color you want to clean, and then press Menu/Set.
The FAX/MFC will clean the print head automatically. When cleaning is finished, the FAX/MFC will go back online automatically.
If you clean the print head at least five times and the print has not improved, call Brother Customer Service for assistance.
