MFC-7365DN
FAQs & Troubleshooting |
Poor fixing
Check the following points to resolve the issue:
NOTE: Illustrations shown below are from representative product and may differ from your Brother machine.
-
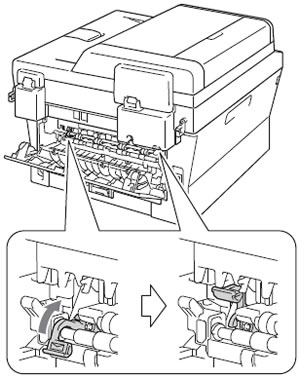
Open the back cover and make sure that the two green envelope levers on the left and right hand sides are in the up position. Close the back cover.
-
Select Improve Toner Fixing mode in the printer driver.
For Windows users:
NOTE: The steps and screens may differ depending on the operating system and application being used.-
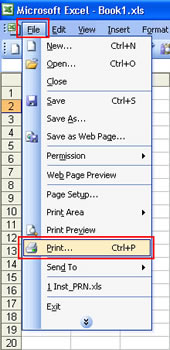
From the menu bar of an application, click File => Print.
-
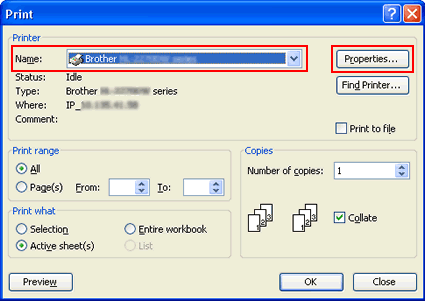
Check your printer name is selected and click Properties.
-
Click Advanced tab and then Other Print Options.
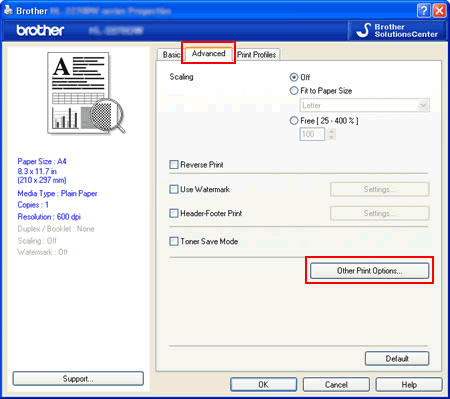
-
Click Improve Print Output and select Improve Toner Fixing.
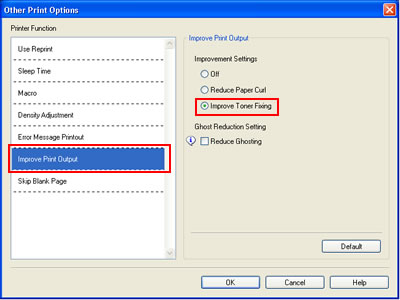
- Click OK to close the Other Print Options dialogue.
- Click OK to close the Properties dialogue.
-
Click OK. The document will be printed.
If this selection does not provide enough improvement, select Thicker Paper in Media Type settings.
For Macintosh users:
NOTE: The steps and screens may differ depending on the operating system being used.- Open Print dialog. (Click here to see the details of how to open Print dialog.)
- Select Print Settings from the print options pop-up menu.
-
Click Advanced and then Improve Print Output....

-
Select Improve Toner Fixing.
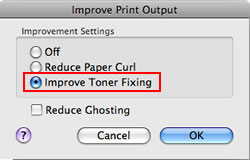
- Click OK.
-
Click Print.
If this selection does not provide enough improvement, select Thicker Paper in Media Type settings.
-
From the menu bar of an application, click File => Print.