HL-4040CN
FAQs & Troubleshooting |
Replace the drum unit.
Follow the procedure below to replace drum unit.
The Brother machine has separate consumables the toner cartridge and the drum unit. Verify you replace only the drum unit and not the toner cartridge. If you want to know their difference, refer to "What is the difference between the toner cartridge and the drum unit?"
- While removing the drum unit, handle it carefully because it may contain toner.
- DO NOT use flammable substances or any type of spray to clean the inside or outside of the machine.

For the order number (Order No.) of the drum unit, please refer to the User's guide provided with your Brother Printer or the Consumables & Options page of your model on Brother Solutions Center. To visit Consumables & Options page, click your model name link on the top section and then click "Consumables & Options" link on the opened page.
-
Turn off the printer power switch. Press the front cover release button and then open the front cover.

-
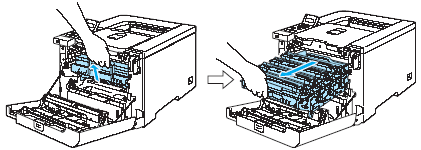
Hold the green handle of the drum unit. Lift the drum unit up and then pull it out until it stops.
-
Release the gray lock lever (1) that is on the left side of the printer. Pull the drum unit completely out of the printer using the green handles on the drum unit.

- We recommend that you place the drum unit on a clean, flat surface with a piece of disposable paper underneath it in case you accidentally spill or scatter toner.
- Handle the toner cartridge carefully. If toner scatters on your hands or clothes, wipe or wash it off with cold water at once.
- Hold the handles of the drum unit when you carry it. DO NOT hold the sides of the drum unit.

-
Hold the handle of the toner cartridge and pull it out of the drum unit. Repeat this for all the toner cartridges.
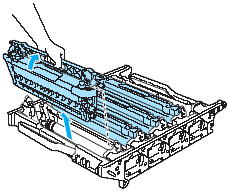
To prevent damage to the printer from static electricity, DO NOT touch the electrodes shown in the illustration.
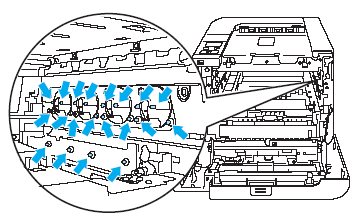
To avoid print quality problems, DO NOT touch the shaded parts shown in the illustrations.

-
Unpack the new drum unit and remove the protective cover.
Wait to unpack a drum unit until immediately before you put it in the printer. Exposure to direct sunlight or room light may damage the drum unit.
-
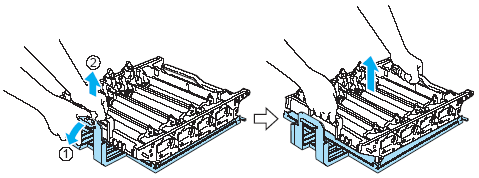
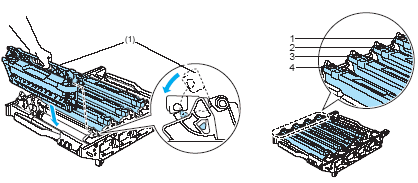
Hold the handle of the toner cartridge and slide the toner cartridge into the drum unit. Make sure that you match the toner cartridge color to the same color label on the drum unit, and make sure that you fold down the toner cartridge handle (1) once the toner cartridge is in place. Repeat this for all the toner cartridges.
-
Put the drum unit back in the printer as follows.
-
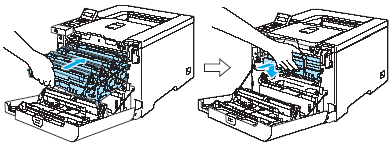
Make sure that the gray lock lever (1) is in the up position and put the drum unit in the printer. Push down the gray lock lever (1).

When you put the drum unit in the printer, match the green guides (1) of the drum unit handle to the green arrows (2) on both sides of the machine.

-
Push the drum unit in until it stops.
-
Make sure that the gray lock lever (1) is in the up position and put the drum unit in the printer. Push down the gray lock lever (1).
-
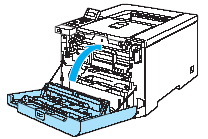
Close the front cover.
When you replace the drum unit with a new one, you need to reset the drum counter by completing the following steps:
- Turn the printer power switch back on.
- Press the + or - button to choose "Machine Info".
-
Press OK to proceed to the next menu level, and then press the + or - button to choose
"Reset Parts Life". - Press OK, and then press the + button to choose "Drum Unit".
- Press OK two times.