Innov-is XP1
FAQs & Troubleshooting |
How to set up the wireless network connection with the wizard on the machine
Introduction
This machine supports a wireless network connection. Using this function, an embroidery pattern or decorative stitch pattern edited in embroidery editing software (PE-DESIGN 11) with wireless transfer functions can be transferred to the machine from a computer. In addition, embroidery patterns can be transferred from the machine to the embroidery editing software (PE-DESIGN 11). The machine and computer must be connected to the same network. For detailed procedures, refer to the manual for the application.
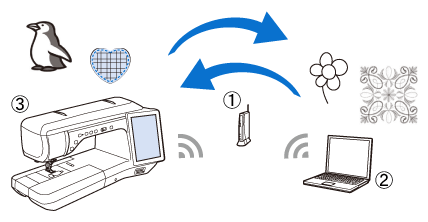
(1) Wireless network access point/router
(2) Computer connected to wireless network access point/router and the embroidery editing software (PE-DESIGN 11)
(3) Your machine (Innov-Ís XP1)
Requirements for a Wireless Network Connection
The wireless network connection complies with IEEE 802.11 n/g/b standards and uses the 2.4 GHz frequency.
A wireless network cannot be set up with WPA/WPA2 Enterprise.
Setting up the wireless network connection
In order to to set up the wireless network connection, we recommend the method that uses the wizard on this machine.
1. Before setting up
In order to connect your machine to a wireless network, the security information (SSID and network key) for your home network will be required. The network key may also be called a password, security key or encryption key. First, find your security information and note it.
| SSID | Network Key (Password) |
|---|---|
The wireless network connection cannot be set up if you do not have the security information.
Find the security information for your home network as noted below
-
See the side of your home network access point/router. The information may be listed on the label on the network access point/router.* The illustration shown above is an example.
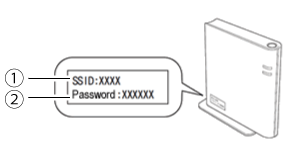
(1) SSID
(2) Network Password (Key)
- Check the manual provided with your home network.
- The default SSID may be the manufacturer's name or the model name.
If you cannot find the security information, contact the manufacturer of the router, your network administrator or your Internet provider.
2. Specifying wireless network connection settings
-
Press
 to display the settings screen.
-
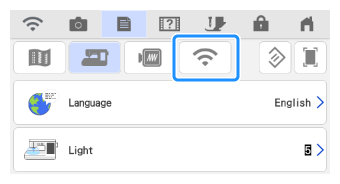
Press
 to go to Wireless LAN settings screen.
-
Set "Wireless LAN Enable" to "ON".
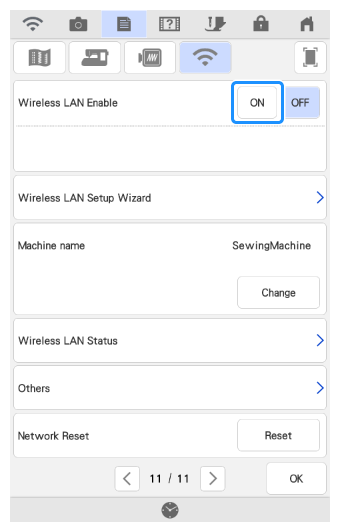
⇒ The machine will begin to emit the wireless network signal.
3. Using the wizard to set up the wireless network connection
There are multiple ways to set up the wireless network connection. We recommend the method that uses the wizard on this machine.
-
Press Wireless LAN Setup Wizard.
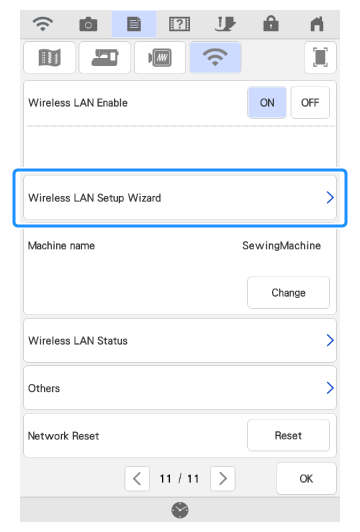
⇒ A list of available SSIDs appears.
-
Select your Network Name (SSID) in the list of SSIDs.
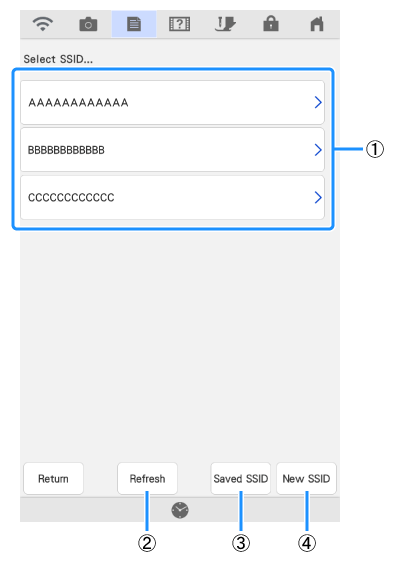
(1) Network SSID The network SSIDs are appeared in the list. (2) Refresh If the desired network SSID does not appear in the list, press Refresh key. (3) Saved SSID If the machine had already been connected to the home network, press "Saved SSID" key , and then select the saved SSID. (4) New SSID If the desired network SSID is not displayed, specify it as described below. - Press "New SSID" key.
- Enter the desired network SSID, and then press OK key.
- Select the authentication method and encryption mode.
- Follow steps indicated on the screen.
⇒ The screen for entering the network key (password) appears.
-
Enter the network key (password) that was noted, and then press OK key.
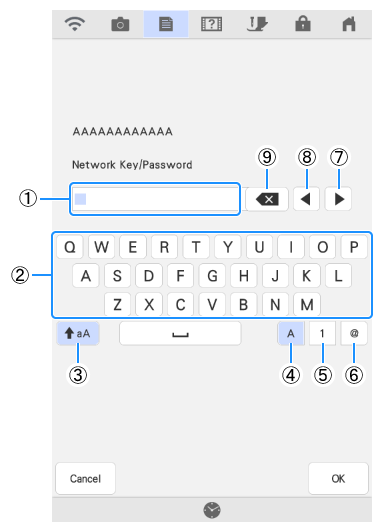
(1) Text input area (2) Character keys (3) Caps key (4) Letters key (5) Numbers key (6) Symbols key (7) Cursor keys (Move the cursor to the right) (8) Cursor keys (Move the cursor to the left) (9) Backspace key (Deletes the character at the cursor's position.)
-
When the message "Apply Settings?" appears, press OK key.

⇒ When a connection is established, the message "Connected to wireless LAN" appears. To close the message screen, press OK key.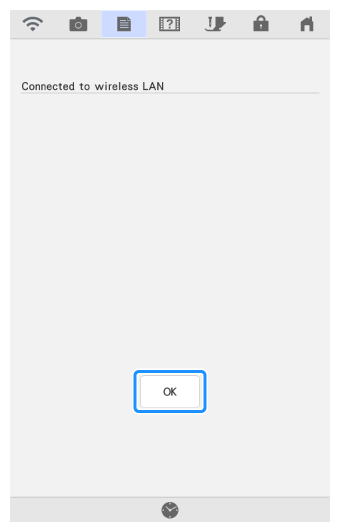
-
Press OK key to exit the setup.
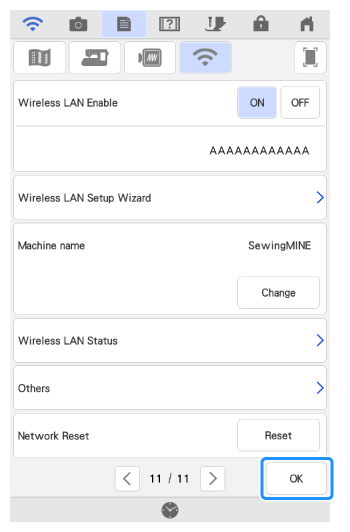
-
While connected, the signal strength is indicated by the icon in the upper-left corner of the display.


Strong signal 
Medium signal 
Weak signal 
No signal - Once a wireless network connection has been set up, a wireless network connection will be established each time the machine is turned on. However, “Wireless LAN Enable” in the network settings screen must remain set to “ON”.