TJ-4420TN
FAQs & Troubleshooting |
How to load the Media
Movie: How to load the Media
*The video clip is being streamed from YouTube.
Media Loading Path
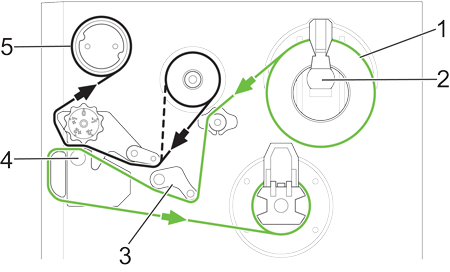 |
1. Media 2. Label Supply Spindle 3. Damper 4. Platen Roller 5. Ribbon |
-
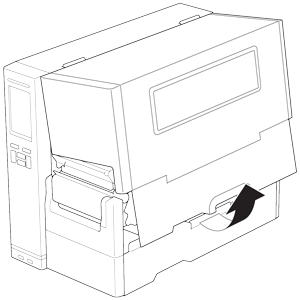
Open the Media Cover.
-
Slide the Label Roll Guard horizontally to the end of the Label Supply Spindle, and then flip it down.
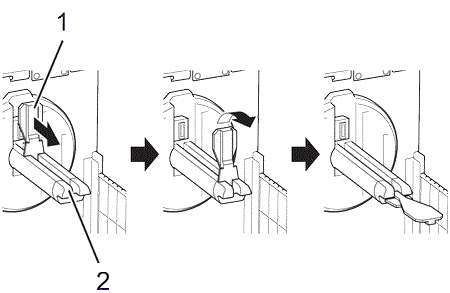
1. Label Roll Guard
2. Label Supply Spindle -
Place the label roll on the Label Supply Spindle and then flip the Label Roll Guard upwards to hold it in place.
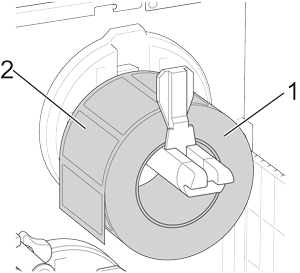
1. Label roll
2. Label print side- Make sure the label print side is facing up.
-
TJ-4422TN/TJ-4522TN
To detect the remaining amount of the media in the label roll, slide the Media Level Sensor up.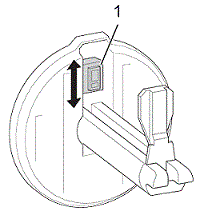
1. Media Level Sensor
-
TJ-4420TN/TJ-4520TN/TJ-4620TN
Push the Print Head Release Lever and thread the label through the Damper, Media Sensor, and Front Label Guide to install the media.
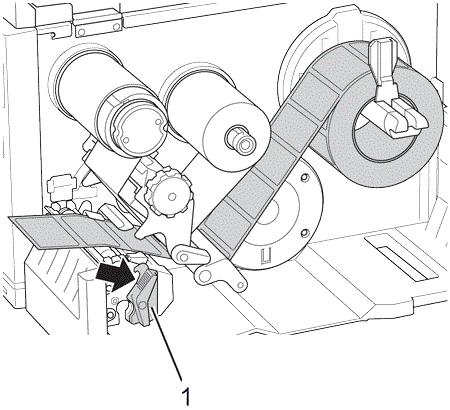
1. Print Head Release Lever
TJ-4422TN/TJ-4522TN
Push the Print Head Release Lever and thread the label through the Media Guide Bar, Damper, Media Sensor, and Front Label Guide to install the media.
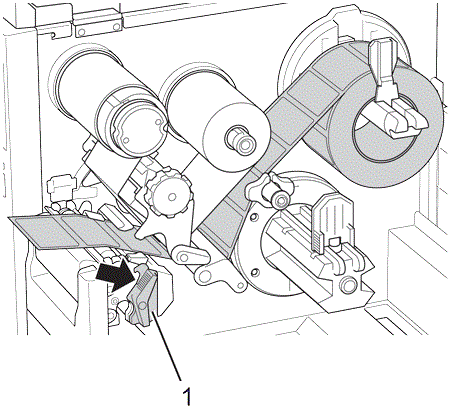
1. Print Head Release Lever
-
Move the Media Sensor by adjusting the Media Sensor Position Adjustment Knob. Make sure the position of the Gap or Black Mark Sensor matches the position of the Gap/Black Mark on the label roll.
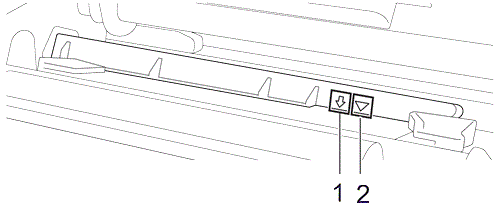
1. Black Mark Sensor
2. Gap Sensor
-
Adjust the Front Label Guide to fix the media position.
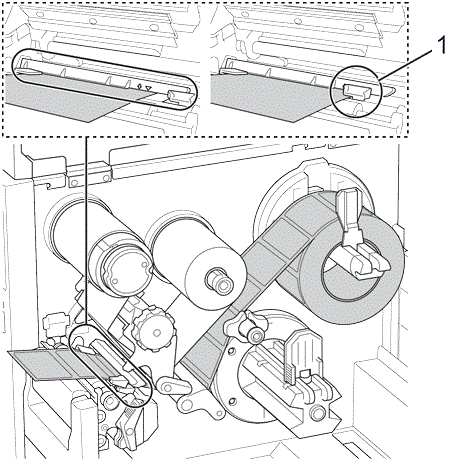
1. Front Label Guide- Make sure you thread the media through the Media Sensor.
- The Media Sensor position is adjustable. Make sure the position of the Gap or Black Mark Sensor matches the position of the Gap/Black Mark on the label roll.
-
Close the Print Head by pushing down on both sides and make sure it locks into place.
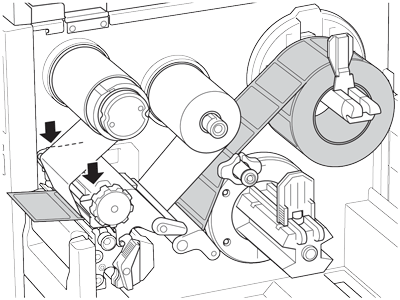
-
Set the media sensor type and calibrate the selected sensor.
To use the Rewind Mode with TJ-4422TN/TJ-4522TN, follow the steps in "Load the Media in Rewind Mode (TJ-4422TN/TJ-4522TN)".You can also use external media (fan-fold label) with this printer.
For details on how to load the fan-fold label, see the User's Guide in the [Manuals] section of this website. -
Close the Media Cover.
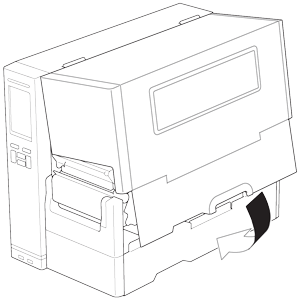
Load the Media in Rewind Mode (TJ-4422TN/TJ-4522TN)
Before loading the media in Rewind Mode, perform steps 1 to 8 in "Load the Media".
-
Perform the calibration first, and set the printer mode to Rewind Mode.
-
Open the Media Cover, and then push the Label Guide to the far right side and pull it down.
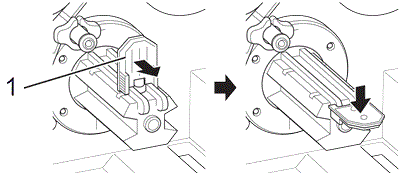
1. Label Guide
-
Install the Paper Core onto the Media Rewind Spindle.
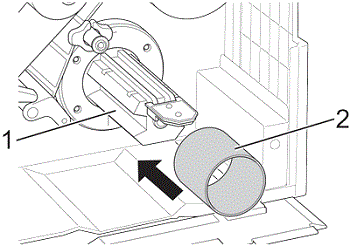
1. Media Rewind Spindle
2. Paper CoreThe paper core is not included in the box. Use the one you have.
-
Open the Print Head Release Lever and Label Guide Bar Release Lever, and pull approximately 650 mm (25.6") of the label roll through the Media Output Slot.
-
Feed the leading edge of the media through the front panel Rewind Slot as shown.
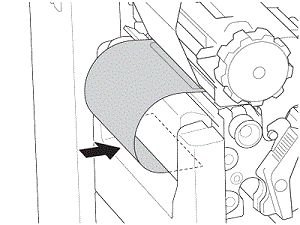
-
Wrap the label around the internal Media Rewind Spindle and . Wind the spindle counterclockwise until the label is fully stretched.
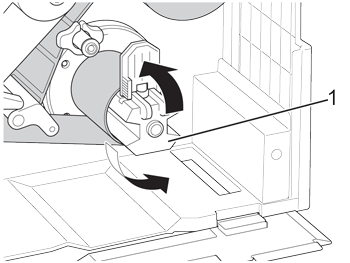
1. Media Rewind Spindle
-
Adjust the Media Rewind Guide to fit the label width.
-
Close the Print Head Release Lever and Base Cover.
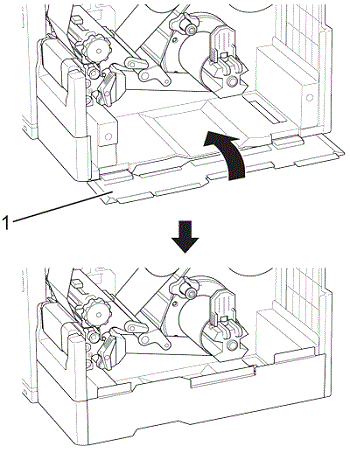
1. Base Cover
-
Close the Media Cover.
