HL-L2375DW
FAQs & Troubleshooting |
Clean the Drum Unit Using Drum Dot Print
If your printout has dots or other repeating marks at 94 mm intervals, the drum may have foreign material, such as glue from a label, stuck on the drum surface.
HL-L2310D
- Make sure the machine is in Ready mode.
- Press Go eight times.The machine prints the Drum Dot Check Sheet.
- Press and hold
 to turn the machine off.
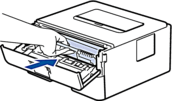
 - Open the front cover.
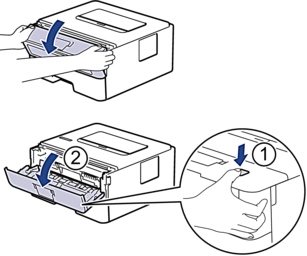
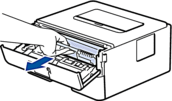
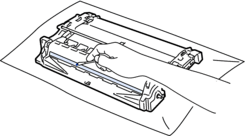
- Remove the toner cartridge and drum unit assembly from the machine.
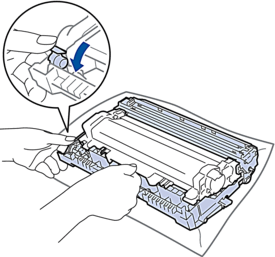
- Push down the green lock lever and take the toner cartridge out of the drum unit.
- Turn the drum unit as shown in the illustration. Make sure that the drum unit gear is on the left side.
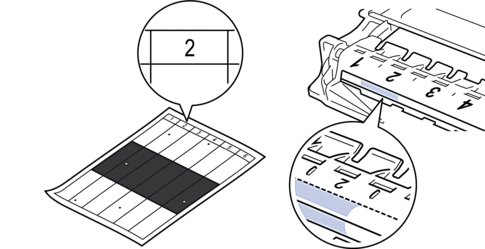
- Use the numbered markers next to the drum roller to find the mark on the drum. For example, a dot in column 2 on the check sheet means that there is a mark in drum region “2”.
- Turn the edge of the drum unit towards you while looking at the drum surface to find the mark.
- IMPORTANT
-
- To avoid print quality problems, DO NOT touch the surface of the drum unit, only the wheel on the end.
- Wipe the surface of the drum gently with a dry cotton swab until the mark or foreign material on the surface comes off.
- NOTE
- DO NOT clean the surface of the photosensitive drum with a sharp object or any liquids.
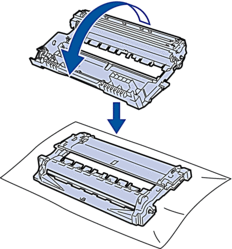
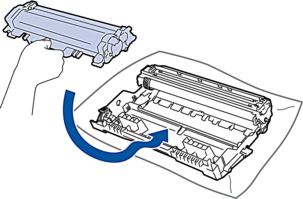
- Push the toner cartridge firmly into the drum unit until you hear it lock into place.
 Make sure you put the toner cartridge in correctly or it may separate from the drum unit.
 - Install the toner cartridge and drum unit assembly back into the machine.
- Close the front cover of the machine.
- Press to turn the machine on.
HL-L2350DW/HL-L2351DW/HL-L2370DN/HL-L2375DW/HL-L2376DW/HL-L2385DW/HL-L2386DW
- Make sure the machine is in Ready mode.
- Press
 or
or  to display the [Print Reports] option, and then press OK.
 - Press or to select the [Drum Dot Print] option.
- Press Go.The machine prints the Drum Dot Check Sheet.
- Press and hold to turn the machine off.
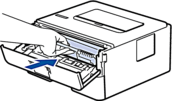
- Open the front cover.
- Remove the toner cartridge and drum unit assembly from the machine.
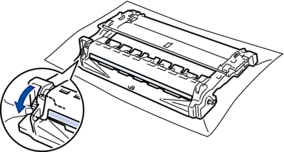
- Push down the green lock lever and take the toner cartridge out of the drum unit.
- Turn the drum unit as shown in the illustration. Make sure that the drum unit gear is on the left side.
- Use the numbered markers next to the drum roller to find the mark on the drum. For example, a dot in column 2 on the check sheet means that there is a mark in drum region “2”.
- Turn the edge of the drum unit towards you while looking at the drum surface to find the mark.
- IMPORTANT
-
- To avoid print quality problems, DO NOT touch the surface of the drum unit, only the wheel on the end.
- Wipe the surface of the drum gently with a dry cotton swab until the mark or foreign material on the surface comes off.
- NOTE
- DO NOT clean the surface of the photosensitive drum with a sharp object or any liquids.
- Push the toner cartridge firmly into the drum unit until you hear it lock into place.Make sure you put the toner cartridge in correctly or it may separate from the drum unit.
- Install the toner cartridge and drum unit assembly back into the machine.
- Close the front cover of the machine.
- Press to turn the machine on.