QC-1000
FAQs & Troubleshooting |
How do I thread the needle?
- The needle threader can be used with home sewing machine needles 75/11 through 100/16.
- If automatic needle threading could not be completed correctly, repeat steps 1 through 9 below.
- Never use the thread of No. 20 or lower.
- Use the needle and the thread in the correct combination. For details on the correct combination of needles and threads, refer to "Combination of fabric, thread and needle".
-
Make sure that the presser foot is raised.
If the presser foot is not raised, press the "Presser Foot Lifter" button to raise the presser foot.

-
Make sure that the needle is raised.
If the needle is not raised, press the "Needle Position" button to raise the needle.
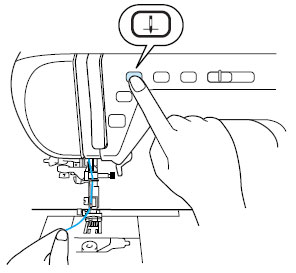
If you try to thread the needle with the needle threader lever without raising it, damage to the machine may result.
-
Pull the end of the thread, which has been passed through the needle bar thread guide, to the left, then pass the thread through the notch of the thread guide (
 ), and then firmly pull the thread from the front and insert it into the slit of the thread guide disk marked "7" all the way (
 ).
).
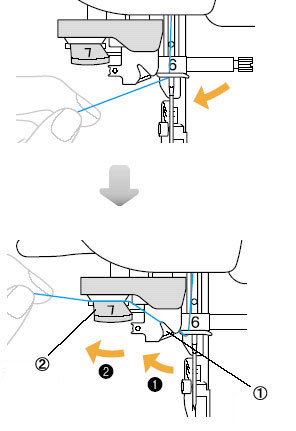
 Notch of the thread guide
 Thread guide disc
Make sure that the thread passes the notch of the thread guide.
-
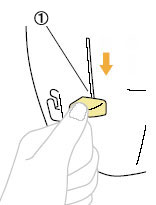
Pull the thread up through the thread cutter to cut the thread, as shown in the illustration.
 Thread cutter
When using thread that quickly winds off the spool, such as metallic thread, it may be difficult to thread the needle if the thread is cut. Therefore, instead of using the thread cutter, pull out about 80 mm (approx. 3 inches) of thread after passing it through the thread guide disks (marked "7").
 80 mm or more
-
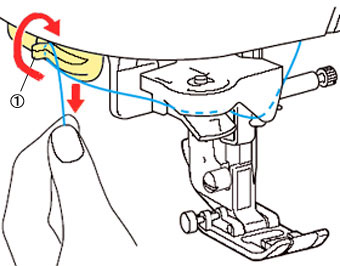
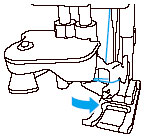
Lower the needle threader lever on the left side of the machine as much as possible to make the hook turn.
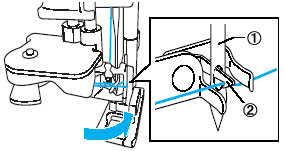
Needle threader lever Needle Hook-
If the needle threader lever is not lowered as much as possible, the hook will not turn fully as shown below and the thread will not pass through the eye of the needle.
In such a case, start from step 3 again.
- If the needle is not raised, the needle threader cannot thread the needle. Be sure to press the "Needle Position" button to raise the needle before using the needle threader.
-
If the needle threader lever is not lowered as much as possible, the hook will not turn fully as shown below and the thread will not pass through the eye of the needle.
-
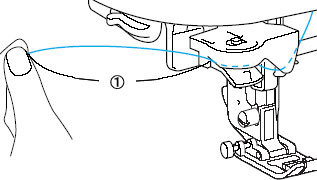
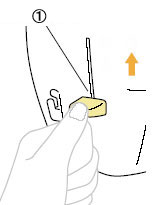
Raise the needle threader lever slowly.
-
Raise the presser foot lever, and carefully pull the loop of the thread through the eye of the needle to pull out the end of the thread.

When pulling out the thread, do not pull it with extreme force, otherwise the needle may bend or break.
-
Pass the end of the thread through the presser foot, and then pull out about 5 cm (2 inches) of thread toward the rear of the machine.

 5 cm (2 inches)
 -
Press the "Presser Foot Lifter" button to lower the presser foot before starting to sew.
The upper threading is finished.