TJ-4522TN
FAQs & Troubleshooting |
How to adjust the cut position (For Windows)
> Using BPM (Brother Printer Management Tool)
-
Open the printers folder.
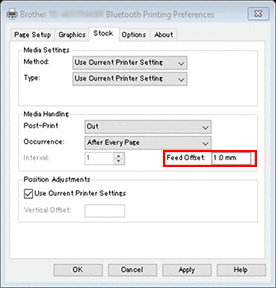
For more information, see "How to open the Devices and Printers window". - Right-click the printer you want to change the settings for, and then select Printing Preferences.
- Select the Stock tab.
-
Enter a positive or negative value (such as "1.0 mm" or "-1.0 mm") in the Feed Offset field to fine-tune the cut position.

- Click Apply, and then click OK to apply the settings.
- Try to print to confirm the cut position.
Using BPM (Brother Printer Management Tool)
You can download BPM from the [Downloads] section of this website.
-
Connect your printer to the computer using a USB cable.
-
Start BPM.
-
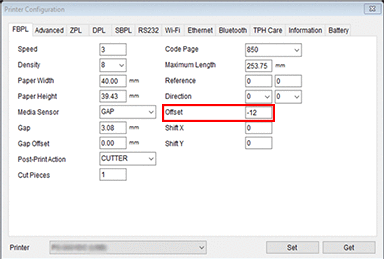
Click Printer Configuration, and then select the FBPL tab.
-
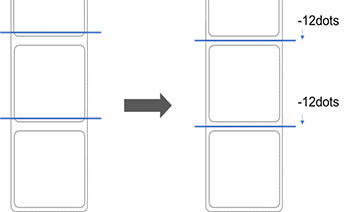
Enter a positive or negative value (such as "12" dots or "-12" dots) in the Offset field to fine-tune the cut position.
You can set values between -999 dots to 999 dots.For 200 dpi printers: 1 mm = 8 dots
For 300 dpi printers: 1 mm = 12 dots
For 600 dpi printers: 1 mm = 24 dots

The cut position can be adjusted variously depending on the printer and media you use.
-
Click Set to apply the settings.
-
Try to print to confirm the cut position.