TJ-4121TN
FAQs & Troubleshooting |
Using the CommTool (for Windows)
- You can download the CommTool from the [Downloads] section of this website.
-
For TJ-40 or TJ-41 series:
To use Wi-Fi®, an optional Wi-Fi Interface (PA-WI-002) is required. For details, see the FAQ : "How to install the Windows driver via Wi-Fi® / wired network". -
For TJ-44, TJ-45 or TJ-46 series:
To use Bluetooth® or Wi-Fi, an optional WLAN / BT Interface (PA-WB-001) is required. For details, see the FAQ : "How do I connect the printer via Bluetooth® / Wi-Fi® / wired network?".
> Wi-Fi® Network Connection (using the BPM) (For Wi-Fi models only)
> Bluetooth® Connection (For Bluetooth models only)
> USB Connection
Wi-Fi® Network Connection (using the BPM)
-
Make sure the printer and your computer are connected to the same Wi-Fi network.
For more information, see "How to connect the printer to your computer (for Windows)". - Start the BPM (Brother Printer Management Tool).
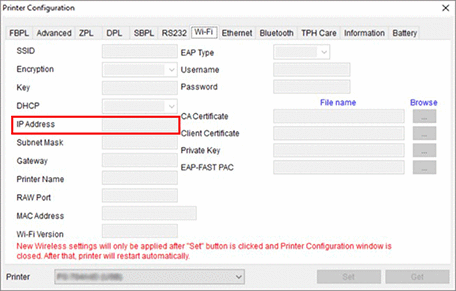
- Click Printer Configuration > Wi-Fi.
-
Check the IP Address.
- Start the CommTool.
-
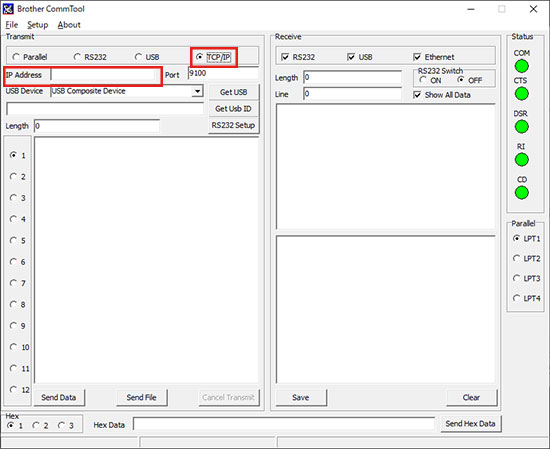
Select TCP/IP for Transmit, and then enter the IP Address that you checked in step 4.
- Enter the character code to use the tool, and then click Send Data.
-
From the Start menu on your computer, select Windows System > Control Panel > Devices and Printers.
For more information, see the FAQ: "How to open the Devices and Printers window". - Right-click the printer whose settings you want to change, and then select Properties.
- Select the Hardware tab, and then check the COM port number.
- Start the CommTool.
-
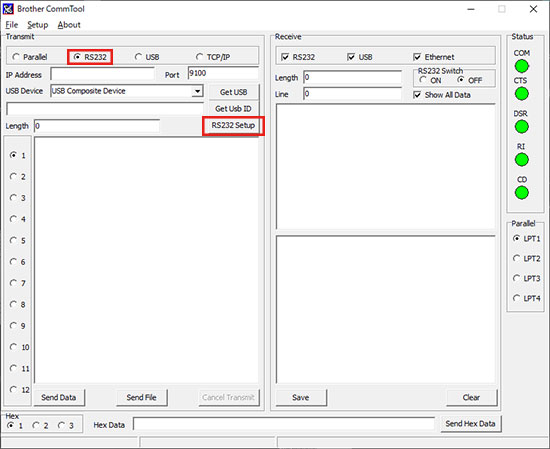
Select RS232 for Transmit, and then click RS232 Setup.
-
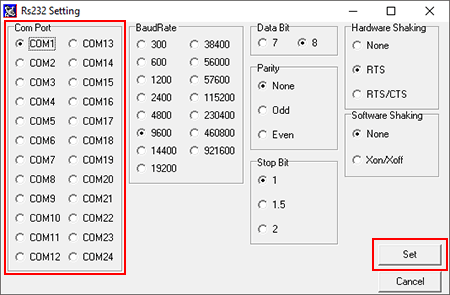
Select the COM port number that you checked in step 3, and then click Set.
- Enter the character code to use the tool, and then click Send Data.
- Connect the printer to your computer using a USB cable.
- Start the CommTool.
-
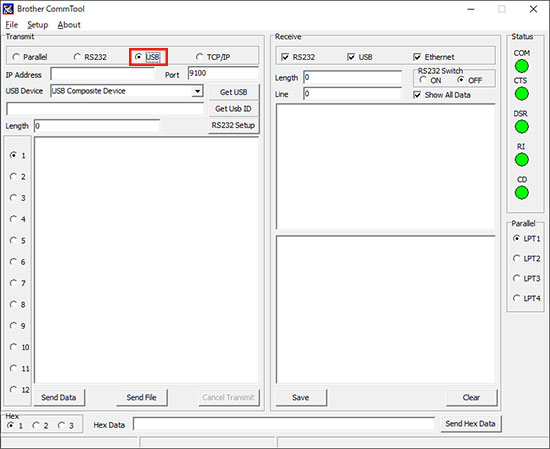
Select USB for Transmit.
-
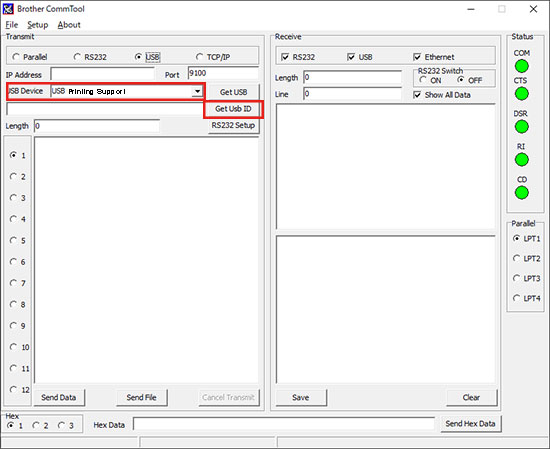
Select USB Printing Support for USB Device, and then click Get USB ID.
- Enter the character code to use the tool, and then click Send Data.