QL-500A
FAQs & Troubleshooting |
Creating an Address Label using the Add-In function with Microsoft Outlook (P-touch Editor 5.x for Windows)
For TD-4T / TJ-4T series:
To use P-touch Editor, download and install “Printer Driver for P-touch Editor” from the [Downloads] section of this website.
The procedure of creating an address label using data from Microsoft Outlook and taking advantage of the Layout Style Function is described below.
-
Copy the text from Microsoft Outlook
- Start Outlook, and then open the item containing the data to be imported.
- Select the text to be imported. For a contact, select the contact to be imported.
-
Click the
 "Brother P-touch" button, on the [Add-in] tab of the Ribbon.
-
Specifying the data import format
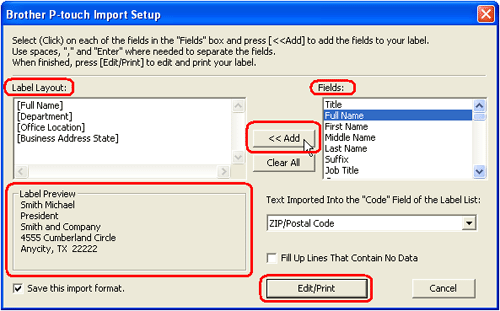
In the Brother P-touch Import Setup dialogue box, click on the item in the "Fields:" box and press the [Add] button. The selected item is added as a tag in the "Label Layout:" box. You can enter spaces, returns and text here until the layout is designed. If you think the "Label Preview" is ok, click the "Edit/Print" button.
- To save the settings specified in "Label Layout:", check the "Save this import format." box on.
- If the "Fill Up Lines That Contain No Data" check box is on, lines containing no data are deleted automatically.
- To import data into the "Code" field of the Label List, use the "Text Imported Into the Code Field of the Label List:" field to specify the information to include.
- To delete the contents of the "Label Layout:" box, click the [Clear All] button.
-
Apply a Layout style
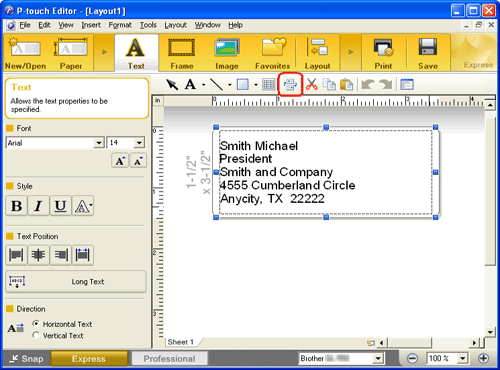
The data is imported onto the edit screen. Click the [Apply Layout Style] button to change the layout style.
The "Apply Layout Style" window appears. Select the "Standard Address Label" layout and click [OK].
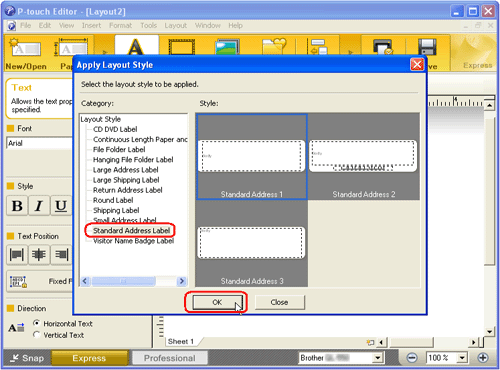
Basically, after running the Add-In function from Microsoft Office, the default layout style or the last used layout style for currently installed media size is applied to the highlighted information.
-
Adjust the data
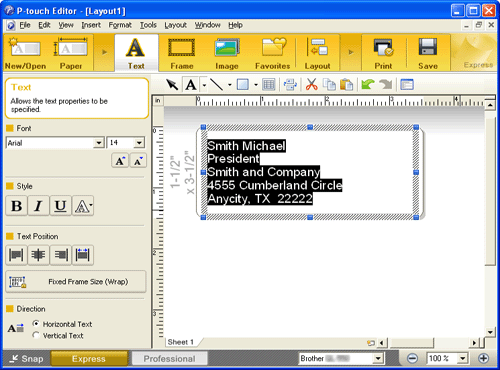
You can adjust the text using the Text properties.
-
Print the label
Click to print the label.
Completed label
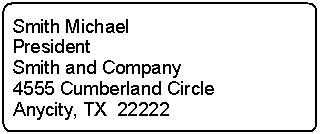
If the Add-In is set to register the text in the Label List, the imported data from Microsoft Outlook will be registered in the Label List as shown below.
Message content:
|
Label Data |
Column |
| Date Created | "Date" field |
| First line of data | "Title" field |
| All imported data | "Body" field |
Contacts:
|
Label Data |
Column |
| Date Created | "Date" field |
| "Full Name" data from the data | "Title" field |
| All highlighted information | "Body" field |
| Text set to be imported into the "Code" field | "Code" field |