Innov-is XV
FAQs & Troubleshooting |
How do I attach or remove the embroidery frame ?
Wind and insert the bobbin before attaching the embroidery frame.
attaching the Embroidery Frame
- Press the “Presser Foot Lifter” button to raise the presser foot.
- Align the embroidery frame guide with the right edge of the embroidery frame holder.
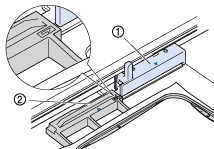
(1) Embroidery frame holder (2) Embroidery frame guide
- Slide the embroidery frame into the holder,
making sure to align the embroidery frame’s with the holder’s
  .
. 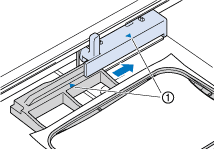
(1) Arrow mark
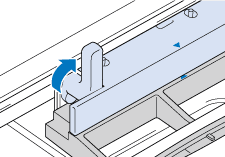
- Lower the frame-securing lever to be level with the frame to secure the embroidery frame in the embroidery frame holder.
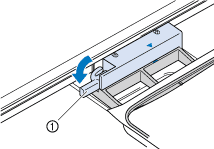
(1) Frame-securing lever
If the frame-securing lever is not lowered, the following message appears.
You cannot start sewing until you lower the frame-securing lever.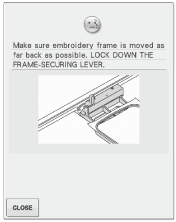
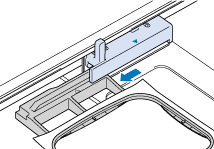
Removing the Embroidery Frame
- Raise the frame-securing lever.
- Pull the embroidery frame toward you.