AS1430S
FAQs & Troubleshooting |
How do I wind the bobbin?
- Only use the bobbin that comes with this machine or bobbins of the same type (part code: SA156, SFB: XA5539-151). Using other bobbins may cause damage to the machine.
-
We designed the bobbin that comes with this machine. If you use bobbins from other models, the machine will not work properly.
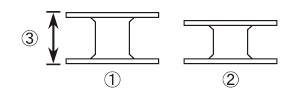
(1) This model (2) Other models
(3) 11.5 mm (7/16 inch)
-
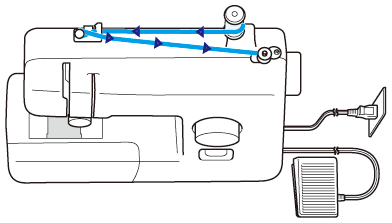
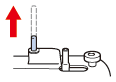
Pull up the spool pin completely.
-
Put a spool of thread on this pin.
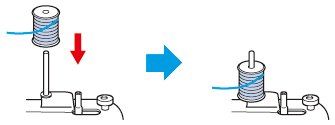
If the spool of thread is in the wrong place, or is set incorrectly, the thread may tangle on the spool pin.
-
While holding the thread from the spool with your right hand, pass the thread toward you, in the groove on the thread guide. Then, pass the thread around the pre-tension disk and pull the thread in completely.
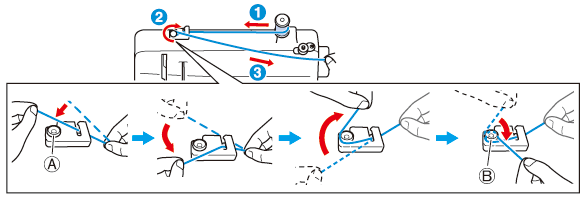
(A) Pre-tension disk (B) Pull the thread completely
Make sure that the thread passes under the pre-tension disk.
-
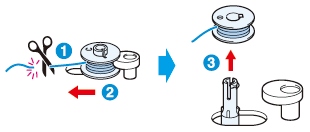
Pass the end of the thread through the hole on the bobbin from the inside of the bobbin.

-
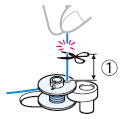
Put the bobbin onto the bobbin winder shaft and slide the bobbin winder shaft to the right. Turn the bobbin clockwise, by hand, until the projection slides into the notch of the bobbin.

(1) Projection
(2) Notch
* Align the notch of the bobbin to the projection on the shaft.
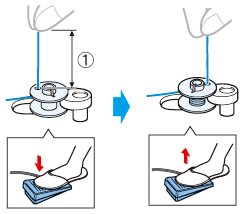
(3) 7 - 10 cm (3 to 4 inches)Make sure to pull out 7 to 10 cm (3 to 4 inches) of thread from the hole on the bobbin.
Pull the thread taut and hold the end of the thread straight up. If the thread is too short, not pulled taut or held at an angle, injuries may occur when the thread is wound around the bobbin.
-
Turn on the machine.

Do not turn on the machine while pressing down the foot controller. The machine may start unexpectedly and cause personal injury or damage to the machine.
-
While holding the end of the thread, gently press the foot controller to wind the thread around the bobbin a few times. Then stop the machine.
(1) 7 - 10 cm (2-3/4 to 3-15/16 inches)
-
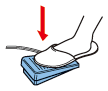
Trim the excess thread above the bobbin.
(1) Leave 1 cm (1/2 inch) of thread from the hole on the bobbin.
Make sure you follow the instructions carefully. If you do not cut the excess thread completely before winding the bobbin, when the thread runs low it may tangle around the bobbin and cause the needle to break.
-
Press the foot controller to start.
-
When the bobbin seems full and begins spinning slowly, take your foot off the foot controller.
-
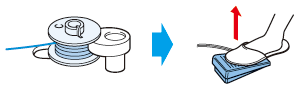
Cut the thread, slide the bobbin winder shaft to the left and remove the bobbin.
- When the sewing machine is started or the handwheel is turned after winding the thread around the bobbin, the machine will make a clicking sound; this is not a malfunction.
- The needle bar does not move when you slide the bobbin winder shaft to the right.
Not winding the bobbin properly may cause the thread tension to loosen, and may break the needle.
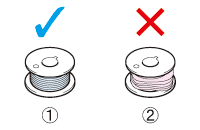
(1) Wound evenly (2) Wound poorly