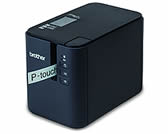
PT-P900W
FAQs & Troubleshooting |
Find the Wireless Security Information (e.g., SSID, Network key, etc.) for Windows
These steps may help you locate your wireless security settings if your computer is also connected to your network using a wireless connection.
If you are unable to find this information using the steps below, you can find the wireless network security settings on the documentation provided with your wireless access point /router. The initial setting of security information could be the manufacturer's name or the model name.
If you still cannot find the security settings, please consult the router manufacturer, your system administrator, or your internet provider.
Illustrations shown below are from a representative product and operating system, and may differ from your printer and operating system.
- Click the [Start] button - [Windows System].
- Click [Control Panel].
-
Click [View network status and tasks] under [Network and Internet].
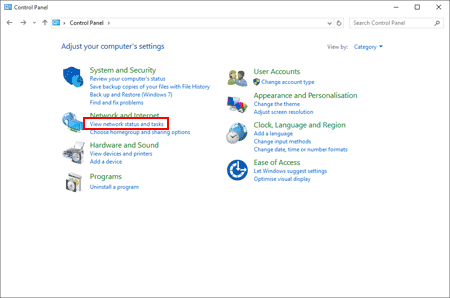
If the appearance is set to “Large icons” or “Small icons”, click [Network and Sharing Center].
-
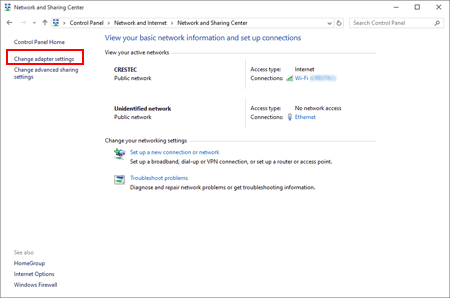
Click [Change adapter settings].
-
Double-click [Wi-Fi].

The Network Connections screen is displayed.If the NETWORK & INTERNET screen is displayed, follow the steps below:
- If the Wi-Fi switch is set to off, click to turn it on.
- Click the name (SSID) of the network settings you want to use.
- Click [Connect].
- Double-click [Wi-Fi] in the Network Connections screen.
-
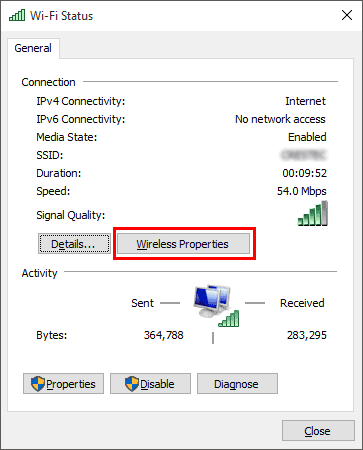
Click [Wireless Properties].
-
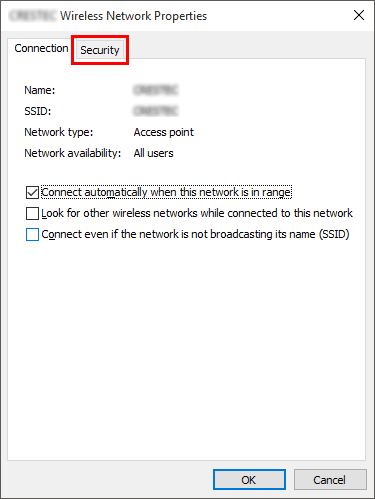
Click the [Security] tab.
-
Confirm the items to the right of "Security type", "Encryption type" and "Network security key".
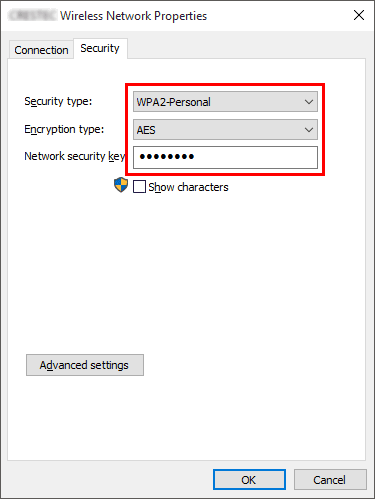
Select the "Show characters" check box to display the "Security key".
Because the security key will be changed depending on the security type, the values may be different from the values of your network access point/router.
- Click [X] to close the (SSID) Wireless Network Properties dialog box.
-
Click the [Desktop] Tile.

If the desktop is already displayed, go to the next step. -
Move the mouse pointer to the lower-right corner of the screen.

-
The charms will be displayed.
Click [Settings].

-
Click [Control Panel].

-
The control panel will be displayed.
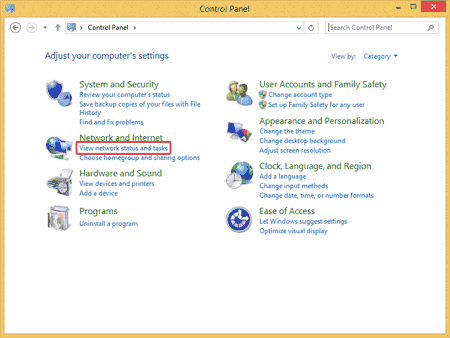
Click [View network status and tasks].
-
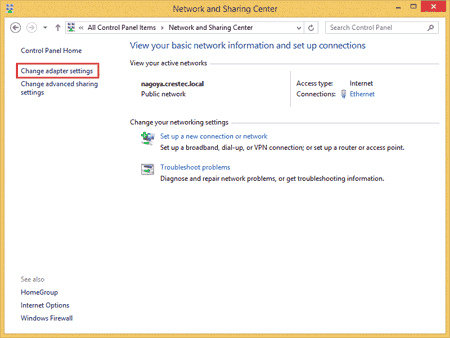
Click [Change adapter settings].
-
Double-click [Wi-Fi].

-
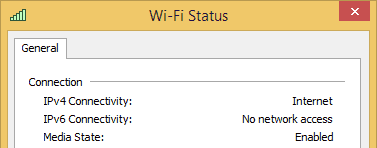
The procedures hereafter differ depending on the displayed screen.
If the Network charm is displayed, go to the next step.

If Wi-Fi Status is displayed, go to step 13.
-
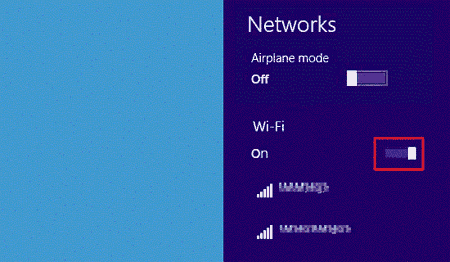
Click the [Wi-Fi] switch to turn it on.
If the switch does not appear or it is already turned on, go to the next step.
-
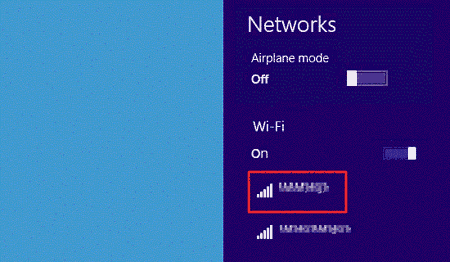
Click the name (SSID) of the network whose settings you want to see.
-
Click [Connect].

-
Double-click [Wi-Fi] under [Network Connections].

-
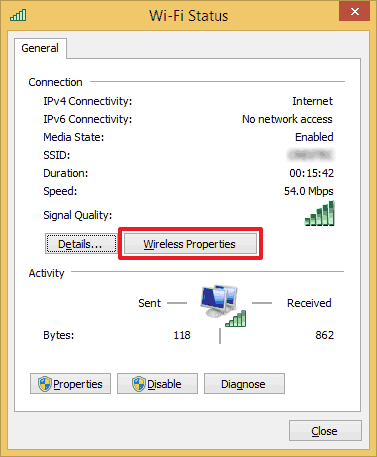
The Wi-Fi Status dialog box will be displayed.
Click [Wireless Properties].
-
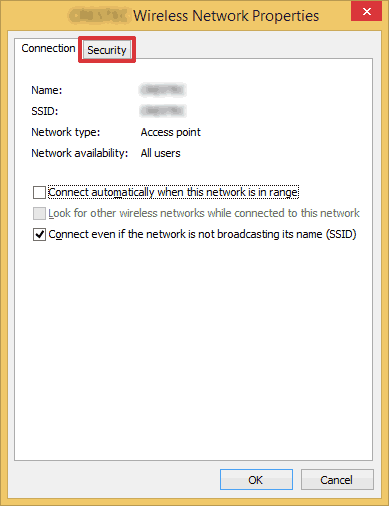
The (SSID) Wireless Network Properties dialog box will be displayed.
Click the [Security] tab.
-
Confirm the items to the right of "Security type", "Encryption type" and "Network security key".
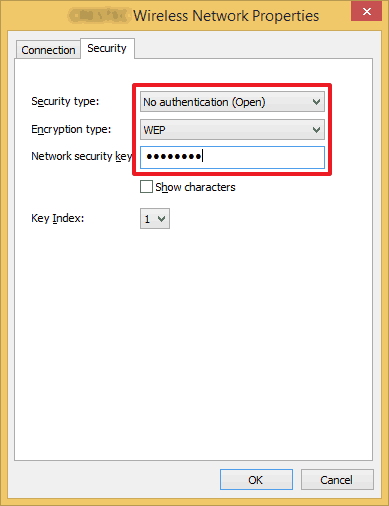
Select the "Show characters" check box to display the security key.
Because the security key will be changed depending on the security type, the values may be different from the values of your network access point/router.
- Click [X] to close the (SSID) Wireless Network Properties dialog box.
-
Move the mouse pointer to the lower-right corner of the screen.

Click the network icon displayed in the notification area to display the screen shown in step 4.

-
The charms will be displayed.
Click [Settings].

-
Click the network icon.

-
Network will be displayed.
Right-click the name (SSID) of the network whose settings you want to see, and click [View connection properties] in the displayed menu.

-
The (SSID) Wireless Network Properties dialog box will be displayed.
Click the [Security] tab.

-
Confirm the items to the right of "Security type", "Encryption type" and "Network security key".

Select the "Show characters" check box to display the security key.
Because the security key will be changed depending on the security type, the values may be different from the values of your network access point/router.
- Click [X] to close the (SSID) Wireless Network Properties dialog box.
- Click [Start] - [Control Panel].
-
Click [View network status and tasks] under [Network and Internet].
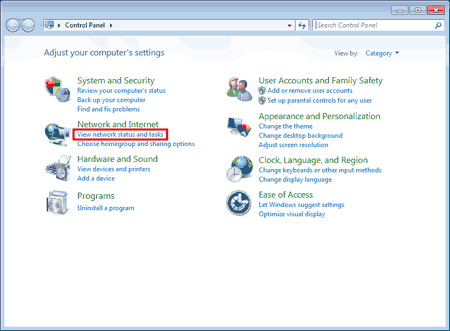
If the appearance is set to "Large icons" or "Small icons", click [Network and Sharing Center].
-
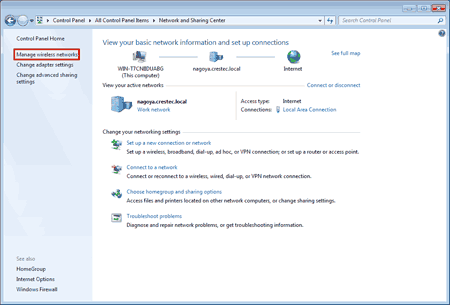
The Network and Sharing Center dialog box will be displayed.
Click [Manage wireless networks].
-
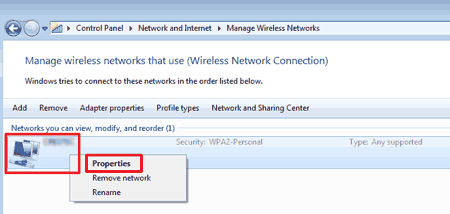
The Manage wireless networks dialog box will be displayed.
Right-click the registered profile, and click [Properties] in the displayed menu.
-
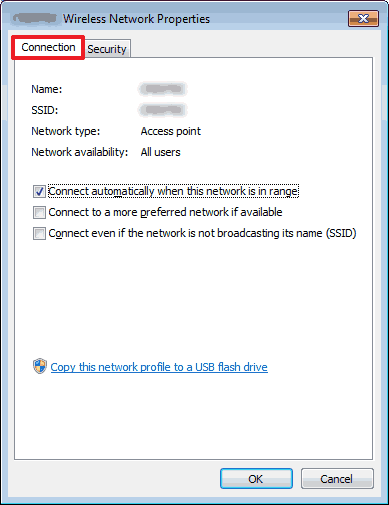
The (profile name) Wireless Network Properties dialog box will be displayed.
Click the [Connection] tab.
-
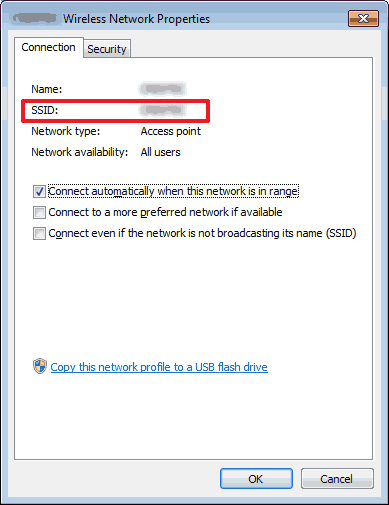
Confirm the characters to the right of "SSID".
-
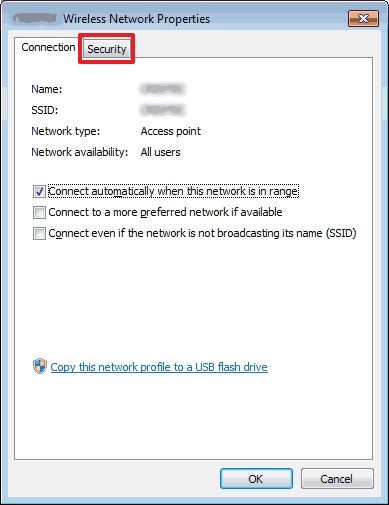
Click the [Security] tab.
-
Confirm the items to the right of "Security type", "Encryption type" and "Network security key".
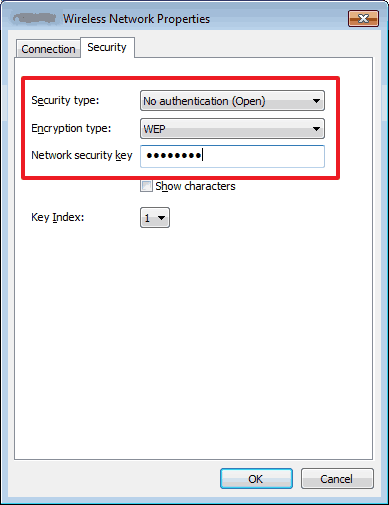
Select the "Show characters" check box to display the security key.
Because the security key will be changed depending on the security type, the values may be different from the values of your network access point/router.
- Click [X] to close the (profile name) Wireless Network Properties dialog box.
- Click [X] to close the Manage wireless networks dialog box.
- Click [Start] - [Control Panel].
-
Click [View network status and tasks] under [Network and Internet].
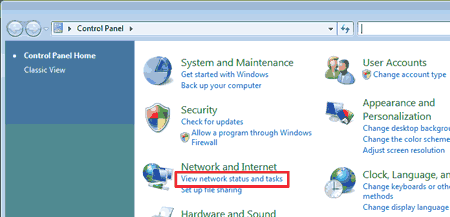
If [Network and Internet] is not displayed, click [Network and Sharing Center].
-
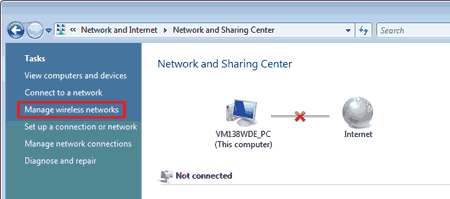
The Network and Sharing Center dialog box will be displayed.
Click [Manage wireless networks].
-
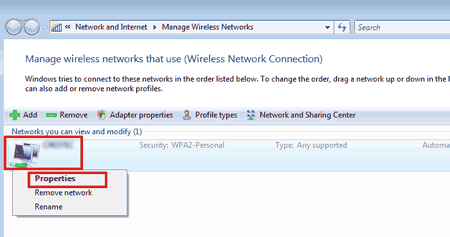
The Manage wireless networks dialog box will be displayed.
Right-click the registered profile, and click [Properties] in the displayed menu.
-
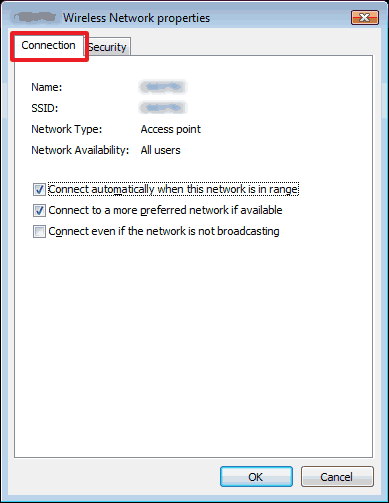
The (profile name) Wireless Network Properties dialog box will be displayed.
Click the [Connection] tab.
-
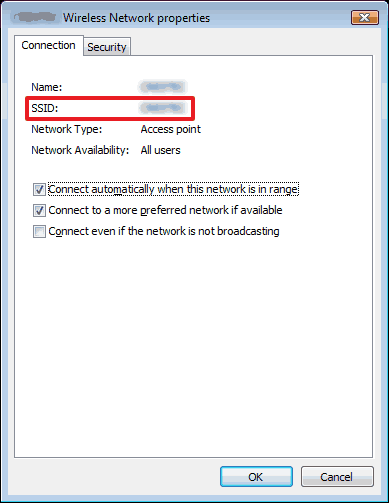
Confirm the characters to the right of "SSID".
-
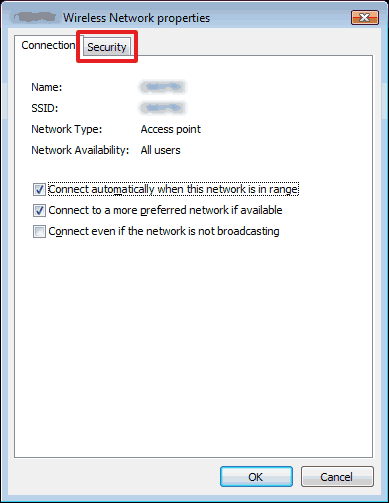
Click the [Security] tab.
-
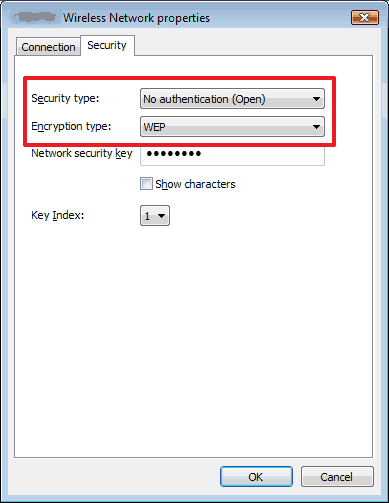
Confirm the items to the right of "Security type" and "Encryption type".
- Click [X] to close the (profile name) Wireless Network Properties dialog box.
- Click [X] to close the Manage wireless networks dialog box.
- Click [X] to close the Network and Sharing Center dialog box.
