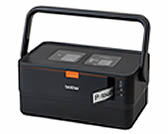
PT-E800T
FAQs & Troubleshooting |
How to install the rechargeable Li-ion battery (optional)
You must attach the battery base (optional*: PA-BB-003) to the printer before installing the rechargeable Li-ion battery (optional: PA-BT-4000LI).
*For E800T/E800TK/E850TKW/D800W only.
The printing speed may also fluctuate depending on the voltage.
-
Attaching the battery base
- Before attaching the battery base, you must disconnect the AC adapter from the printer.
-
For models equipped with the keyboard:
Before attaching the battery base, remove the keyboard LCD unit from the printer (only for models equipped with the keyboard).
-
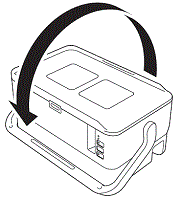
Turn the printer over so that the bottom of the printer is facing up as shown in the illustration.
-
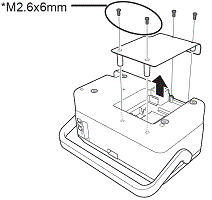
Remove the screws and the cover.
-
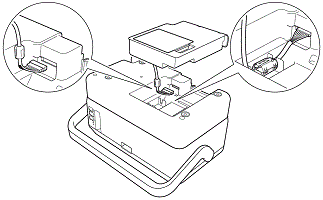
Insert the connector of the battery base into the connector of the printer, and then install the battery base.
-
Open the battery cover on the battery base.
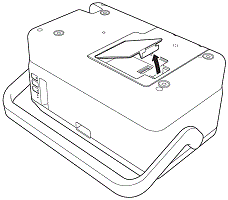
-
Install the specified screws in the locations indicated in the illustration.
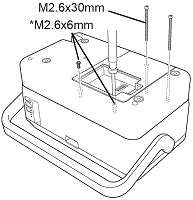
For two of the four screws, use the M2.6 × 6 mm screws removed in step 2.
For the remaining two screws, use the M2.6 × 30 mm screws included with the battery base.
-
Installing the Li-ion battery
-
Align the connectors and install the Li-ion battery.
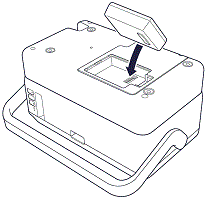
-
Close the battery cover, and then turn the printer over so that the top of the printer is facing up.
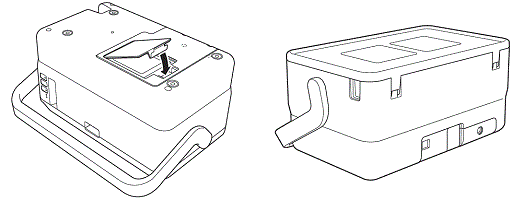
-
Align the connectors and install the Li-ion battery.
-
Removing the Li-ion battery
Press and hold the
 (Power) button to turn the printer off.
Remove the battery cover and the battery, and then reattach the battery cover.
If it is difficult to remove the rechargeable battery, turning the printer over with the battery cover removed may allow the rechargeable battery to fall out.
Be careful that this does not cause any injuries.
