PE-DESIGN 10
FAQs & Troubleshooting |
Embroidery (.PES) files are not displayed as thumbnails in File Explorer. (Windows 8/8.1)
Check the following solutions when embroidery files are not displayed properly as thumbnails in File Explorer.
STEP1: Checking the setting of "Folder and search options"
The setting for diplaying thumbnails in File Explorler may not be correct.
Try the following steps to check the setting for it in the Folder Options dialog box.
-
Open the folder where embroidery files are not displayed as thumbnails using File Explorer.
-
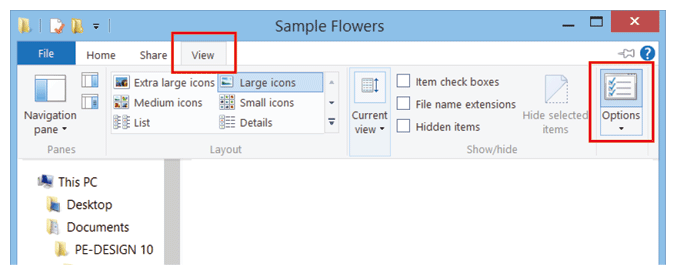
On the menubar, Click View, and then click Options.
-
The Folder Options dialog box appears.
-
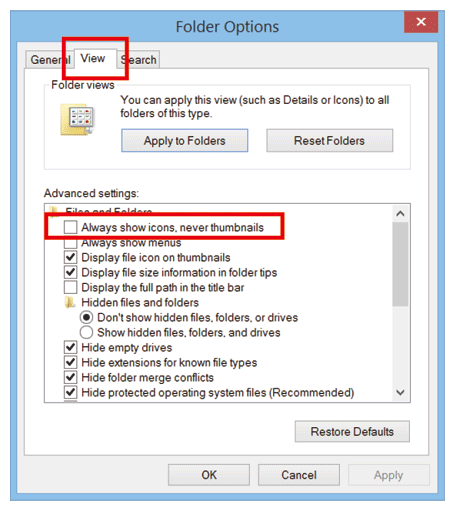
Click the View tab.
-
Check the setting of "Always show icons, never thumbnails".
If it's checked, uncheck this option ("Always show icons, never thumbnails").
- Click OK.
- If you unchecked the option for "Always show icons, never thumbnails", check whether embroidery files can be displayed properly as thumbnails in File Explorer.
- When the setting of the option for "Always show icons, never thumbnails" has already been unchecked, go to STEP2 "Clearing the Thumbnail Cache using Disk Cleanup".
STEP2: Clearing the Thumbnail Cache using Disk Cleanup
The thumbnail cache may have become corrupted.
Try the following steps to clear the thumbnail cache using Disk Cleanup.
-
Move the mouse pointer to the upper or lower right corner of your Desktop screen.
When the menu bar appears, click Settings.
And then click Control Panel.

Another method to open Control Panel
-
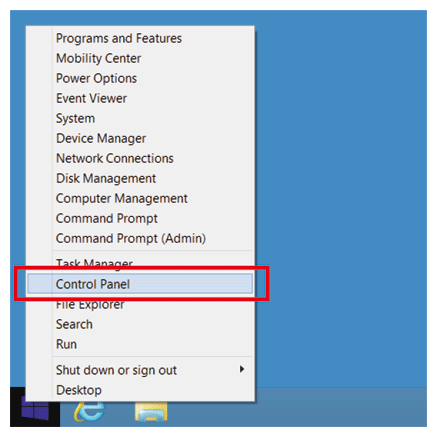
Press X key while pressing Windows key, and then, click Control Panel in the displayed menu.
-
Move the mouse pointer to the Start button at the lower left corner of your Desktop screen, and then right-click on Start button.
Click Control Panel in the displayed menu.
-
Press X key while pressing Windows key, and then, click Control Panel in the displayed menu.
-
When the Control Panel window opens, click System and Security.
And then, when the System and Security window opens, click Free up disk space.
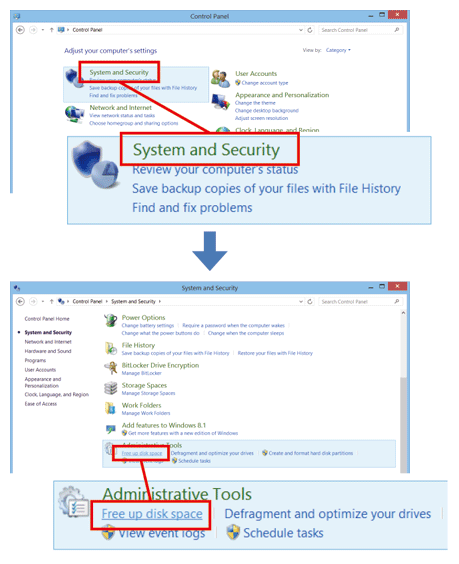
When the Control Panel is shown by Large icons or small icons, click Administrative Tools.
And then, when the Administrative Tools window opens, click Disk Cleanup.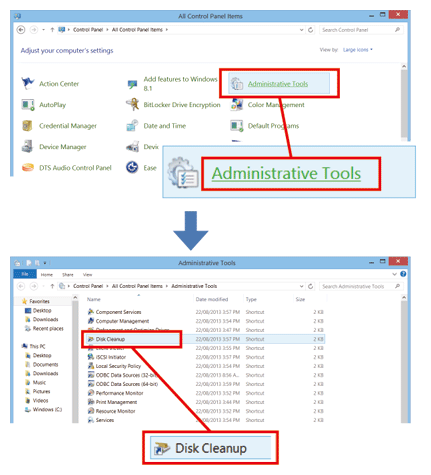
-
If the Disk Cleanup: Drive Selection dialog box appears, select the drive that you want to clean up, and then click OK.

-
If the Disk Cleanup is scanning your drive first, wait until it has completed.
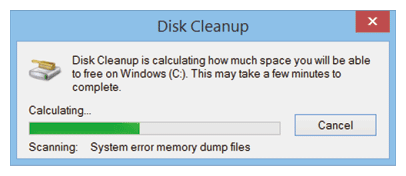
-
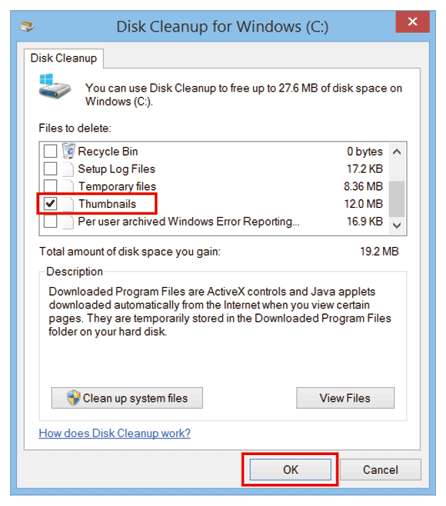
The Disk Cleanup dialog box appears.
-
Select the checkbox for Thumbnails at the "Files to delete" box, and then clikc OK.
-
The message "Are you sure you want to permanently delet these files?" appears. Click Delete Files.

-
Disk Cleanup program starts. When the cleanup is completed, the dialog box is closed automatically.
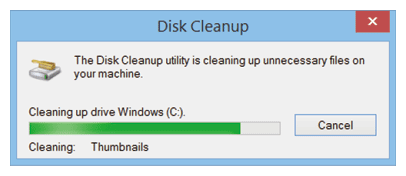
The operation for Disk Cleanup was completed.
Check whether embroidery files can be displayed properly as thumbnails in File Explorer.
