MFC-8950DW
FAQs & Troubleshooting |
Clean the corona wire
Please follow the steps below to clean the corona wire.
NOTE: Illustrations shown below are from a representative product and may differ from your Brother machine.
- DO NOT use cleaning materials that contain ammonia, alcohol, any type of spray, or any type of flammable substance to clean the outside or inside of the machine. Doing this may cause a fire or electrical shock.

-
Be careful not to inhale toner.
- Leave the machine turned on for 10 minutes for the internal fan to cool the extremely hot parts inside the machine.
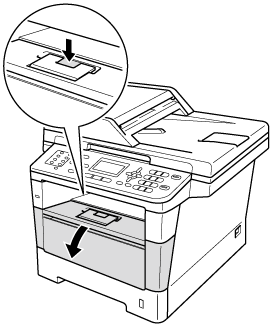
- Press the front cover release button and then open the front cover.
-
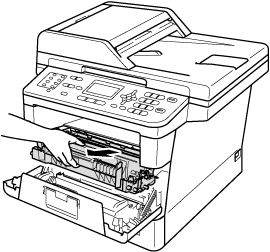
Take out the drum unit and toner cartridge assembly.
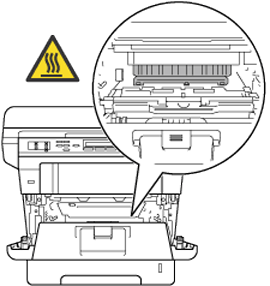
- After you have just used the machine, some internal parts of the machine will be extremely hot. Wait for the machine to cool down before you touch the internal parts of the machine.
- We recommend that you put the drum unit and toner cartridge assembly on a piece of disposable paper or cloth in case you accidentally spill or scatter toner.
- Handle the drum unit and toner cartridge assembly carefully. If toner scatters on your hands or clothes, immediately wipe or wash it off with cold water.
- To prevent damage to the machine from static electricity, DO NOT touch the electrodes shown in the illustration.
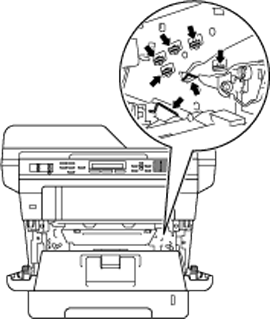
- After you have just used the machine, some internal parts of the machine will be extremely hot. Wait for the machine to cool down before you touch the internal parts of the machine.
-
Clean the corona wire inside the drum unit by gently sliding the green tab from left to right and right to left several times.
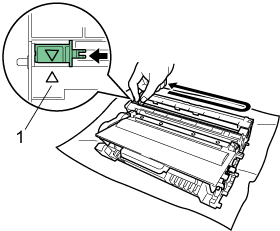
Be sure to return the tab to the home position (1). If you do not, printed pages may have a vertical stripe.
-
Put the drum unit and toner cartridge assembly back into the machine.
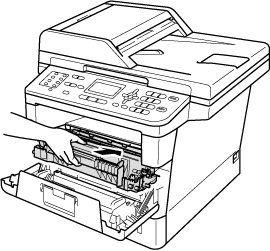
-
Close the front cover of the machine.
If the "Drum Error" is displayed on the LCD after you cleaned the corona wire, the drum unit is near the end of its life. We recommend that you obtain a new drum unit to replace the current one. Click here to learn how to replace the drum unit.
Content Feedback
To help us improve our support, please provide your feedback below.
