QL-810W
FAQs & Troubleshooting |
Creating an Address Label using the Add-In function with Microsoft Outlook (P-touch Editor 5.x for Windows)
For TD-4T/TJ-4T series:
To use P-touch Editor, download and install “Printer Driver for P-touch Editor” from the [Downloads] section of this website.
The procedure of creating an address label using data from Microsoft Outlook and taking advantage of the Layout Style Function is described below.
-
Copy the text from Microsoft Outlook
- Start Outlook, and then open the item containing the data to be imported.
- Select the text to be imported. For a contact, select the contact to be imported.
-
Click the
 "Brother P-touch" button, on the [Add-in] tab of the Ribbon.
-
Specifying the data import format
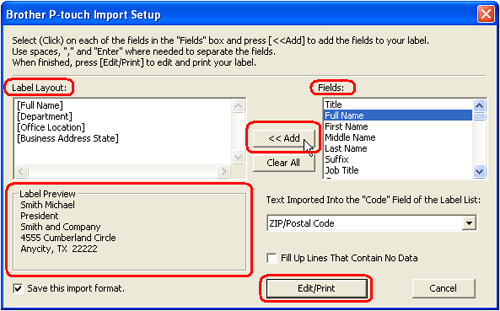
In the Brother P-touch Import Setup dialog box, click on the item in the "Fields:" box and press the Add button. The selected item is added as a tag in the "Label Layout:" box. You can enter spaces, returns and text here until the layout is designed. If you think the "Label Preview" is ok, click the "Edit/Print" button.- To save the settings specified in "Label Layout:", check the "Save this import format." box on.
- If the "Fill Up Lines That Contain No Data" check box is on, lines containing no data are deleted automatically.
- To import data into the "Code" field of the Label List, use the "Text Imported Into the Code Field of the Label List:" field to specify the information to include.
- To delete the contents of the "Label Layout:" box, click the "Clear All" button.
-
Apply a Layout style
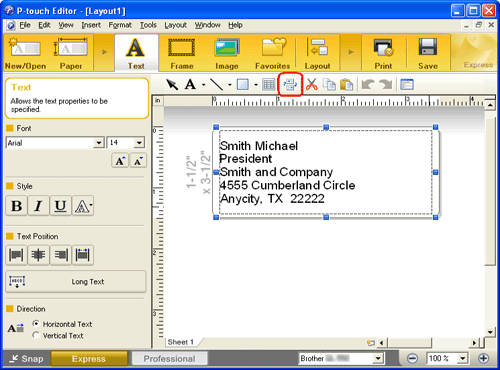
The data is imported onto the edit screen. Click the "Apply Layout Style" button to change the layout style.
The "Apply Layout Style" window appears. Select the "Standard Address Label" layout and click "OK".
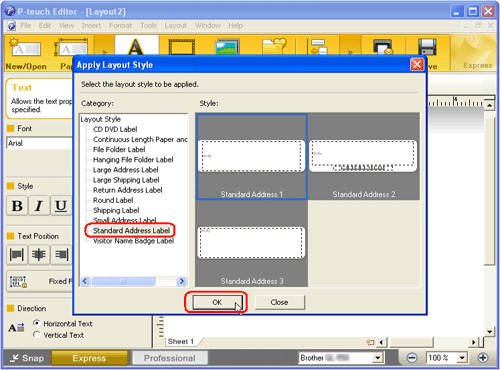
Basically, after running the Add-In function from Microsoft Office, the default layout style or the last used layout style for currently installed media size is applied to the highlighted information.
-
Adjust the data
You can adjust the text using the Text properties.
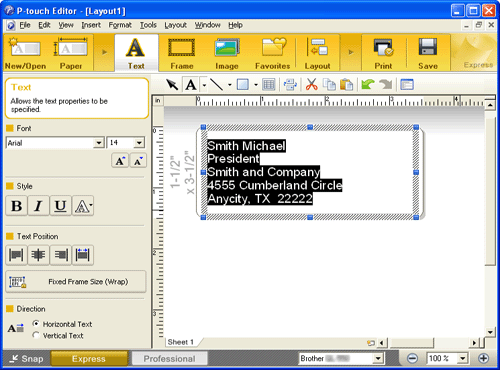
-
Print the label
Click to print the label.
Completed label
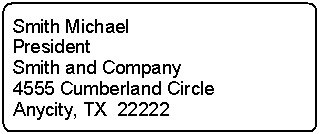
If the Add-In is set to register the text in the Label List, the imported data from Microsoft Outlook will be registered in the Label List as shown below.
Message content:
| Label Data | Column |
|---|---|
| Date Created | "Date" field |
| First line of data | "Title" field |
| All imported data | "Body" field |
Contacts:
| Label Data | Column |
|---|---|
| Date Created | "Date" field |
| "Full Name" data from the data | "Title" field |
| All highlighted information | "Body" field |
| Text set to be imported into the "Code" field | "Code" field |
Related Models
PT-9700PC, PT-9800PCN, PT-D600, PT-E800T, PT-E850TKW, PT-P750W, PT-P900W, PT-P950NW, QL-1050, QL-1060N, QL-1100, QL-1110NWB, QL-500, QL-570, QL-580N, QL-700, QL-720NW, QL-800, QL-810W, QL-820NWB, RJ-2030, RJ-2150, RJ-3050, TD-2020/2020A, TD-2130N, TD-4000, TD-4100N, TD-4410D, TD-4420DN, TD-4420TN, TD-4520TN, TD-4550DNWB, TJ-4420TN
