SDX1200
FAQs & Troubleshooting |
The pattern to be scan is not cleanly scanned
When the pattern to be cut is not cleanly scanned, check the following problem and perform the necessary operation according to each solution.
Problem 1: Unnecessary dots and lines are scanned. The line printed on the mat is scanned.
Problem 2: Some of the lines or images are not converted to cutting lines.
Problem 3: The scanned image is red.
Problem 4: The scan image is out of focus.
Problem 5: When converting the patterns to cutting data, [Cannot operate when there are too many patterns.] message appeared.
Problem 1: Unnecessary dots and lines are scanned. The line printed on the mat is scanned.
Solution 1
The scanner glass may be dirty. Clean the scanner glass inside the machine. For details, refer to Care and Maintenance (Cleaning the Scanner Glass).
Solution 2
The original to be scanned is dirty or scratched.
In [Direct Cut] or [Scan to Cut Data] mode, remove thin lines or dirt in the image editing screen. Edit the scanned image according to the following procedure.
-
Touch the [Ignore Object Size] in the image trim screen after scanning the material.
[Direct Cut] mode or [Scan to Cut Data] mode 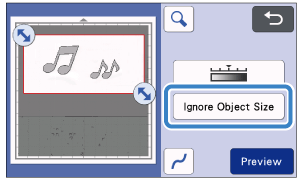
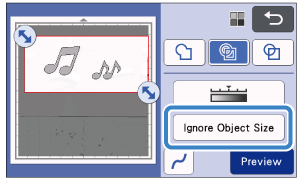
-
Specify an object size smaller than which is not to be converted to cutting lines, and then touch the [OK].
The image smaller that the specified size is not converted to cutting lines.
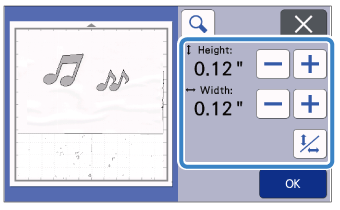
In Grayscale recognition mode, the image detection level (light, medium, dark) can be set by selecting the in the image trim screen.
When setting to [dark], only the scanned dark image is recognized, and if it is set to [light], the scanned light image is also converted to the cutting line.
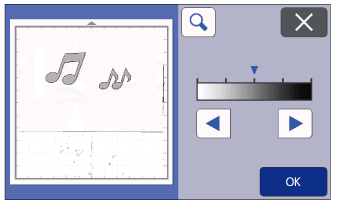
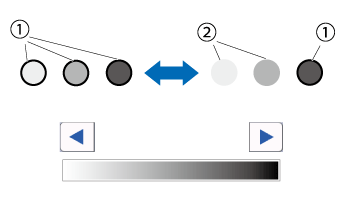
-
When changing the settings are finished, touch the [OK].
- Check the image to be cut on the preview screen.
Problem 2: Some of the lines or images are not converted to cutting lines.
Solution 1
The following pattern may not be able to convert to the desired cutting line.
- Patterns that are clearly drawn, with no gradation, fading or blurriness.
- Not using an extremely intricate design.
- The color of the pattern and the background are similar.
- The outline of the pattern is broken.
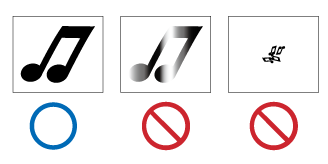
Solution 2
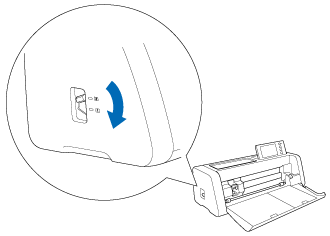
Set the scanner lever position on the left of the machine to "1".
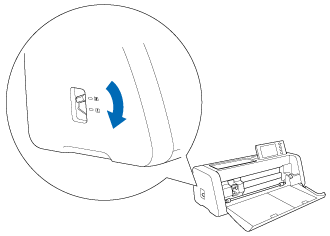
Solution 3
If a small pattern such as a dot or a line has not been converted to a cut line when scanning in [Direct Cut] or [Scan to Cut Data] mode, check the [Ignore Object Size]. If the size setting of the [Ignore Object Size] is larger than the pattern that could not be converted, reduce the size setting. For details on adjustment of [Ignore Object Size], refer to "Solution 2" in the "Problem 1".
Solution 4
It may be improved by changing the [Recognition mode]. Change the [Recognition mode] according to the following procedure.
-
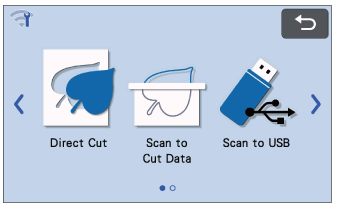
Select the Scan mode.
-
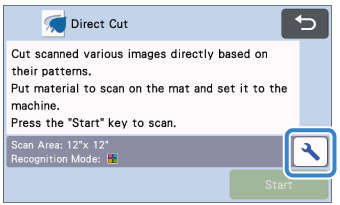
After selecting the cutting data destination, touch
 .
.
-
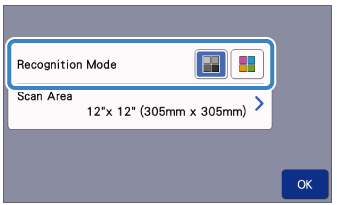
Select
 (Color recognition mode), and then touch [OK].
Try to scan the material again.
Examples of illustrations appropriate for grayscale recognition mode:
| Example | Result | |
| Outlines that are clear |  |
 |
|
Distinct difference in brightness between background and illustration |
 |
|
Scanning in grayscale recognition mode is most appropriate for illustrations with clear outlines or distinct brightness differences. Processing is faster with this mode compared with the color recognition mode. If there are adjacent objects of the same color after an illustration has been converted to grayscale, select the [Color recognition mode].
Examples of illustrations appropriate for color recognition mode:
| Example | Result | |
| Illustrations that are the same light color as the background |  |
 |
| Illustrations that are the same dark color as the background |  |
|
The cutting data is created without converting the illustration to grayscale. Creating data in this mode may take longer, depending on the pattern.
Solution 4
The scanner glass may be dirty. Clean the scanner glass inside the machine. For details, refer to Care and Maintenance (Cleaning the Scanner Glass).
Problem 3: The scanned image is red.
Solution
Did you peel off the blue tape when using an optional scanning mat?
If not, peel off the blue tape from the optional scanning mat before scanning.
Problem 4: The scan image is out of focus.
Solution
Set the scanner lever position on the left of the machine to "1".
Problem 5: When converting the patterns to cutting data, [Cannot operate when there are too many patterns.] message appeared.
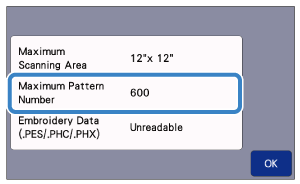
When converted to cutting data, more than the maximum number of patterns than the maximum number of patterns have been detected or are being saved as cutting data.
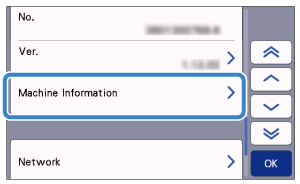
Depending on the machine model, the maximum number of patterns will differ. Check the [Maximum Pattern Number] under [Machine Information] of the settings screen.
 |
 |
Solution1
Reduce the number of patterns being used. Small patterns (dotted lines, etc.) can be excluded from cutting data by using [Ignore Object Size]. For details on adjustment of [Ignore Object Size], refer to "Solution 2" in the "Problem 1".
Solution2
Adjust the scanning area.
