MFC-8840DN
FAQs & Troubleshooting |
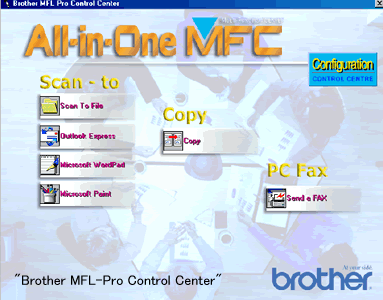
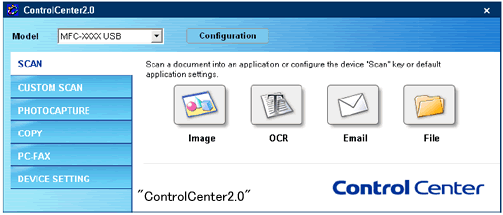
The Interface of the Control Center has changed suddenly. Why?
Did you install or update the driver recently? That might be the cause of the problem. If you want to use the previous interface Control Center, please uninstall the current driver and reinstall the previous installed driver again.
Driver Uninstallation Steps:
If you are a Windows 95/98/2000 user, this procedure deletes both the USB driver and Parallel driver even though you selected only one.
-
Please click here to download the Uninstall Tool to remove the drivers.
-
The Brother End-User License Agreement will appear. If you agree to the terms, click I ACCEPT.
-
" File Download" will appear. Click SAVE.
-
" Save as" will appear. From the SAVE IN drop down, click DESKTOP. Then, click SAVE to save the uninstaller on your Desktop. This will begin the download of the Uninstall Tool to your Desktop.
-
Once the download is complete, "Download complete" may appear. If it does appear, click OPEN. If it does not appear, go to the DESKTOP and double click DelInf_x.EXE (ZIP is on the icon and .exe may appear at the end of the name).
-
" ZIP Self Decompression" appears. Click DECOMPRESS.
-
A message that the process was successful will appear. Click OK.
-
Go to your Desktop and locate the icon named DelInf32.exe. This is the Uninstall Tool.
-
Double click the DelInf32 (.exe may appear at the end of the name) icon. "Brother MFC Uninstaller" will appear.
DO NOT double click DelInf_x.EXE with ZIP on the icon.
-
Verify your model appears in the box under "Please select the MODEL" and select your connection type (USB or Parallel) under "Please select connection type". Then, click OK.
-
" Complete" will appear. Click OK.
-
Restart the computer. The Brother Drivers have now been removed.
-
Unplug the power cord of the Brother machine AND the USB or Parallel cable before starting the Reinstallation Steps below.
Driver Reinstallation Steps:
-
Please verify the version of PaperPort that is installed on your computer. It will be ver.8.0 or ver.9.0.
(You can check which version of PaperPort you are using; click:Start->Program->PaperPort->Help->About PaperPort...) -
Create a folder on your Desktop and title it BROTHER. This is where you will save the downloaded driver.
-
The Brother End-User License Agreement will appear. If you agree to the terms, click I ACCEPT.
-
" File Download" will appear. Click SAVE. " Save as" will appear. From the SAVE IN drop down, click DESKTOP and then select the BROTHER folder you created in the STEP 2.
-
Then, click SAVE to save the driver in the folder on your Desktop. This will begin the download of the driver.
-
Once downloading is completed, go to your Desktop and double click the Brother Folder to open it. In the folder is the downloaded file. Double click the downloaded file inside the Brother folder.
-
" ZIP Self Decompression" appears. Click DECOMPRESS. The files will appear in the BROTHER folder.
-
A message that the process was successful will appear. Click OK.
-
Connect the FAX/MFC/DCP to your computer with a Parallel or USB cable and turn on the FAX/MFC/DCP by plugging in the power cord.
-
When the "Found New Hardware Wizard" screen appears,click "Next".
-
Select(Recommended) and click "Next".
-
Check only "Specify a location" and click "Next".
-
Click "Browse" to locate the the Brother file on your Desktop. Specify the same directory as you extracted the file in Step 6 and click "Open", then "OK".
-
Make sure "Specify a location" is selected and click "Next".
-
Click "Finish".
-
You may need to repeat STEPS 11 to 16 depending on your OS and Interface.
There are two types of User Interface in the Control Center which pops up by pressing the Scan keys.


