MFC-L3750CDW
FAQs & Troubleshooting |
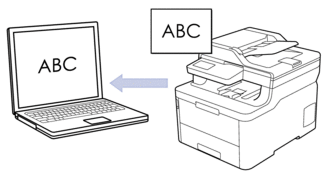
Scan to an Editable Text File (OCR)
- The Scan to OCR feature is available for certain languages.
- Use the Scan button on the machine to make temporary changes to the scan settings. To make permanent changes, use either ControlCenter4 (Windows®) or Brother iPrint&Scan (Mac) software.
HL-L3290CDW/DCP-L3551CDW
- Load your document.
- Press
 (Scan).
 - Press
 or
or  to select the [to PC] option, and then press OK.
 - Press or to select the [OCR] option, and then press OK.
- If the machine is connected over the network, press or to select the destination computer.
- Press OK.

If the LCD prompts you to enter a PIN, enter the four-digit PIN for the destination computer on the LCD and then press OK.
- Do one of the following:
- To change the scan settings for this document, press Options or Copy/Scan Options and then go to the next step.
- To use the default scan settings, press Black Start or Color Start.
The machine starts scanning. If you are using the machine's scanner glass, follow the LCD instructions to complete the scanning job.
To change scan settings, Brother's ControlCenter software must be installed on a computer connected to the machine.
- The machine will prompt you to set each of the following scan settings. Press or to select the desired option, and then press OK to proceed to the next scan setting.
- [Scan Type]
- [Resolution]
- [File Type]
- [Document Size]
- [Auto Deskew] (available for certain models)
- [Remove Bkg Clr]
(available only for the [Color] and [Gray] options.)
- Press Black Start or Color Start.The machine scans the document, converts it to editable text, and then sends it to your default word processing application.
MFC-L3710CW/MFC-L3750CDW/MFC-L3770CDW
- Load your document.
- Press .
- If the machine is connected over the network, select the computer name you want to send data.
If the LCD prompts you to enter a PIN for the computer, enter the four-digit PIN on the LCD, and then press [OK].
- Do one of the following:
- To change the scan settings, press [Options], and then go to the next step.
- To use the default scan settings, press [Start].
The machine starts scanning. If using the machine's scanner glass, follow the touchscreen instructions to complete the scanning job.
To change scan settings, a computer with Brother's ControlCenter software installed must be connected to the machine.
- To scan both sides of the document (MFC-L3770CDW):
- Press [2-sided Scan], and then select the document type.
OptionDescription2-sided Scan: Long Edge 2-sided Scan: Short Edge
- Select the scan settings you want to change:
- [Resolution]
- [File Type]
- [Scan Type]
- [Document Size]
- [Scan Settings]
- [Brightness]
- [Contrast]
(available only for the [Color] and [Gray] options)
- [Auto Deskew]
- [Skip Blank Page]
- [Remove Background Color]
(available only for the [Color] and [Gray] options)
If your machine displays the [OK] button, press [OK].
To save the settings as a shortcut, press [Save as Shortcut].
- Press [Start].The machine starts scanning. If using the machine's scanner glass, follow the touchscreen instructions to complete the scanning job.