HL-3075CW
FAQs & Troubleshooting |
Repack the printer
Follow the instruction below to repack the printer.
When shipping the printer, the DRUM UNIT, TONER CARTRIDGE assemblies and WASTE TONER BOX must be removed from the printer and put each of them in a plastic bag. Failure to remove these items and put them in a plastic bag before shipping may cause severe damage to the printer and may VOID THE WARRANTY. Be sure to put them in a plastic bag when repacking the printer.
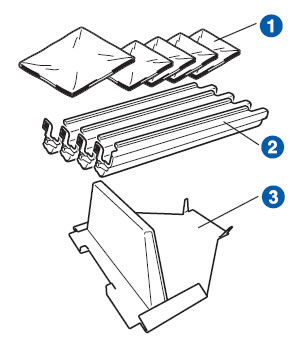
Before shipping the printer, make sure that you have the following parts for repacking:
- Plastic Bags - to be supplied by you, the user; one for the waste toner box, and one each for the four toner cartridge assemblies and the drum unit
- Protective covers that the original drum and toner cartridge assembly came with
- Packing materials for locking the belt unit
This printer is heavy and weights approximately 41.9 lb. (19.0 kg). To prevent injuries, use at least two people to lift the printer. Be careful not to pinch your fingers when you put the printer back down.

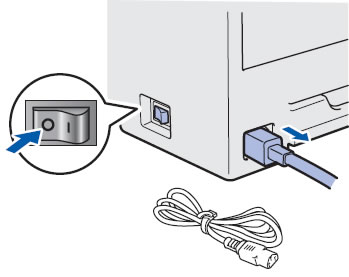
- Turn off the printer power switch, and then unplug the AC power cord.
-
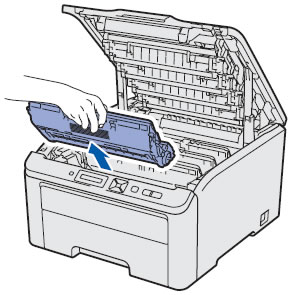
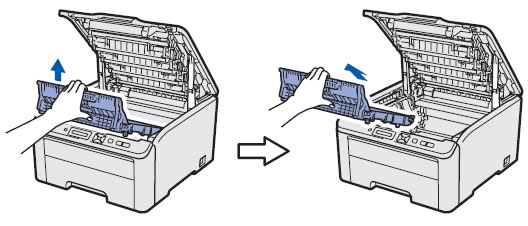
a. Fully open the top cover and take out all the drum unit and toner cartridge assemblies.
b. Attach the protective cover to each of the drum unit and toner cartridge assemblies.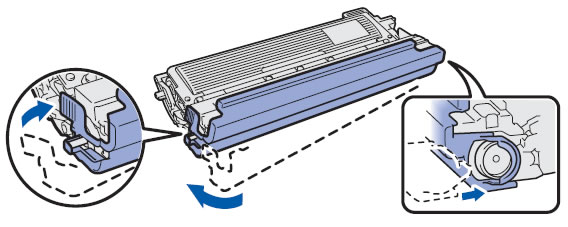
c. Put each assembly into a plastic bag and completely seal each bag.
-
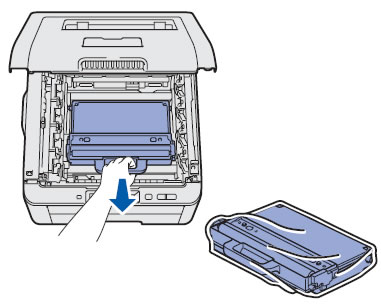
Remove the belt unit by holding the green handle and lifting the belt unit up and out of the printer.
-
Remove the waste toner box from the printer, and then put it into the plastic bag and seal the bag completely.
-
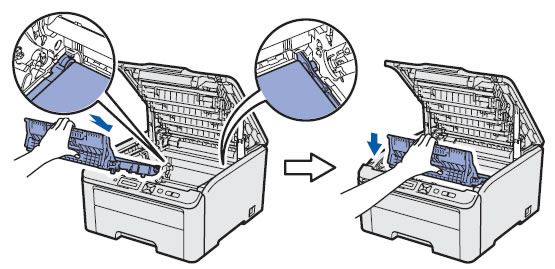
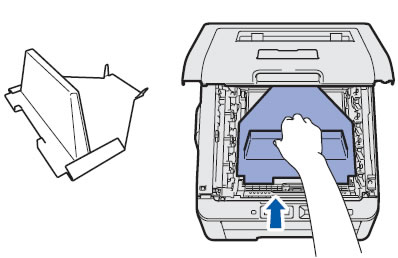
Reinstall the belt unit in the printer.
-
Reinstall the original packing material into the printer.
-
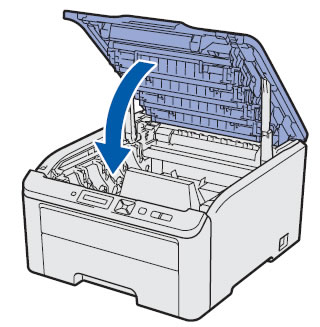
Close the top cover of the printer.
-
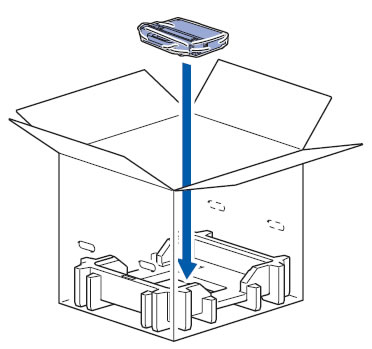
Put the waste toner box in the Styrofoam piece.
-
Using two people, place the printer into the plastic bag.
-
Put the printer and the Styrofoam pieces into the carton. Match the front side of the printer to the "FRONT" mark on the Styrofoam pieces.
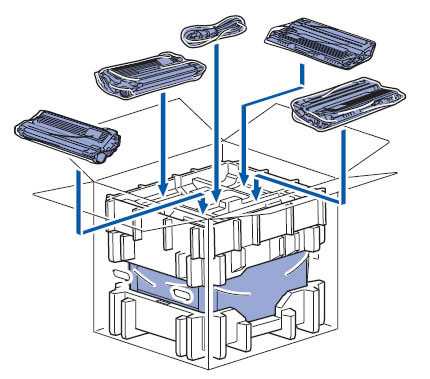
Put the Styrofoam piece for the drum unit and toner cartridge assemblies on the top of the printer.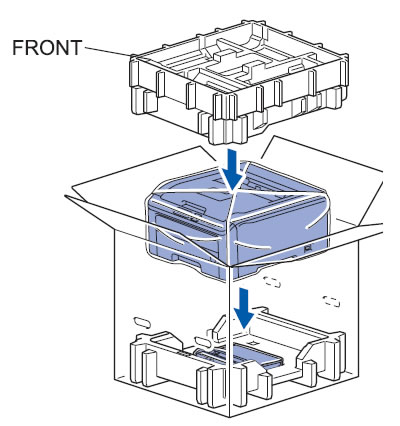
-
Put the power cord, drum unit and toner assemblies in to the Styrofoam piece as shown in the illustration.
-
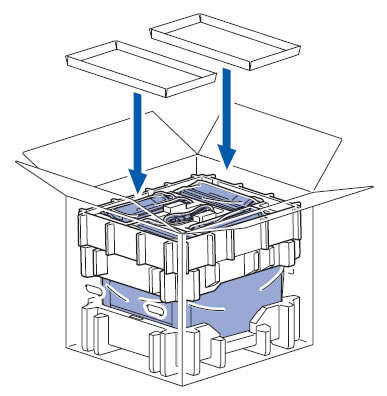
Put two carton trays on the top.
-
Close the carton and tape it shut.