HL-2600CN
FAQs & Troubleshooting |
What is the optional DX-2600 used for and how do I install it?
Installing the DX-2600 unit allows you to automatically print on both sides of the paper (this is referred to as Duplex printing).
The following paper sizes can be used with the DX-2600:
A4, Letter, B5 (JIS/ISO), Legal, Executive
- The Lower Tray Unit must be connected before you install the Duplex Unit.
- When you perform maintenance on the printer, open the Duplex Top Cover Assembly first.
- When you want to open the Rear Access Cover of the printer, open the Duplex Lower Cover and the inside unit.
Follow the instructions below to install DX-3400.
- This printer is heavy and weighs approximately 39kg (86 lbs). To avoid injury when moving or lifting this printer, be sure to use at least two people.
- When you lift the printer be sure to use the handholds located at the bottom four corners of the printer.
- When moving or lifting this printer, be sure to keep the printer flat. To avoid spills, you must first remove the Toner Cartridges, Waste Toner Pack, Oil Bottle and Fusing Unit.
-
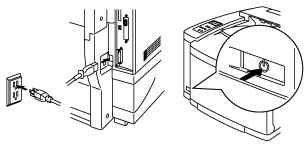
Turn the printer off, and then unplug the power cord from the AC outlet.
-
Remove the Fuser Cover that is located at the rear top of the printer. Remove the Rear Caps (2 pieces) from the fuser unit. We recommend removing those caps with a coin or a screwdriver.
-
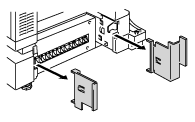
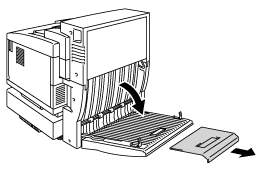
Remove the left hand side cover of the Lower Tray Unit.
-
Remove the Back caps (2 pieces) of the Lower Tray Unit. Push down lightly on the caps and slide them to the rear of the printer to remove them.
-
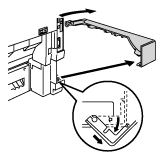
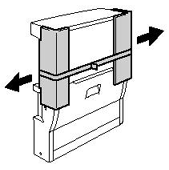
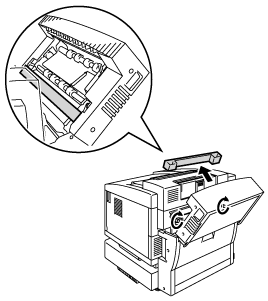
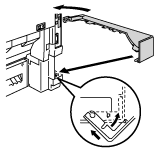
Remove the Protective Parts as shown (do not remove ALL the Protective Parts of the Duplex Unit).
-
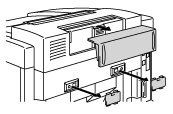
Pull out the connection cable located at the bottom left hand side of the Duplex Unit.

-
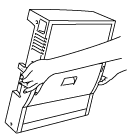
Use the handholds of the Duplex Unit to lift it up.
Ensure that the Duplex Cover Top Assembly is correctly aligned and latched with the lower part of the Duplex Unit.
-
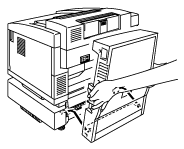
Insert the fixing pins at both sides of the Duplex Unit into the installation grooves in the Lower Tray Unit.
Make sure that the Rear Cover of the Lower Tray Unit is closed.
-
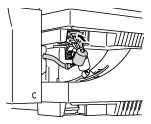
Secure the pawl of the Duplex Unit into the rectangular hole in the back of the printer.
-
Open the Duplex Lower Cover and remove the protective parts. Close the Duplex Lower Cover.
-
Open the Inside Unit to remove the protective parts and close the Inside Unit.

-
Open the Duplex Cover Top Assembly and remove the protective parts from the Duplex Cover Top Assembly.
-
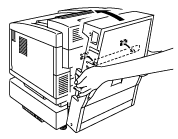
Securely connect the Duplex Unit and the Printer with the thumbscrews (2 pieces).

-
Connect the connector cable to the upper connector on the printer.
- Fit the left hand side cover of the Lower Tray Unit to the Lower Tray Unit.
- Plug in the printer and turn the printer on.