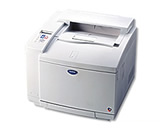
HL-2600CN
FAQs & Troubleshooting |
How do I replace the fuser unit?
Follow the steps below:
-
Press the Power button to turn off the printer. Unplug the printer.
To avoid injury, wait until the printer has cooled down sufficiently before replacing the Fusing Unit.
-
Open the Top Cover.
-
Unscrew the two long screws as shown to release the Fusing unit from the printer.
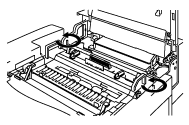
Please wait for 30 minutes after installing a new Fusing Unit the oil circulates completely through to the Heat Roller. If you begin using a new Fusing Unit immediately, poor print quality may result.
-
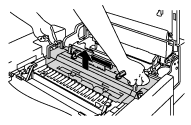
Remove the Fusing Unit from the printer by holding the handles on both sides.
When removing the Fusing Unit from the printer, be sure to keep the Fusing Unit flat so that oil will not spill. Damage can occur if oil is spilled inside the printer.
-
Remove the Oil Bottle and the Fuser Cleaner from the Fusing Unit.
-
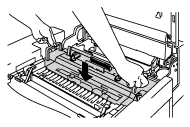
Install the new Fusing Unit into the printer. Be sure to insert the Fusing Unit completely into the printer.
-
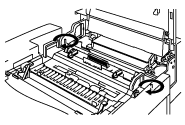
Secure the Fusing Unit with the two long screws.
-
Install the Fuser Cleaner and the Oil Bottle into the new Fusing Unit, and then lock the Oil Bottle Lock Levers.
Be careful not to spill oil inside the printer. This could damage the printer.
-
Close the Top Cover.
-
Plug the printer into the AC outlet.
Please wait for 30 minutes after installing a new Fusing Unit to allow the oil to circulate completely through to the Heat Roller.
If the condition of the Fuser Cleaner is poor, we recommend that you replace the Fuser Cleaner at the same time as the Fusing Unit. The life counter for the Fuser Cleaner will need to be reset. Click here to see how to replace the Fuser Cleaner.
-
Press the Power button to turn the printer On.
-
Press any of the Menu buttons (+, -, Set or Back) to take the printer Off Line.
- Press + or - until "RESET MENU" appears.
- Press Set to proceed to the next menu level, and then press + or - until "PARTS LIFE" appears.
- Press Set, and then press + until "FUSER UNIT" appears.
- Press Set, and then press Go. The printer is now in the READY state.
- Please be careful when replacing the Fusing Unit. Do not place pressure on the Fusing Unit; it should fit in easily. If it does not, make sure the Fusing Unit connector is free to move.
- DONOT apply force! It could damage both the Fusing Unit and the printer.
