TD-4520TN
FAQs & Troubleshooting |
How to load the Ribbon
Movie: How to load the Ribbon
*The video clip is being streamed from YouTube.
-
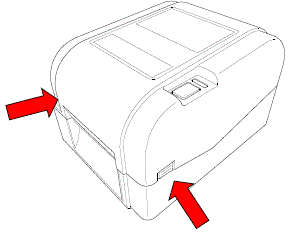
Open the Roll Compartment Cover by pressing the tabs on both sides of the printer.
-
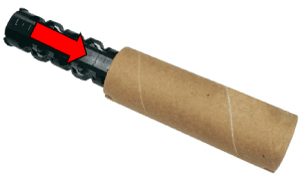
Insert the Ribbon Rewind Spindle into the paper core in the direction show in the images.

-
Insert the right side of the Ribbon Rewind Spindle first. Then, insert the left side to the hole at the left side of the Ribbon Rewind Hub.
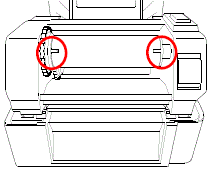
It can also be substituted by 12.7 mm (0.5”) or 25.4 mm (1”) paper roll with notches on both sides. Insert it into the Ribbon Rewind Hub directly.
-
Push the Print Head Release Button to open the Print Head mechanism.
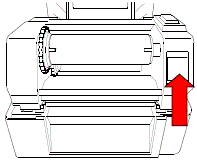
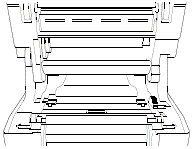
-
Insert the Ribbon into the Ribbon Spindle.
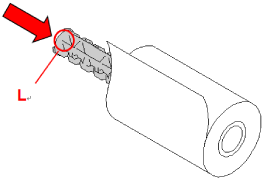
The Ribbon Spindle can be substituted by inserting the Ribbon with notches on both sides into the Ribbon mechanism directly.
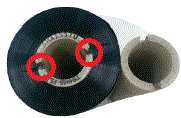
-
Insert the right side of the Ribbon Supply Spindle into the Ribbon Supply Hub first. Then, insert the left side of the Ribbon Supply Spindle into the hole on the left side of the Ribbon Supply Hub.
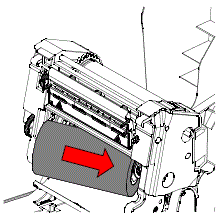
-
Pull the Ribbon through the Print Head and adhere the leader of the Ribbon onto the Ribbon Rewind Paper Core.
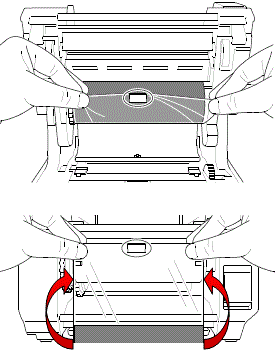
-
Turn the Ribbon Rewind Hub until the Ribbon plastic leader is thoroughly wound and the black section of the Ribbon covers the Print Head.
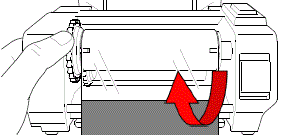
-
Make sure that the Ribbon Rewind Hub is covered with the black section of the Ribbon, and then close the Print Head mechanism with both hands until it locks into place.
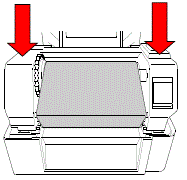
Ribbon Loading Path
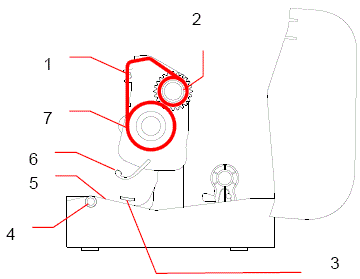
1. Print Head
2. Ribbon Rewind Gear
3. Media Guide Tips
4. Platen Roller
5. Black Mark Sensor
6. Gap Sensor
7. Ribbon
Do not touch rotating parts. There is a risk of injury if your finger is caught in the rotating gear. Turn off the printer before touching the gear.
Content Feedback
To help us improve our support, please provide your feedback below.
