SDX135PRO
FAQs & Troubleshooting |
The Area Around the Piercing Pattern Cannot Cut Cleanly
If the area around the piercing pattern cannot cut cleanly, check the following cause and perform the necessary operation according to each solution.
Example:
 |
(1) Dot line (2) Cut line (If this line cannot cut cleanly) |
Problem 1: The entire pattern cannot be cut.
Problem 2: Some areas remain uncut.
Problem 3: The part of the cut material* got crumbled or tone.
*Especially the pattern with sharp corner or intricate pattern.
Problem 1: The entire pattern cannot be cut.
Solution 1:
Touch
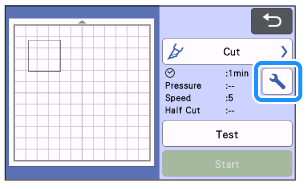 |
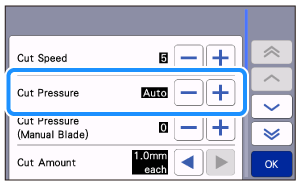 |
Before cutting the material, perform a test/trial cut to confirm successful cutting. Be careful not to increase the pressure too much. Otherwise, the blade may break. And also, the material may not be cut cleanly.
In addition, the blade may cut through the mat or may cause decrease in adhesive strength.
Solution 2:
Check that the Half Cut setting is OFF.
 |
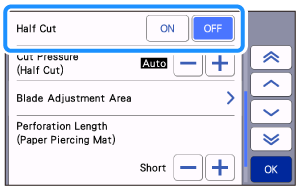 |
Solution 3:
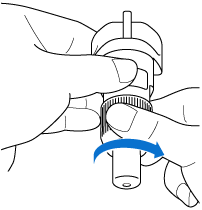
Check that the blade is loose. If it is loose, turn the cap to the right to tight it securely.
Solution 4:
If material cuttings, lint or dust accumulate in the holder, it may not operate correctly.
Clean the holder after every use.
For details, refer to Care and Maintenance (Cleaning the Holder) and Care and Maintenance (Cleaning Inside the Machine).
Problem 2: Some areas remain uncut.
Solution 1:
When cutting around the piercing pattern on the paper piercing mat, there are uncut pieces as a joint part for paper piercing. Those parts are necessary to prevent the material from moving or peeling off during paper piercing. The amount of joint parts depends on the material and the pattern.
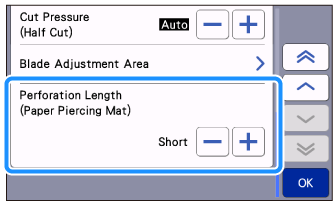
You can set the length of this uncut piece from the 4 levels of None, Short, Medium and Long in the Perforation Length menu. For details on the Perforation Length, refer to How to access the Perforation Length menu.
The image of Uncut piece:
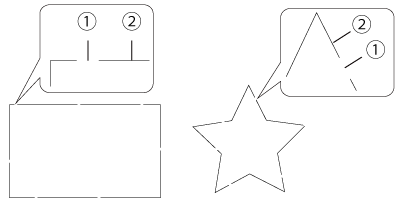 |
(1) Joint part (Uncut piece) (2) Cutting part |
This function (to make uncut piece as a joint part) will only apply when the paper piercing mat is inserted.
- Be careful not tear the material when peeling it from the mat, as the uncut area is not cut.
- This function also applies when performing test cut
【How to access the Perforation Length menu】
There are 2 ways to access the menu.
-
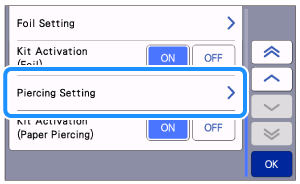
Touch
 on the home screen and then touch the Premium Functions.
When selecting the Piercing Setting, the Perforation Length menu appears.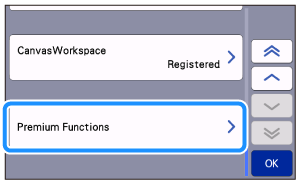

-
Select the Cut operation on the pattern preview screen after the pattern editing is finished.
When touching , the Perforation Length menu appears.

Solution 2:
It may have the same cause as the Problem 1 in The entire pattern cannot be cut.
Check the solution from The entire pattern cannot be cut., and perform the necessary operation.
Problem 3 : The part of the cut material got crumbled or tone.
Due to the characteristics of paper piercing mat, the pattern with sharp corner(s) or intricate pattern may not be able to cut cleanly on the paper piercing mat.
If it does not improve even if the following solutions are performed, enlarge the pattern or change the pattern.
Solution 1:
The cutting pressure may be too strong. Decrease the cut pressure in the setting screen, and then try again.
Solution 2:
The adhesive strength of the paper piercing mat has decreased.
Lightly wipe the sheet with a wet wipe (alcohol-free recommended) to remove any dust or dirt.
After wiping the mat, be sure to allow it to dry. If the mat becomes wet, its surface will become brittle.
【 If a material still cannot be cut cleanly even though you tried the above operation 】
- The mat’s adhesive strength may have been decreased, or the material is not secured properly. Replace the mat with a new one.
- The blade may be worn. Replace the blade with a new one.
