PR1X
FAQs & Troubleshooting |
How do I change the needle?
Embroidering with a bent needle is extremely dangerous since the needle may break while the machine is operating.
Place the flat side of the needle on a flat surface and check that the distance between the needle and the flat surface is even.
If the needle is bent or the tip of the needle is broken, replace the needle with a new one.
 |
||
| (1) | Flat side | |
| (2) | Needle type marking | |
If the distance between the needle and the flat surface is not even, the needle is bent.
Do not use a bent needle.
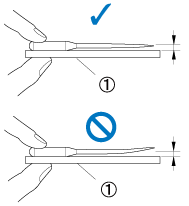 |
(1) |
Flat surface |
-
Turn off the embroidery machine.
Be sure to turn off the embroidery machine before replacing the needle, otherwise injuries may result if the machine starts embroidering.
-
Loosen the needle set screw and remove the needle.
Hold the needle with your left hand, and then hold the Allen screw driver in your right hand and turn the needle set screw counterclockwise.
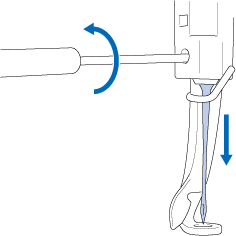
- Be sure to use the included Allen screw driver to replace the needle, otherwise too much force may be applied to the needle, causing it to break.
- Do not apply extreme force when loosening or tightening the needle set screw, otherwise the machine may bedamaged.
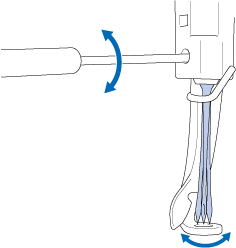
-
With the flat side of the needle toward the back of the machine, insert the needle all the way up until it touches the needle bar
stopper.
Pass the needle through the hole in the presser foot, and then use the needle changing tool to lift up the needle.
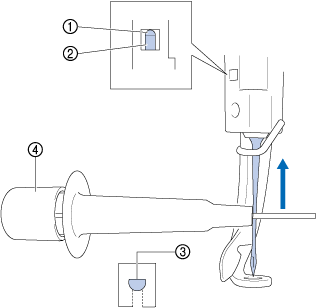
(1) Needle bar stopper (2) Needle (3) Flat side of needle (4) Needle changing tool Hold the needle changing tool and press the end of the needle changing tool 1 in to extend the needlemounting clamp 2. Attach the clamp to the needle, and then release the pressed area to clamp the needle.
To unclamp the needle, press 1 again.

(1) End of the needle changing tool (2) Needle mounting clamp
-
While holding the needle in place with your left hand, tighten the needle set screw.
Use the Allen screw driver to turn the needle set screw clockwise.
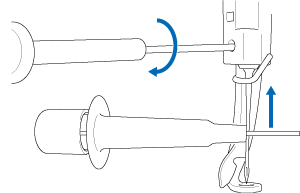
- Be sure to insert the needle all the way up until it touches the needle bar stopper and securely tighten the needle set screw with the Allen screw driver, otherwise the needle may break or the machine may be damaged.
- If the needle is not fully inserted, the hook of the automatic threading mechanism will not pass through the eye of the needle during automatic needle threading, and the hook may bend or the needle cannot be threaded.
- If the hook of the automatic threading mechanism is bent or damaged, contact your authorized Brother dealer.
