HL-4570CDW
FAQs & Troubleshooting |
Thin lines do not print.
Please check the following points to solve the problem:
NOTE: Illustrations shown below are from a representative product and operating system, and may differ from your Brother machine and operating system.
- Make sure toner save mode is off in the control panel or the printer driver. Click here to see the details of how to change the toner save mode setting.
- Check the print resolution. If Fine (2400 dpi class) is in use, change it to Normal (600 x 600 dpi) as described below.
For Windows printer driver:
- Open Printing Preferences. Click here to see the details of how to open Printing Preferences.
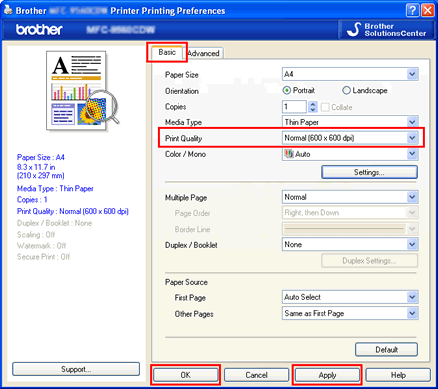
- Click the Basic tab and choose Normal (600 x 600 dpi) for Print Quality, and click Apply => OK.
- Open Printing Preferences. Click here to see the details of how to open Printing Preferences.
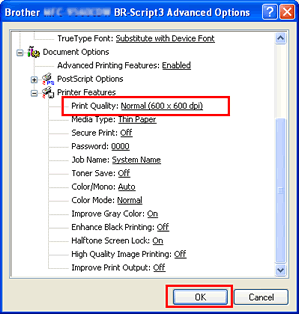
- Click Advanced....
- Choose Normal (600 x 600 dpi) for Print Quality in Printer Features, and click OK.
- Open the Print dialog. Click here to see the details of how to open Print dialog.
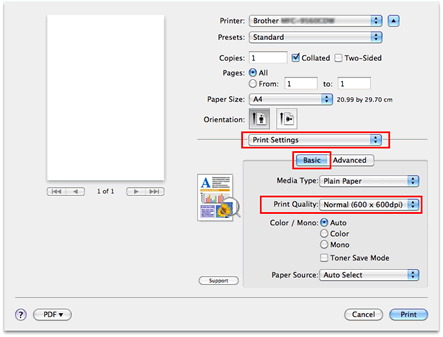
- Choose Print Settings from the pane pop-up menu.
- Click the Basic tab and choose Normal (600 x 600 dpi) for Print Quality.
- Open the Print dialog. Click here to see the details of how to open Print dialog.
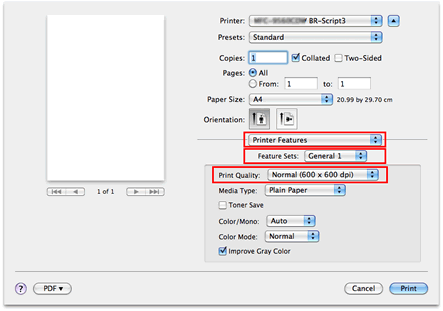
- Choose Printer Features from the pane pop-up menu.
- Choose General 1 (Set 1 for Mac OS X 10.4) for Feature Sets and choose Normal (600 x 600 dpi) for Print Quality.
- If you use a Windows printer driver, choose the Improve Thin Line option and the Improve Pattern Printing option as described below.
- Open Printing Preferences. Click here to see the details of how to open Printing Preferences.
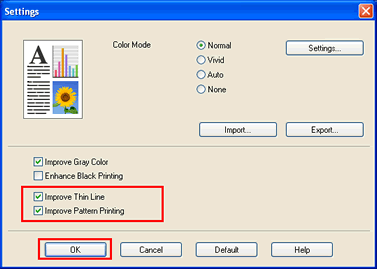
- Click Settings... from the Basic tab.
- Check the Improve Thin Line option and the Improve Pattern Printing option, and click OK.
- Click Apply => OK.
Content Feedback
To help us improve our support, please provide your feedback below.
