HL-4050CDN
FAQs & Troubleshooting |
How do I repack the printer?
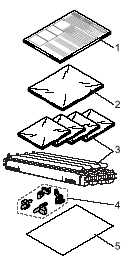
Before shipping the printer, make sure that you have the following parts for repacking:
- Insertion sheet for repacking
- Plastic bag for the waste toner box
- Plastic bags and orange protective covers for the toner cartridge (4 pieces that the toners were originally packed in.)
- The original orange packing material for locking the drum unit and the belt unit (4 pieces)
- A piece of paper (letter or A4) to protect the belt unit (Please prepare by yourself.)
- Once your printer has been set up and used, we do not recommend that it be moved or shipped unless absolutely necessary.
- Color laser printers are complex printing devices. Moving the printer or shipping it without properly removing the installed supplies can result in SEVERE damage to the printer. As a result, your printer may not operate properly afterwards.
- Failure to properly prepare the printer for shipping may VOID YOUR WARRANTY.
- If for any reason you must move or ship your printer, carefully re-pack the printer in the original packing material to avoid any damage during transport. The Printer should also be adequately insured with the shipping company you choose.
- This printer is heavy and weights roughly 29.1 kg (64.2 lb). To prevent injuries when moving or lifting this printer, make sure to use at least two people. Be careful not to pinch your fingers when you put the printer down.
Follow the procedure below to repack the printer.
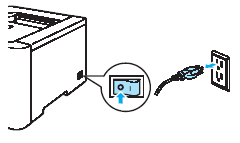
- Turn off the power switch, and unplug all the cables from the printer.
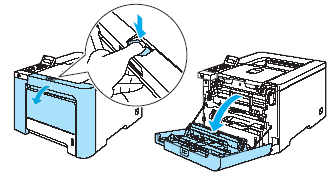
- Press the front cover release button and then open the front cover.
- Hold the green handle of the drum unit. Lift the drum unit up and then pull it out until it stops.
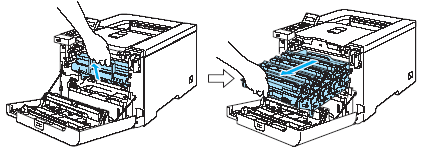
- Release the gray lock lever (1) that is on the left side of the printer. Pull the drum unit completely out using the green handles on the drum unit.

- Hold the green handles of the drum unit when you carry it. DO NOT hold the sides of the drum unit.

- We recommend that you place the drum unit on a clean, flat surface with a piece of disposable paper underneath it in case you accidentally spill or scatter toner.
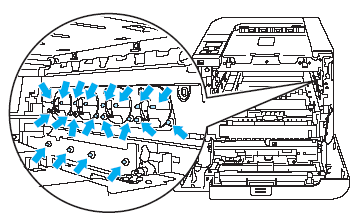
- To prevent damage to the printer from static electricity, DO NOT touch the electrodes shown in the illustration.
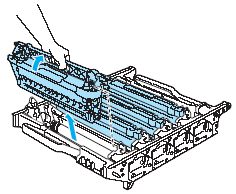
- Hold the handle of the toner cartridge and pull it out of the drum unit. Repeat this for all the toner cartridges.
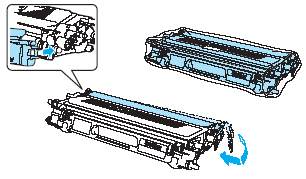
To avoid print quality problems, DO NOT touch the shaded parts shown in the illustrations.

- Attach the original orange protective cover to each of the toner cartridges. Place each of the toner cartridges into the plastic bags included with the toners. Repeat steps 5 to 6 for all the toner cartridges.
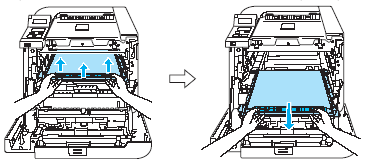
- Hold the green parts of the belt unit with both hands and lift the belt unit up, then pull it out.
We recommend that you put the belt unit on a clean, flat surface with a piece of disposable paper underneath it in case you accidentally spill or scatter toner.
- Remove the waste toner box from the printer using the green handle and place it into the plastic bag included in the carton.
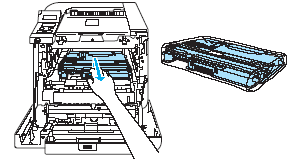
- Put the belt unit back in the printer. Match the
 mark on the belt unit to the
  mark on the printer. Push down on the green area of the belt unit to lock it in place.

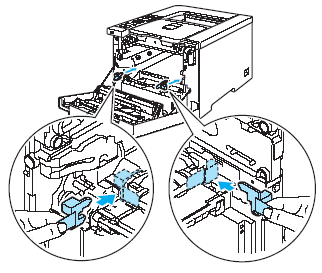
- Insert the original orange packing material for locking the belt unit as shown in the illustration.
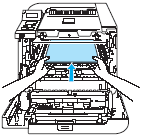
- Put a piece of paper (letter or A4) on the belt unit to prevent damage to the belt unit.
- Make sure that the gray lock lever (1) is in the up position and put the drum unit in the printer. Push down the gray lock lever (1).

- Push the drum unit in until it stops.
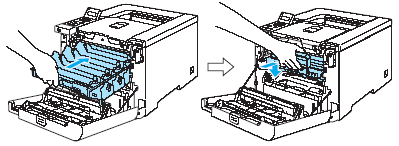
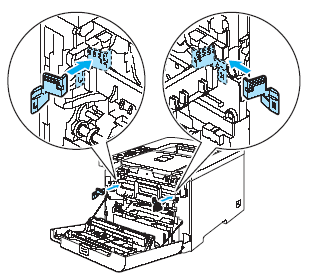
- Insert the original orange packing material for the drum unit as shown in the illustration, and then close the front cover.
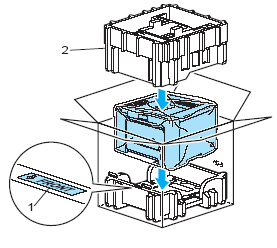
- Two people should place the printer into the plastic bag and put the printer and the Styrofoam pieces into the carton. Match the front side of the printer to the "FRONT" mark (1) on the Styrofoam pieces. Put the Styrofoam piece for the toner cartridges (2) on top of the printer.
- Put the toner cartridges into the Styrofoam piece.
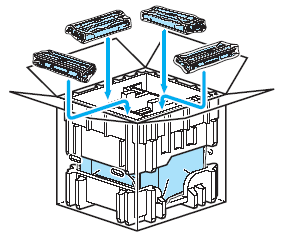
- Put the two carton trays (1) (2) on the top and put the waste toner box in the tray placed towards on the front side of the printer (1).
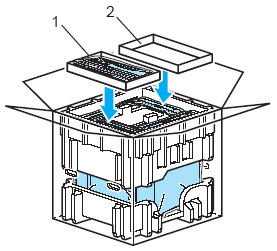
- Close the carton and tape it shut.
Content Feedback
To help us improve our support, please provide your feedback below.
