MFC-J6520DW
FAQs & Troubleshooting |
Setup a Brother machine on a wireless (Wi-Fi) network using the supplied CD-ROM
This FAQ explains how to configure your Brother machine for a wireless network using the CD-ROM without a USB cable. (The computer must be on your wireless network.)
Before configuring the wireless settings:
Confirm that you have already set up your router and computer. If not, set up your network firstly.
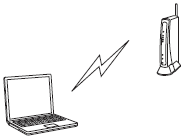
You must know your wireless network settings of the WLAN access point/router. Check and record the Network Name (SSID: Service Set ID, ESSID: Extended Service Set ID).
Click here to see how to find SSID from your computer.
Configure the wireless settings:
Follow the steps below.
NOTE: The screens may differ depending on operating system being used and your Brother machine.
- Place the Brother machine as close to the network access point/router as possible with minimal obstructions.
- Make sure your Brother machine is ON.
- Make sure your computer is ON and you are logged on with Administrator rights.
- Put the supplied CD-ROM into your CD-ROM drive.
If you do not have the CD-ROM:
(Windows)
Go to Downloads section of this website and download Full Driver & Software Package. First, follow the installation instructions on the download page. Once the installation screen appears, follow the steps from STEP c for Windows users below.
(Macintosh)
Configure your Brother machine using the Setup Wizard from the machine's control panel manually. For more details on how to configure from the control panel, refer to the Quick Setup Guide. The latest Quick Setup Guide is available in the Manuals section of this website.
After wireless configuration, go to Downloads section of this website and download the printer driver. The installation instructions are available in the download.
(Windows)
- The installation screen will appear automatically. If prompted, choose your model and language.
NOTE: If the installation screen does not appear automatically, click here to see how to open the installation screen.
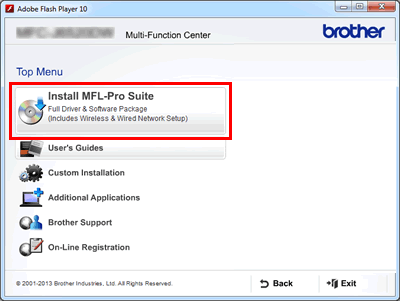
- Click Install MFL-Pro Suite.
NOTE: When the User Account Control screen appears, click Allow or Yes.
- When the License Agreement window appears, click Yes if you agree to the License Agreement.
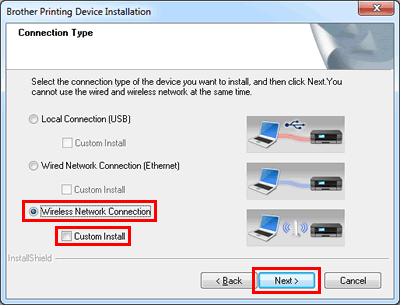
- Choose Wireless Network Connection without checking Custom Install. Click Next.
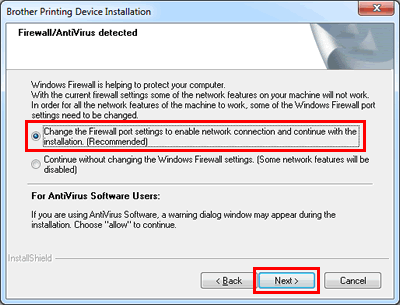
- When the Firewall/AntiVirus detected screen appears, choose Change the Firewall port settings to enable network connection and continue with the installation. (Recommended) and then click Next. Continue to STEP 5.
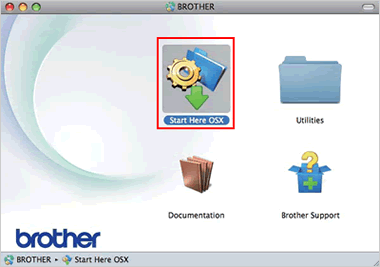
- Double-click the BROTHER icon on your desktop.
- Double-click the Start Here OSX icon.
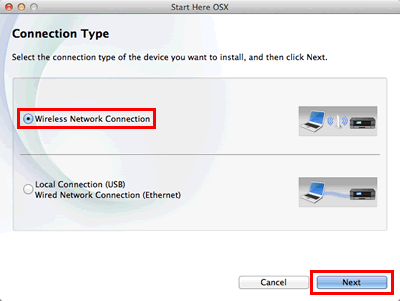
- Choose Wireless Network Connection and then click Next.
- The installation screen will appear automatically. If prompted, choose your model and language.
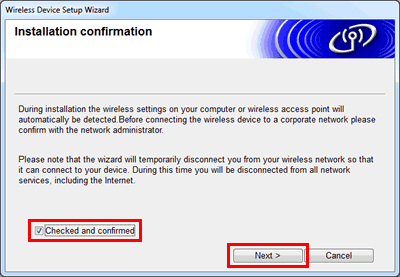
- The Installation confirmation screen may appear. If you are prompted to use a USB cable for connecting your Brother machine to your wireless network, click here to see how to configure the Brother machine for a wireless network with a USB cable.
Confirm the message on the screen. Check the Checked and confirmed box and click Next.
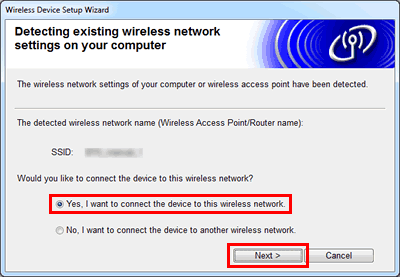
- Your Network Name (SSID, ESSID) will be displayed. Choose Yes and then click Next.
- When the Enable Wireless screen appears, you should now enable wireless networking on the device using its control panel. Follow the steps on the right side of the screen.
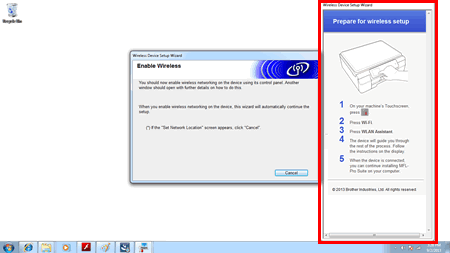
- On your machine's display (hereinafter called Touchscreen), press
 (Settings).
- Press Wi-Fi.
- Press WLAN Assistant.
- When Switch Network interface to wireless? is displayed, press Yes to accept. This will start wireless setup wizard. To cancel, press No.
- Press OK and your machine will now try to connect to your Wireless network. It may take a few minutes.
- A connection result message appears on the Touchscreen and a WLAN report will automatically be printed. Press OK.
- On your machine's display (hereinafter called Touchscreen), press
- Get back to your computer. Choose Connection: OK and click Next.
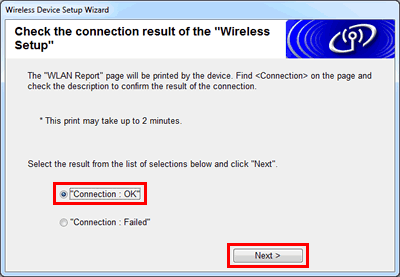
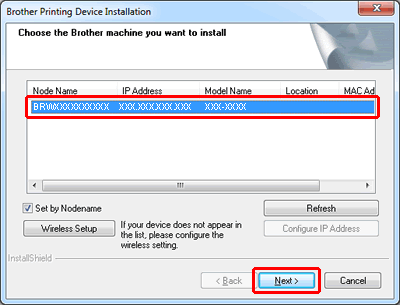
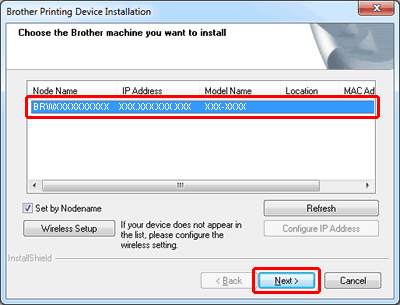
- Choose the Brother machine you want to install.
Then click Next and follow the on-screen instructions to install the printer driver for network connection. Even if you have printed with USB connection, you need to install the printer driver for network connection.
Configure the Brother machine for a wireless network with a USB cable
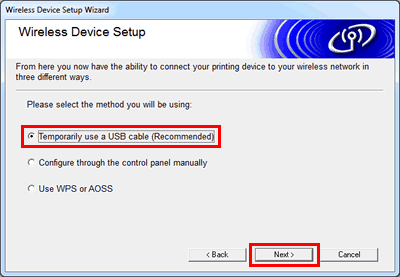
- When the Setting Up Wireless screen appears, choose Temporarily use a USB cable (Recommended) and then click Next.
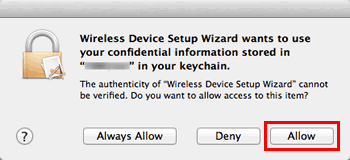
If this screen appears, click Allow when you agree to use your confidential information stored in your keychain for configuring a wireless network.
When prompted, enter your admin username and password to use your confidential information.
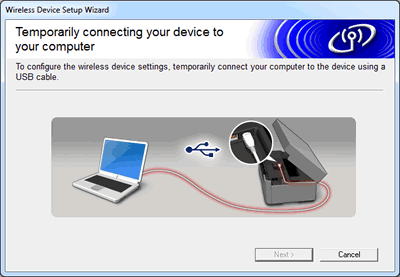
- Connect the USB cable to the Brother machine and your computer.
- Your wireless settings will automatically be detected. Confirm the displayed information. Check the Checked and Confirmed box and click Next.
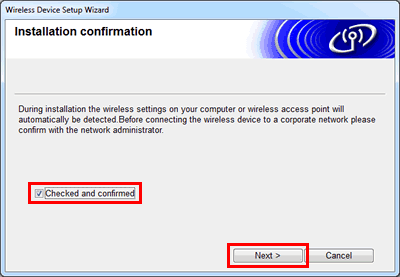
- Your Network Name (SSID, ESSID) will be displayed. Choose Yes and then click Next.
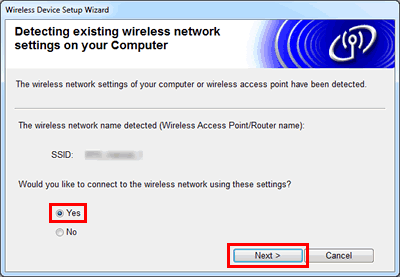
- Confirm the settings are correct. Click Next to send the settings to the Brother machine.
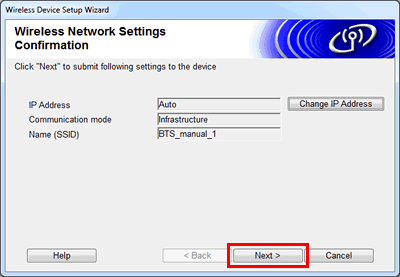
- Once the following screen appears, disconnect the USB cable from your computer and the Brother machine.
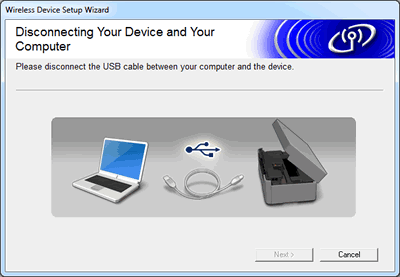
- If the following screen appears, the wireless setup is now complete.
Click Next to install the printer driver for network connection. Even if you have printed with USB connection, you need to install the printer driver for network connection.
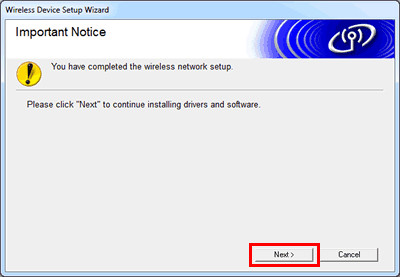
If the printer driver for network connection has already been installed, click Cancel to finish.
- Choose the Brother machine you want to install.
Then click Next and follow the on-screen instructions to install the printer driver for network connection. Even if you have printed with USB connection, you need to install the printer driver for network connection.
