MFC-J5910DW
FAQs & Troubleshooting |
Clear the message "Set Paper and Press Start" from my Brother machine's display
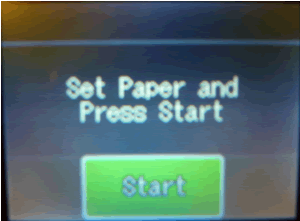
To clear the Set Paper and Press Start message from your Brother machine's display, follow these steps:
- Make sure the Jam Clear Cover at the back of the machine is closed properly.
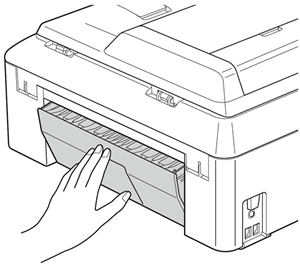
The Jam Clear Cover must be flush with the back of the machine.
- If the Jam Clear Cover is closed, go to Step 2.
- If the Jam Clear Cover is open, follow these steps:
- Close the Jam Clear cover, making sure it is flush with the back of the machine.
- Press Black Start on the machine.
- Do one of the following:
- If the LCD does not display Set Paper and Press Start, the issue is resolved. Follow the instructions on the LCD to finish setting up your machine.
- If the Set Paper and Press Start message appears on the LCD, go to Step2.
- If the LCD does not display Set Paper and Press Start, the issue is resolved. Follow the instructions on the LCD to finish setting up your machine.
- Close the Jam Clear cover, making sure it is flush with the back of the machine.
- If the Jam Clear Cover is closed, go to Step 2.
- Do one of the following:
- If you loaded plain Letter-size paper into the machine when you were setting it up, click here to see how to solve the problem.
- If you loaded any other paper size and type into the machine when you were setting it up, follow these steps:
- Pull the paper tray (1) completely out of the machine.
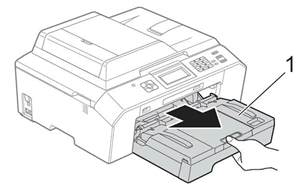
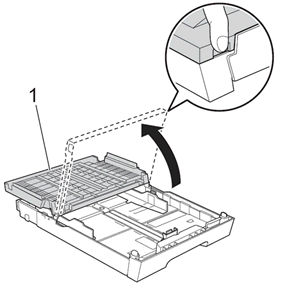
- Open the output paper tray cover (1)
- Remove the current paper from your machine's paper tray.
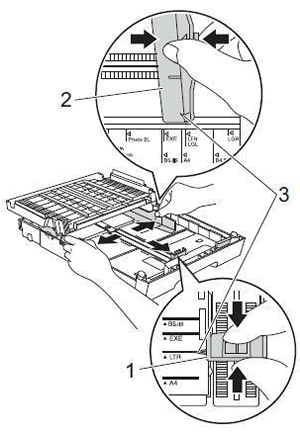
- With both hands, press and slide the paper length guide (1) and paper side guides (2) to fit the paper.
- Make sure that the triangular marks (3) on the paper length guide (1) and paper side guides (2) line up with the mark for the paper you're using.
- Fan the stack of paper well to avoid jams and misfeeds.
Always make sure the paper is not curled or wrinkled.
- Gently put the stack of paper into the paper tray print side down and top edge first.
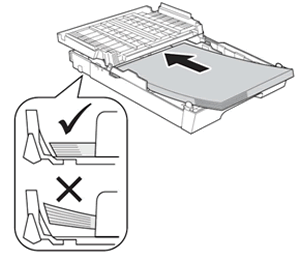
- Make sure the paper is flat in the tray.
- Do not push the paper too far into the tray. If you do, it may lift at the back of the tray and cause paper feed problems.
- Make sure the paper is flat in the tray.
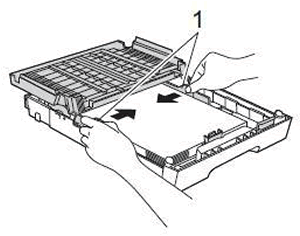
- Gently adjust the paper side guides (1) with both hands.
- Make sure the paper side guides touch the edges of the paper.
- Close the output paper tray cover (1).
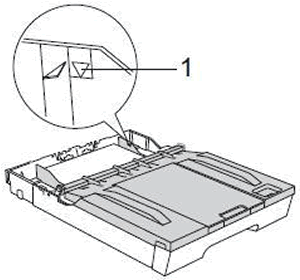
- Slowly push the paper tray completely into the machine.
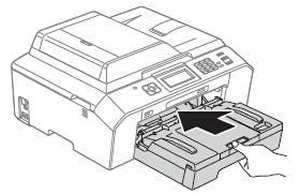
-
While holding the paper tray in place, pull out the paper support (1) until it clicks, then unfold the paper support flap (2).
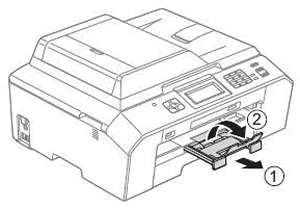
- Pull the paper tray (1) completely out of the machine.
- If you loaded plain Letter-size paper into the machine when you were setting it up, click here to see how to solve the problem.
- Press Black Start on the machine.
- If the LCD does not display Set Paper and Press Start, the issue is resolved. Follow the instructions on the LCD to finish setting up your machine.
- If the LCD displays Set Paper and Press Start, click here to see how to solve the problem.
- If the LCD does not display Set Paper and Press Start, the issue is resolved. Follow the instructions on the LCD to finish setting up your machine.
Content Feedback
To help us improve our support, please provide your feedback below.
