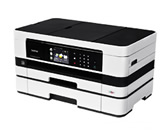
MFC-J4710DW
FAQs & Troubleshooting |
Set your most frequently used fax, copy, scan, and Web Connect settings as Shortcuts
You can set your most frequently used fax, copy, scan, and Web Connect settings as Shortcuts, which you can then quickly and easily recall and apply. You can store eighteen Shortcuts on your Brother machine. Click the link below for your case.
To add Copy Shortcuts
You can include the following settings in a copy Shortcut:
- Quality
- Paper Type
- Paper Size
- Tray Select (for some model's)
- Enlarge/Reduce
- Density
- Stack/Sort
- Page Layout
- 2-sided Copy
- Advanced Settings
Follow the steps below to add copy Shortcuts:
-
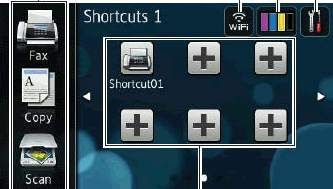
If the machine's display (hereinafter called LCD) currently displays the Home or More screen, swipe left or right, or press the Left or Right arrow key to display one of the Shortcut screens.
-
Press
 to select an empty Shortcut slot.
-
Press Copy.
-
Read the information on the LCD.
-
Press OK.
-
Press a copy preset you want to include in the copy Shortcut.
-
Swipe up or down, or press the Up or Down arrow key to display the available settings.
-
Press the setting you want to change.
-
Swipe up or down, or press the Up or Down arrow key to display the available options for the setting you selected.
-
Press the option you want to set.
-
Do one of the following:
-
If you want to select another setting, repeat Steps 7 through 10.
- If you have finished selected settings, go to Step 12.
-
If you want to select another setting, repeat Steps 7 through 10.
-
Press Save as Shortcut.
-
Read and confirm the displayed list of your chosen settings.
-
Press OK.
-
Do one of the following:
-
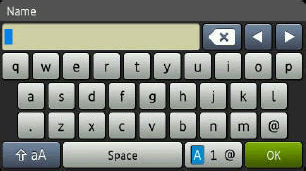
Use the keyboard on the LCD to enter a name for the Shortcut.
-
If you want to use the default Shortcut name, go to Step 16.
-
Use the keyboard on the LCD to enter a name for the Shortcut.
-
Press OK.
-
Press OK to save your Shortcut.
To add Fax Shortcuts
You can include the following settings in a fax Shortcut:
- Address
- Fax Resolution
- 2-sided Fax (for some model's)
- Contrast
- Broadcasting
- Preview
- Color Setting
- Real Time TX
- Overseas Mode
- Glass Scan Size
Follow the steps below to add fax Shortcuts:
-
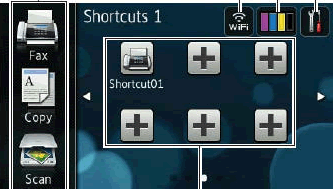
If the machine's display (hereinafter called LCD) currently displays the Home or More screen, swipe left or right, or press the Left or Right arrow key to display one of the Shortcut screens.
-
Press
 to select an empty Shortcut slot.
-
Press Fax.
-
Read the information on the LCD.
-
Press OK.
-
Use the dial pad, the Address Book, or the Call History to enter the fax or telephone number.
-
The fax number can be up to 20 digits long.
-
If you are going to use the Shortcut for Broadcasting, press Options and select Broadcasting in Step 8 before entering the fax or telephone number.
-
If you are going to use the Shortcut for Broadcasting, you can enter up to 20 fax numbers. You can enter any combination of Group numbers from the Address Book, individually dialed numbers from the Address Book, or manually dialed numbers. Click here for more information about Broadcasting.
- When you enter a fax number in a Shortcut, it will automatically be added to the Address Book. Its name in the Address Book will be the Shortcut name plus a sequential number.
-
The fax number can be up to 20 digits long.
-
Press Options.
-
Swipe up or down, or press the Up or Down arrow key to display the available settings.
-
Press the setting you want to change.
-
Swipe up or down, or press the Up or Down arrow key to display the available options for the setting you selected.
-
Press the option you want to set.
-
Do one of the following:
-
If you want to select another setting, repeat Steps 8 through 11.
- If you have finished selected settings, go to Step 13.
-
If you want to select another setting, repeat Steps 8 through 11.
-
Press Save as Shortcut.
-
Read and confirm the displayed list of your chosen settings.
-
Press OK.
-
Do one of the following:
-
Use the keyboard on the LCD to enter a name for the Shortcut.
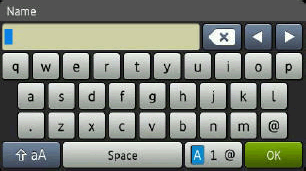
- If you want to use the default Shortcut name, go to Step 17.
-
Use the keyboard on the LCD to enter a name for the Shortcut.
-
Press OK.
-
Press OK to save your Shortcut.
To add Scan Shortcuts
You can include the following settings in a scan Shortcut:
to Media:
- 2-sided Scan (for some model's)
- Scan Type
- Resolution
- File Type
- File Name
- Auto Crop
- Skip Blank Page (for some model's)
- Remove Background Color
to E-mail Server (available after you have downloaded IFAX):
- Address
- 2-sided Scan (for some model's)
- Scan Type
- Resolution
- File Type
to OCR/to File/to Image/to E-mail:
- PC Select
to FTP/to Network:
- Profile Name
Follow the steps below to add scan Shortcuts:
-
If the machine's display (hereinafter called LCD) currently displays the Home or More screen, swipe left or right, or pressthe Left or Right arrow key to display one of the Shortcut screens.
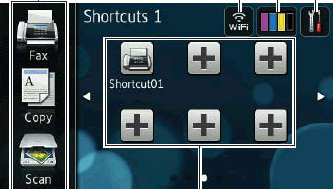
-
Press
 to select an empty Shortcut slot.
-
Press Scan.
-
Swipe up or down, or press the Up or Down arrow key to display the type of scan you want to do.
-
Press the scan type you want to do.
- You can press to Media, to E-mail Server, to File, to OCR, to Image, to E-mail, to Network, or to FTP.
-
Do one of the following:
-
If you pressed to Media, follow these steps:
- Read the information on the LCD.
- Press OK.
-
Go to Step 9.
-
If you pressed to E-mail Server, follow these steps:
- Read the information on the LCD.
- Press OK.
-
Go to Step 7.
-
If you pressed to File, to OCR, to Image, or to E-mail, follow these steps:
- Read the information on the LCD.
- Press OK.
-
Go to Step 8.
-
If you pressed to Network or to FTP, follow these steps:
- Read the information on the LCD.
- Press OK.
- Swipe up or down, or press the Up or Down arrow key to display the Profile Name
-
Press the Profile Name.
You must have already added a Profile Name before you add a to Network or to FTP Shortcut. - Press OK.
-
Go to Step 14
-
If you pressed to Media, follow these steps:
-
Do one of the following:
-
To manually enter an e-mail address, follow these steps:
- Press Manual.
-
Use the keyboard on the LCD to enter the e-mail address.
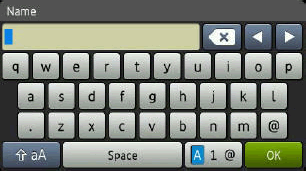
- Press OK.
- Press OK.
-
Go to Step 9.
-
To enter an e-mail address from the Address Book, follow these steps:
- Press Address Book.
- Swipe up or down, or press the Up or Down arrow key to display the e-mail address you want.
- Press the e-mail address.
- Press OK.
- Press OK.
-
Go to Step 9.
Press Detail to view the list of addresses you've entered.
-
To manually enter an e-mail address, follow these steps:
-
Do one of the following:
-
When the machine is connected to a PC using a USB connection, follow these steps:
- Press OK to confirm the PC Name is listed as <USB>.
-
Go to Step 20.
-
When the machine is connected to a network, follow these steps:
- Swipe up or down, or press the Up or Down arrow key to display the PC Name.
- Press the PC Name.
- Press OK.
-
Go to Step 20.
-
When the machine is connected to a PC using a USB connection, follow these steps:
-
Press Options.
-
Swipe up or down, or press the Up or Down arrow key to display the available settings.
-
Press the setting you want to change or store.
-
Swipe up or down, or press the Up or Down arrow key to display the available options for the setting you selected.
-
Press the new option you want to set.
-
Do one of the following:
-
If you want to select another setting, repeat Steps 10 through 13.
-
If you have finished selected settings, press OK.
-
If you want to select another setting, repeat Steps 10 through 13.
-
Review the settings you have chosen.
-
Do one of the following:
-
Press Save as Shortcut.
-
Read and confirm the displayed list of your chosen settings.
-
Press OK.
-
Do one of the following:
-
Use the keyboard on the LCD to enter a name for the Shortcut.
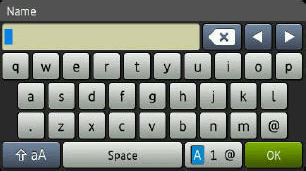
- If you want to use the default Shortcut name, go to Step 21.
-
Use the keyboard on the LCD to enter a name for the Shortcut.
-
Press OK.
-
Press OK to save your Shortcut.
To add Web Connect Shortcuts
You can store settings for the following services in a Web Connect Shortcut:
- GOOGLE DOCS™
- FLICKR®
- Facebook™
- EVERNOTE®
- Dropbox
- To add a Web Connect Shortcut, you must have an account with the desired service.
- Picasa Web Albums™ service from Google is not available from the beginning of May 2016.
Follow the ateps below to add Web Connect Shortcuts:
-
If the machine's display (hereinafter called LCD)currently displays the Home or More screen, swipe left or right, or press the Left or Right arrow key to display one of the Shortcut screens.
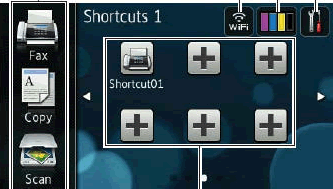
-
Press
 to select an empty Shortcut slot.
-
Press Web.
-
Do one of the following:
-
If the LCD displays information about the Internet connection, read it.
- If the LCD does not display information about the Internet connection, go to Step 6.
-
If the LCD displays information about the Internet connection, read it.
-
Press OK.
-
Swipe left or right, or press the Left or Right arrow key to display the available services.
-
Press the desired service.
-
Press your account.
-
Do one of the following:
-
If the account needs a PIN, enter it using the keyboard on the LCD.
- If the account does not need a PIN, go to Step 11.
-
If the account needs a PIN, enter it using the keyboard on the LCD.
-
Press OK.
-
Choose the function you want to use.
The functions you can set depend on the service you selected. -
Read and confirm the displayed list of your chosen functions.
-
Press OK.
- Press OK to save your Shortcut.
