MFC-9970CDW
FAQs & Troubleshooting |
Load paper in the paper tray
The machine can feed paper from the standard paper tray (Tray 1), optional lower tray (Tray 2) or multi-purpose tray (MP tray). The paper capacity of the paper trays, acceptable paper size and paper type differ depending on the tray.
> Click here to check the detailed information.
STEP I : Loading paper in the paper tray
NOTE: Illustrations shown below are from a representative product and may differ from your Brother machine.
Click the link below for your case and follow the steps:
- Printing on plain paper, thin paper or recycled paper from the standard paper tray (Tray 1) or optional lower tray (Tray 2)
- Printing on plain paper, bond paper, labels or glossy paper from the multi-purpose tray (MP tray)
- Printing on envelopes and thick paper from the multi-purpose tray (MP tray)
Printing on plain paper, thin paper or recycled paper from the standard paper tray (Tray 1) or optional lower tray (Tray 2)
-
Pull the paper tray completely out of the machine.
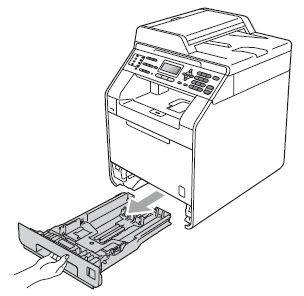
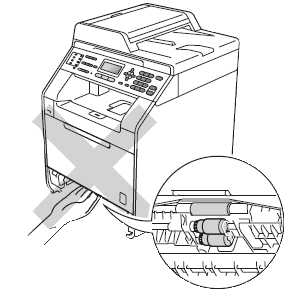
DO NOT touch the shaded parts shown in the illustration. These rollers may be rotating at high speed and can pinch or entrap your hand.
-
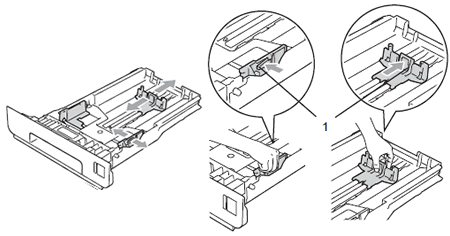
While pressing the green paper-guide release lever (1), slide the paper guides to fit the paper size you are loading in the tray. Make sure that the guides are firmly in the slots.
-
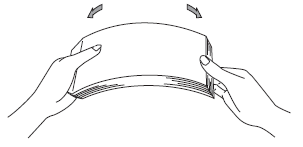
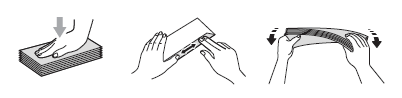
Fan the stack of paper well to avoid paper jams and misfeeds.
-
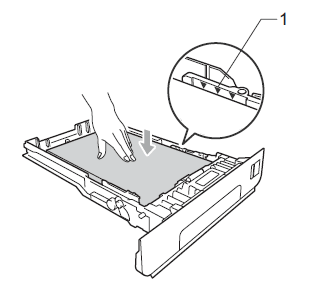
Put paper in the tray and make sure:
-
The paper is below the maximum paper mark (1), which is located on the top of the right and left green paper guides.
Overfilling the paper tray will cause paper jams. - The side to be printed on must be face down.
- The paper guides touch the sides of the paper so it will feed properly.
-
The paper is below the maximum paper mark (1), which is located on the top of the right and left green paper guides.
-
Put the paper tray firmly back in the machine. Make sure that it is completely inserted into the machine.
-
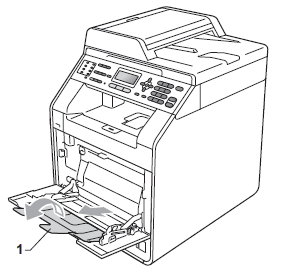
Lift up the support flap (1) to prevent paper from sliding off the face down output tray or remove each page as soon as it comes out of the machine.
> Go to STEP II to set the paper size and paper type for your Brother machine.

Printing on plain paper, bond paper, labels or glossy paper from the multi-purpose tray (MP tray)
-
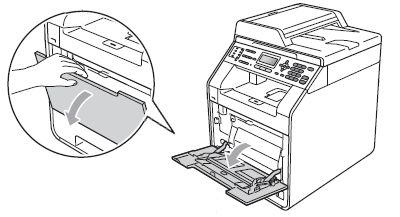
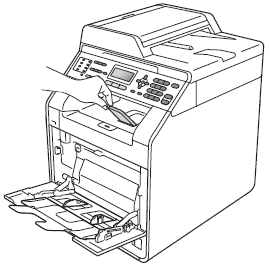
Open the MP tray and lower it gently.
-
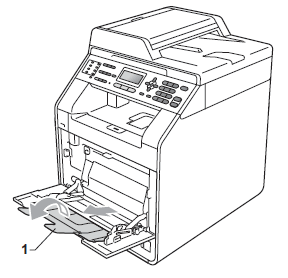
Pull out the MP tray support and unfold the flap (1).
-
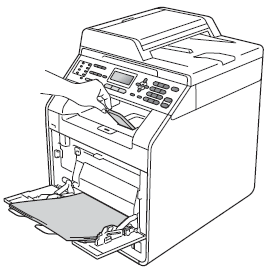
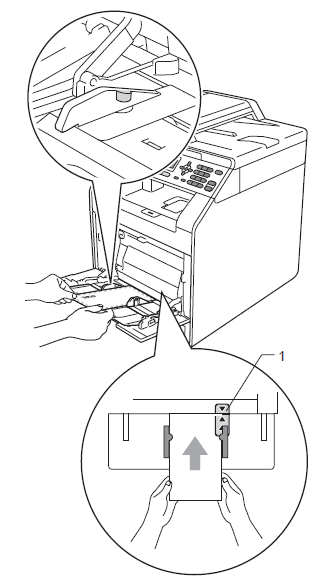
Put paper in the MP tray and make sure:
- The paper stays under the maximum paper mark (1).
- The top of paper edge is positioned between the arrows (2).
- The side to be printed on must be face up with the leading edge (top of the paper) in first.

When you are using glossy paper, put only one sheet at a time in the MP tray to avoid a paper jam.
-
Lift up the support flap to prevent paper from sliding off the face down output tray, or remove each page as soon as it comes out of the machine.
> Go to STEP II to set the paper size and paper type for your Brother machine.
Printing on envelopes and thick paper from the multi-purpose tray (MP tray)
Before loading, press the corners and sides of the envelopes to make them as flat as possible.
-
Open the MP tray and lower it gently.

-
Pull out the MP tray support and unfold the flap (1).
-
Lift up the support flap to prevent envelopes and thick sheets of paper from sliding off the face down output tray. If the support flap is closed you should remove each envelope as soon as it comes out of the machine.
-
Put up to 3 envelopes or up to 25 sheets of thick paper [163 g/m2 (43 lb)] in the MP tray. If you add more envelopes or paper it may cause a jam. Make sure:
- The top of envelope edge is positioned between the arrows (1).
- The side to be printed on must be face up.
-
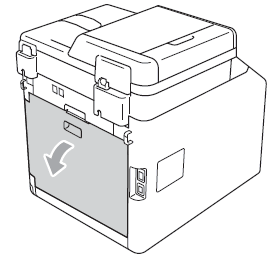
Open the back cover (Face up output tray).
-
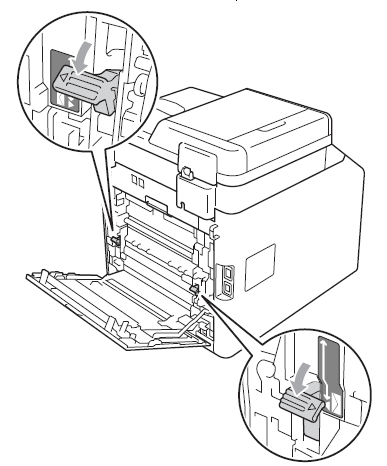
Pull down the two gray levers, one on the left-hand side and one on the righthand side, to the envelope position as shown in the illustration below.
-
Close the back cover.
> Go to STEP II to set the paper size and paper type for your Brother machine.
NOTE: When you have finished printing, open the back cover and reset the two gray levers which were pulled down in step 6 back to their original positions.
STEP II : Setting the paper size and paper type
Select the appropriate Paper Size and Media Type in the printer driver and your Brother machine.