MFC-9560CDW
FAQs & Troubleshooting |
Store numbers on my Brother machine for easy dialing from the control panel.
(For users who installed the Internet fax feature into their Brother machines.)
You can store One Touch and Speed Dial numbers on your Brother machine for easy dialing. If you lose electrical power, One Touch and Speed Dial numbers stored in your Brother machine's memory will not be lost.
-
To enter a new One Touch number from the control panel, go to SECTION A: STORING ONE TOUCH NUMBERS.
-
To enter a new Speed Dial number from the control panel, go to SECTION B: STORING SPEED DIAL NUMBERS.
-
To enter a new number from the PC, refer to the solution, "Store numbers on my Brother machine for easy dialing from the PC."
- If you want to know how to Broadcast a fax to the maximum possible number of recipients, refer to the solution, "Broadcasting a fax to the maximum number of fax numbers."
SECTION A: STORING ONE TOUCH NUMBERS
Your machine has 8 One Touch keys where you can store 16 fax or telephone numbers for automatic dialing.
-
To store One Touch numbers from your Brother machine's control panel, go to OPTION 1.
- To dial an existing One Touch number, go to OPTION 2.
OPTION 1: STORING ONE TOUCH NUMBERS FROM THE CONTROL PANEL
One-Touch keys are not the dial pad keys. They are the 8 keys located on the left side of the control panel. To store One Touch numbers from the Brother machine's control panel, follow these steps:
If your machine has been configured for the Internet Fax feature, you can also enter an email address.
-
Press the One-Touch key where you want to store the number or email address. If a number is not stored there, the LCD displays "Register Now?". Press 1 to choose Yes.
To access numbers 9 through 16, hold Shift and press the appropriate One-Touch key. -
Press the UP OR DOWN ARROW key to choose the type of number you are storing. Press OK.
You can choose one of the following:- Fax
- IFAX
- E-mail Color PDF
- E-mail Color JPEG
- E-mail Color XPS
- E-mail Gray PDF
- E-mail Gray JPEG
- E-mail Gray XPS
- E-mail B&W PDF
- E-mail B&W TIFF
-
Do one of the following:
-
If you chose Fax in STEP 2, use the dial pad to enter the fax or telephone number you want to store.
The number can be up to 20 digits long.
You can use Redial/Pause to insert a 3.5-second (for UK: 2.8-second) pause in the stored number.
You can enter multiple pauses by repeatedly pressing Redial/Pause.
-
If you chose E-mail or IFAX Registration Type in STEP 2, use the dial pad to enter the e-mail address you want to store.
The e-mail address can be up to 60 characters long.
-
If you chose Fax in STEP 2, use the dial pad to enter the fax or telephone number you want to store.
-
If you chose E-Mail Registration Type in STEP 2 and stored an e-mail address, you can only use the e-mail address when the Brother machine is in Scan Mode.
- If you chose IFAX Registration Type in STEP 2 and stored an e-mail address, you can only use the e-mail address when the Brother machine is in Fax Mode.
-
Press OK.
-
Do one of the following:
-
To store the number or email address without a name, go to STEP 6.
-
Use the dial pad to enter a name.
The name can be up to 15 characters long.
-
To store the number or email address without a name, go to STEP 6.
- If you need to enter a character that is assigned to the same key as the previous character, press RIGHT ARROW key to move the cursor to the right. (Example: To enter the name "ED", press the number 3 key two times to choose "E". Press the RIGHT ARROW key to advance to the next space. Press the 3 key one time to choose "D".)
- If you entered a letter incorrectly and want to change it, press the LEFT OR RIGHT ARROW key to move the cursor to the incorrect letter and press Clear. All letters above and to the right of the cursor will be deleted. Re-enter the correct character. You can also back up and type over incorrect letters.
Special characters and symbols are entered by using either the *, #, or 0 key. To enter a special character, press the *, #, or 0 key and then press the LEFT OR RIGHT ARROW key until a cursor appears on the desired symbol. Then, press OK to choose it. The symbol will appear on the LCD display. These special characters and symbols are available for Text only, not for phone numbers.
-
Press OK.
-
Do one of the following:
-
If you do not want to change the default fax/scan resolution, go to STEP 14.
- If you want to save a fax/scan resolution along with the number, go to the appropriate step as shown in the following table:
Option chosen in STEP 2 Go to STEP Fax STEP 8 IFAX STEP 9 Email Color PDF STEP 10 Email Color JPEG Email Color XPS Email Gray PDF STEP 11 Email Gray JPEG Email Gray XPS Email B&W PDF STEP 12 Email B&W TIFF -
If you do not want to change the default fax/scan resolution, go to STEP 14.
-
Press the UP OR DOWN ARROW key to choose STD, FINE, S. FINE, or PHOTO. Press OK and go to STEP 15
-
Press the UP OR DOWN ARROW key to choose STD, FINE, or PHOTO. Press OK and go to STEP 15
-
Press the UP OR DOWN ARROW key to choose 100dpi, 200dpi, 300dpi, or 600dpi. Press OK.
-
If you chose E-mail Color PDF, go to STEP 13
- If you chose E-mail Color JPEG or E-mail Color XPS, go to STEP 15
-
If you chose E-mail Color PDF, go to STEP 13
-
Press the UP OR DOWN ARROW key to choose 100dpi, 200dpi, or 300dpi. Press OK.
-
If you chose E-mail Gray PDF, go to STEP 13
- If you chose E-mail Gray JPEG or E-mail Gray XPS, go to STEP 15
-
If you chose E-mail Gray PDF, go to STEP 13
-
Press the UP OR DOWN ARROW key to choose 200x100dpi or 200dpi. Press OK.
-
If you chose E-mail B&W PDF, go to STEP 13
- If you chose E-mail B&W TIFF or E-mail Gray XPS, go to STEP 15
-
If you chose E-mail B&W PDF, go to STEP 13
- Choose the PDF type from PDF, PDF/A, Secure PDF or SiPDF that will be used to send to your PC.
-
Press OK.
-
Do one of the following:
-
To store another One Touch number, repeat STEPS 1 through 14.
- To finish storing One Touch numbers, press Stop/Exit.
-
To store another One Touch number, repeat STEPS 1 through 14.
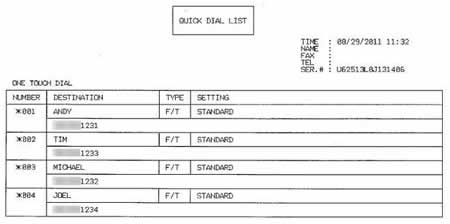
- Print a Tel Index list to confirm the numbers have been stored.
Print a Tel Index list to confirm the numbers have been stored:
-
Press Menu.
-
Press the UP OR DOWN ARROW key to choose Print Reports. Press OK.
-
Press the UP OR DOWN ARROW key to choose Tel Index List. Press OK.
-
Press the UP OR DOWN ARROW key to choose Numerical or Alphabetical. Press OK.
-
Press Black (Mono) Start or Color (Colour) Start.
You Brother machine will print the Tel Index list.
- Press Stop/Exit.
OPTION 2: DIALING A ONE TOUCH NUMBER
Once you have stored a One Touch number, you can dial it by pressing the One Touch key on which you stored it.
To access One Touch numbers 9 through 16, hold down Shift and press the appropriate One Touch key.
SECTION B: STORING SPEED DIAL NUMBERS
You can store up to 300 three-digit Speed Dial numbers on your Brother machine. You can save a name with each number.
-
To store Speed Dial numbers from your Brother machine's control panel, go to OPTION 3.
- To dial an existing Speed Dial number, go to OPTION 4.
OPTION 3: STORING SPEED DIAL NUMBERS FROM THE CONTROL PANEL
-
Press the UP ARROW key (Speed Dial).
-
Use the dial pad to choose the three-digit location (001 - 300) where you want to store the number or email address. If a number is not stored there, the LCD displays "Register Now?". Press 1 to choose Yes.
-
Press the UP OR DOWN ARROW key to choose the type of number you are storing. Press OK.
You can choose one of the following:- Fax
- IFAX
- E-mail Color PDF
- E-mail Color JPEG
- E-mail Color XPS
- E-mail Gray PDF
- E-mail Gray JPEG
- E-mail Gray XPS
- E-mail B&W PDF
- E-mail B&W TIFF
-
Do one of the following:
-
If you chose Fax in STEP 3, use the dial pad to enter the fax or telephone number you want to store.
The number can be up to 20 digits long.
You can use Redial/Pause to insert a 3.5-second (for UK: 2.8-second) pause in the stored number.
You can enter multiple pauses by repeatedly pressing Redial/Pause.
-
If you chose E-mail or IFAX Registration Type in STEP 3, use the dial pad to enter the e-mail address you want to store.
The e-mail address can be up to 60 characters long.
-
If you chose Fax in STEP 3, use the dial pad to enter the fax or telephone number you want to store.
-
If you chose E-Mail Registration Type in STEP 3 and stored an e-mail address, you can only use the e-mail address when the Brother machine is in Scan Mode.
- If you chose IFAX Registration Type in STEP 3 and stored an e-mail address, you can only use the e-mail address when the Brother machine is in Fax Mode.
-
Press OK.
-
Do one of the following:
-
To store the number or email address without a name, go to STEP 7.
-
Use the dial pad to enter a name.
The name can be up to 15 characters long.
-
To store the number or email address without a name, go to STEP 7.
- If you need to enter a character that is assigned to the same key as the previous character, press RIGHT ARROW key to move the cursor to the right. (Example: To enter the name "ED", press the number 3 key two times to choose "E". Press the RIGHT ARROW key to advance to the next space. Press the 3 key one time to choose "D".)
- If you entered a letter incorrectly and want to change it, press the LEFT OR RIGHT ARROW key to move the cursor to the incorrect letter and press Clear. All letters above and to the right of the cursor will be deleted. Re-enter the correct character. You can also back up and type over incorrect letters.
Special characters and symbols are entered by using either the *, #, or 0 key. To enter a special character, press the *, #, or 0 key and then press the LEFT OR RIGHT ARROW key until a cursor appears on the desired symbol. Then, press OK to choose it. The symbol will appear on the LCD display. These special characters and symbols are available for Text only, not for phone numbers.
-
Press OK.
-
Do one of the following:
-
If you do not want to change the default fax/scan resolution, go to STEP 15.
- If you want to save a fax/scan resolution along with the number, go to the appropriate step as shown in the following table:
Option chosen in STEP 3 Go to STEP Fax STEP 9 IFAX STEP 10 Email Color PDF STEP 11 Email Color JPEG Email Color XPS Email Gray PDF STEP 12 Email Gray JPEG Email Gray XPS Email B&W PDF STEP 13 Email B&W TIFF -
If you do not want to change the default fax/scan resolution, go to STEP 15.
-
Press the UP OR DOWN ARROW key to choose STD, FINE, S. FINE, or PHOTO. Press OK and go to STEP 16
-
Press the UP OR DOWN ARROW key to choose STD, FINE, or PHOTO. Press OK and go to STEP 16
-
Press the UP OR DOWN ARROW key to choose 100dpi, 200dpi, 300dpi, or 600dpi. Press OK.
-
If you chose E-mail Color PDF, go to STEP 14
- If you chose E-mail Color JPEG or E-mail Color XPS, go to STEP 16
-
If you chose E-mail Color PDF, go to STEP 14
-
Press the UP OR DOWN ARROW key to choose 100dpi, 200dpi, or 300dpi. Press OK.
-
If you chose E-mail Gray PDF, go to STEP 14
- If you chose E-mail Gray JPEG or E-mail Gray XPS, go to STEP 16
-
If you chose E-mail Gray PDF, go to STEP 14
-
Press the UP OR DOWN ARROW key to choose 200x100dpi or 200dpi. Press OK.
-
If you chose E-mail B&W PDF, go to STEP 14
- If you chose E-mail B&W TIFF or E-mail Gray XPS, go to STEP 16
-
If you chose E-mail B&W PDF, go to STEP 14
- Choose the PDF type from PDF, PDF/A, Secure PDF or SiPDF that will be used to send to your PC.
-
Press OK.
-
Do one of the following:
-
To store another Speed Dial number, repeat STEPS 1 through 15.
- To finish storing Speed Dial numbers, press Stop/Exit.
-
To store another Speed Dial number, repeat STEPS 1 through 15.
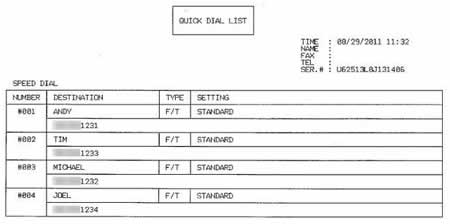
- Print a Tel Index list to confirm the numbers have been stored.
Print a Tel Index list to confirm the numbers have been stored:
-
Press Menu.
-
Press the UP OR DOWN ARROW key to choose Print Reports. Press OK.
-
Press the UP OR DOWN ARROW key to choose Tel Index List. Press OK.
-
Press the UP OR DOWN ARROW key to choose Numerical or Alphabetical. Press OK.
-
Press Black (Mono) Start or Color (Colour) Start.
You Brother machine will print the Tel Index list.
- Press Stop/Exit.
OPTION 4: DIALING A SPEED DIAL NUMBER
Once you have stored a Speed Dial number, you can dial it by following these steps:
-
Press the UP ARROW key (Speed Dial).
-
Use the dial pad to enter the three-digit Speed Dial number you want to dial.
- Press the Black (Mono) Start or Color (Colour) Start key on the Brother machine to dial the number.