MFC-8910DW
FAQs & Troubleshooting |
When I make a copy using Legal size paper the image or text is cut off.
Your copies may be cut off if the paper is loaded incorrectly in the Automatic Document Feeder (ADF) or paper tray, or if the paper size setting is not programmed correctly.
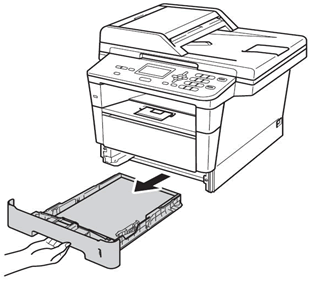
ADJUSTING THE PAPER TRAY FOR LEGAL PAPER
To load Legal paper into the paper tray, follow these steps:
SETTING THE PAPER SIZE
You can use ten sizes of paper for printing copies: Letter, Legal, A4, A5, A5L, A6, B5, B6, Folio, and Executive.
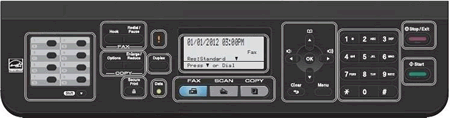
To set the Paper Size (Legal size), follow these steps:
MAKING COPIES
To make copies, follow these steps:
ADJUSTING THE PAPER TRAY FOR LEGAL PAPER
To load Legal paper into the paper tray, follow these steps:
- Pull the paper tray completely out of the machine.
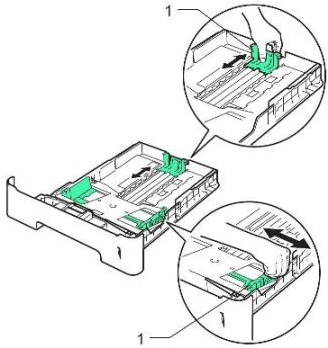
- Press the release button (1) in the bottom of the paper tray and then pull out the back of the paper tray. Extend the tray so that the triangular mark is aligned with the line marked LGL.
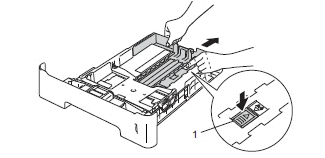
- While pressing the green paper-guide release lever (1), slide the paper guides to fit the paper size. Make sure the guides are firmly in the slots.
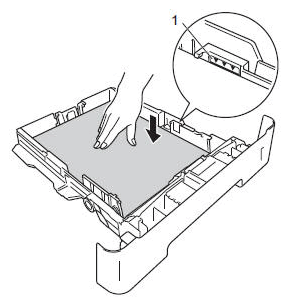
- Put paper in the tray and make sure:
- The paper is below the maximum paper mark (1). The maximum paper mark is located on the right paper guide and marked with 3 red down arrows. Over filling the paper tray will cause paper jams.
- The side to be printed on must be face down.
- The paper guides touch the sides of the paper so it will feed properly.
- The paper is below the maximum paper mark (1). The maximum paper mark is located on the right paper guide and marked with 3 red down arrows. Over filling the paper tray will cause paper jams.
- Put the paper tray firmly back in the machine. Make sure that it is completely inserted into the machine.
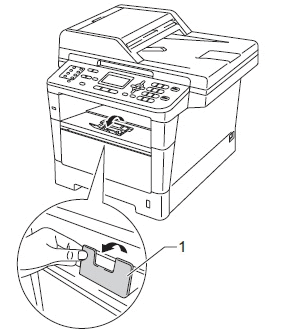
- Unfold the paper support flap (1) to prevent the paper from sliding off the face-down output tray.
SETTING THE PAPER SIZE
You can use ten sizes of paper for printing copies: Letter, Legal, A4, A5, A5L, A6, B5, B6, Folio, and Executive.
To set the Paper Size (Legal size), follow these steps:
- Press Menu, 1 (General Setup), 2 (Paper), 2 (Paper Size).
- Press 1 for MP Tray or Press 2 for Tray 1.
- Press the Down arrow key to select Legal.
- Press OK.
- Press Stop/Exit.
MAKING COPIES
To make copies, follow these steps:
- Press the COPY mode key to illuminate it.
- Unfold the ADF document support flap (2) and the ADF document support (1).
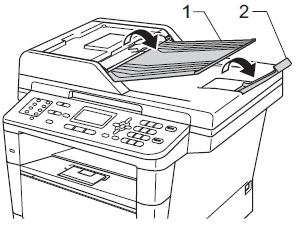
- Place the document(s) you want to copy into the ADF face up, top edge first until you feel it touch the roller.
- Adjust the paper guides (1) to fit the width of your document.

- Use the dial pad to enter the number of copies you want to make (up to 99).
- Press Start to begin copying.
To stop copying, press Stop/Exit.
Content Feedback
To help us improve our support, please provide your feedback below.