HL-8050N
FAQs & Troubleshooting |
How do I replace the Feed Roller?
- To prevent electric shock, always turn the printer off and disconnect the power cord from the AC outlet/socket before cleaning the printer or performing maintenance.
- Before you replace the feed roller, turn the power switch off, unplug the AC power cord and allow the printer to cool for at least 30 minutes before replace the feed roller.
-
There are six feed rollers in the printer. They are located in the following locations: 4 inside the interior of the printer, 1 in the 550-sheet tray and 1 in the 150-sheet tray.
-
Those rollers are periodic replacement parts. We recommend that you call your dealer or Brother Customer Service if you need assistance replacing the Feed Roller.

-
In the interior of the printer.
-
550-sheet tray.
-
150-sheet tray.
Follow the procedure below to replace the "Paper Tray Feed Rollers".
-
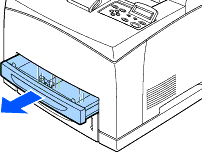
Pull the paper tray out of the printer.
If replacing the feed rolleres for Tray 2, pull out both Tray 1 and Tray 2.
-
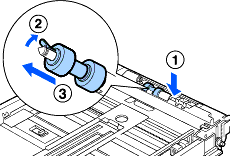
While pushing down on the shaft of the feed roller as shown in the illustration (1), widen the tab of the feed roller to loosen it (2) and then slowly remove the feed roller from the shaft of the paper tray (3).
-
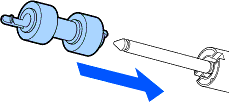
Hold the new feed roller with the tab as shown in the illustration and slowly push it onto the shaft of the paper tray.
-
Align the small tab on the feed roller with the slot of the shaft, and then push the feed roller completely in so that the tab fits into the slot.
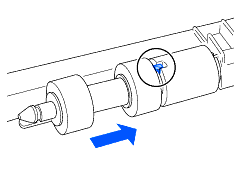
-
Push the paper tray completely into the printer.
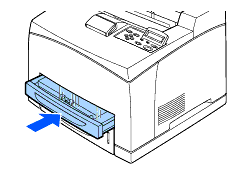
Follow the procedure below to replace the "Feed Rollers" inside the printer.
-
Remove any paper from the center output tray.
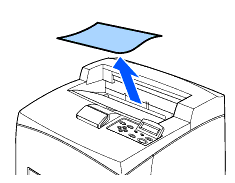
-
Open the top cover.
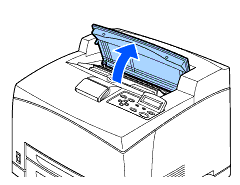
-
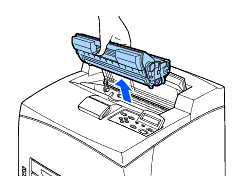
Hold the toner cartridge by the grip and pull it out slowly.
We recommend that you place the toner cartridge on a piece of disposable paper, or lint free cloth in case you accidentally spill or scatter toner.
-
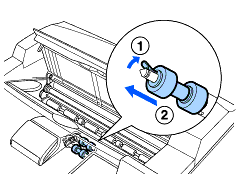
While pushing down on the shaft of the feed roller as shown in the illustration, widen the tab of the feed roller to loosen it (1) and then slowly remove the feed roller from the shaft.
-
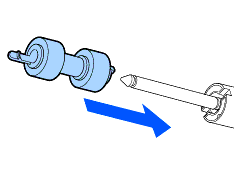
Hold the new feed roller with the tab as shown in the illustration and slowly push it onto the shaft of the paper tray.
-
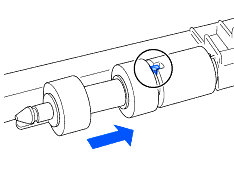
Align the small tab on the feed roller with the slot of the shaft, and then push the feed roller completely in so that the tab fits into the slot.
-
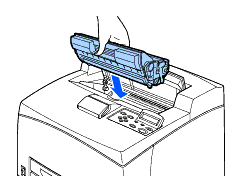
Hold the toner cartridge by the grip and insert it into the slot inside the printer.
Make sure that the toner cartridge is firmly set.
-
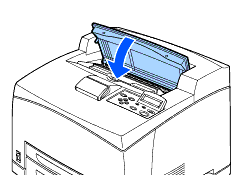
Close the top cover securely.
-
Print a test page by pressing the Set button three times.
