HL-3450CN
FAQs & Troubleshooting |
How do I replace the Drum Cleaner?
Follow the steps below:
Both ends of the Drum Cleaner roller consist of metal bearings that connect the bias element to the power supply. When you install the Drum Cleaner, the metal bearings must be connected correctly. Be sure to check how they are connected by referring to the old Drum Cleaner before you begin replacement.
-
Press the Power button to turn the printer Off, and then unplug the printer.
-
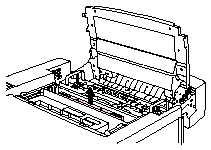
Open the Top Cover.
-
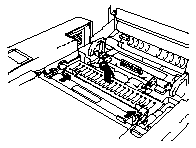
Remove the Drum Cleaner Cover.

-
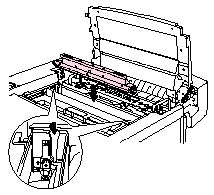
Remove the Drum Cleaner by lifting it up and out of the printer with both hands.

-
Install the new Drum Cleaner into the printer by gently placing the brass bearings into the guides, and then pushing the handle down until the bearings click into place. Ensure that the Drum Cleaner is free to move slightly upward (rotating slightly around the bearings) in the housing after you have installed it.

-
Re-install the Drum Cover, and then close the Top Cover.
-
Press any of the Menu buttons (+, -, Set or Back) to turn the printer Off line.
-
Press + or - until "RESET MENU" appears.
-
Press Set to proceed to the next menu level, and then press + or - until "PARTS LIFE" appears.
-
Press Set, and then press + until "240K KIT" appears.
- Press Set, and then press Go. The printer is now in the READY state.
