SDX85M
FAQs & Troubleshooting |
What Should I Do if the Text or Patterns Drawn with the Calligraphy Pen are Faint?
If the text or patterns drawn with the calligraphy pen are faint, check the following cause and perform the necessary operation according to each solution.
Cause 1 : The pen is not inserted into the holder correctly.
Cause 2 : The tip of the pen does not touch the material (paper) well.
Cause 3 : The setting for the Draw Pressure or the Draw Speed is not appropriate.
Cause 4 : The pen is out of ink.
Cause 5 : There is loose paper debris on your paper or attached to the mat.
Calligraphy pens only work with paper.
Cause 1 : The pen is not inserted into the holder correctly.
Solution
The pattern cannot be cleanly drawn if the calligraphy pen is not inserted into the pen holder correctly.
Check that the pen is inserted into the pen holder correctly and try again.
Check that the pen is inserted into the holder correctly
Insert the pen into the pen holder
Check that the pen is inserted into the holder correctly
-
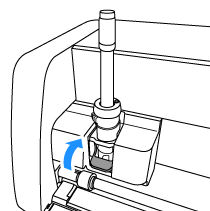
Lift the holder lock lever of the cutting machine, and then remove the pen holder.
-
Push down on the release lever on the calligraphy stand.
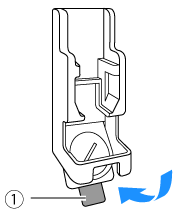
(1) Release lever
-
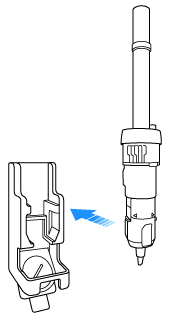
Place the pen holder in the calligraphy stand.
-
Return the release lever on the calligraphy stand to its original position.
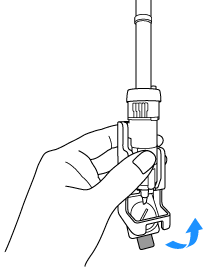
-
Make sure that the tip of the calligraphy pen is in the groove of the pen adjuster.

(1) Groove
If the pen is in the groove, other causes may be considered.
Check the cause from 2 to 5.
If the pen is not in the groove, return the dial from the initial position and try to insert the pen into the pen holder again. For details, refer to the Insert the pen into the pen holder.Dial is in the initial position Dial is NOT in the initial position 
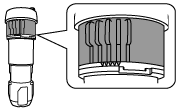
Insert the pen into the pen holder
-
Place the calligraphy stand on a level surface, and vertically hold the pen.
Insert the pen into the calligraphy pen holder so that the pen tip fits into the groove in the pen adjuster.
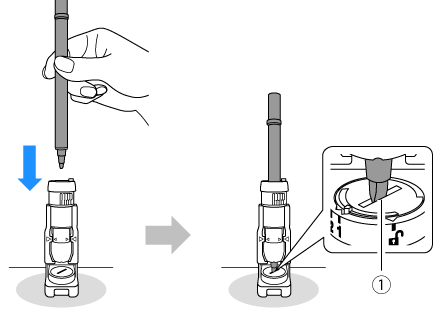 (1) Groove
-
While holding the calligraphy stand and pen holder, pull the gray dial up.
When the dial is up, it can be rotated left.

-
Slowly turn the dial to the left until it stops moving to the left, and then lower the dial so that the teeth are engaged.

-
Make sure that the tip of the calligraphy pen is in the groove of the pen adjuster.
The height and angle of the pen is fixed.
Do not touch or move the pen until the draw is finished.
If the tip of the pen is not in the groove, return the dial of the pen holder to the initial position, and repeat from step 1 again.
(1) Groove
-
Push down on the release lever on the calligraphy stand.
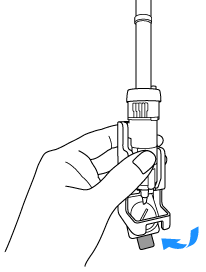
-
Pull the calligraphy pen holder straight out of the stand toward you, to remove the pen holder from the stand.
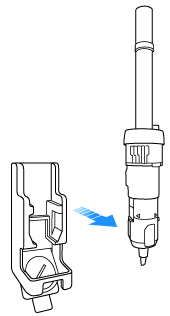
If the pen holder is removed without the release lever pushed down, the pen tip may become damaged.
-
While holding the calligraphy pen holder, insert it into the carriage of the machine.
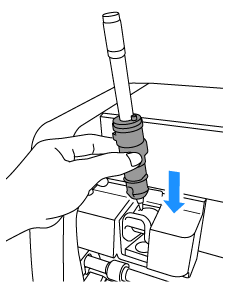
Do not hold the pen when inserting the pen holder into the carriage. Otherwise, the pen will move out of place. If the pen is not proper position, the pattern cannot be drawn cleanly.
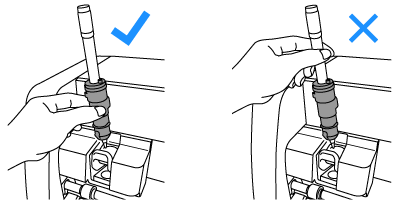
If the pen moves out of place, return the dial of the pen holder to the initial position, and repeat from step 1 again.
Dial is in the initial position

-
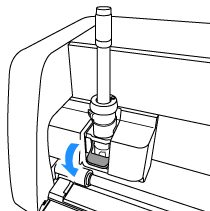
Push down on the holder lock lever.
Cause 2 : The tip of the pen does not touch the material (paper) well.
Solution
The tip of the pen may not touch the material (paper) well.
By rotating the calligraphy pen half turn (180 degrees rotation), the drawing result may be improved.
When inserting the pen into the groove of the pen holder, turn the pen a half turn (180 degrees rotation). For details on inserting the pen, refer to Insert the pen into the pen holder in the Cause 1 of this FAQ.
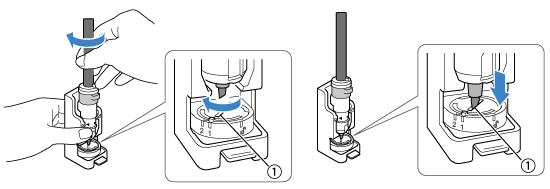 |
(1) Groove |
Cause 3 : The setting for the “Draw Pressure” or the “Draw Speed” is not appropriate.
Solution
If the draw pressure and speed are not appropriate, the drawn text and patterns may be faint.
Adjust those settings according to the following procedure.
-
Select Draw in the preview screen.
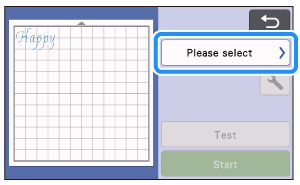

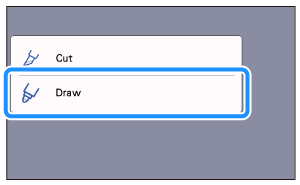
-
When the following screen appears, touch the OK.
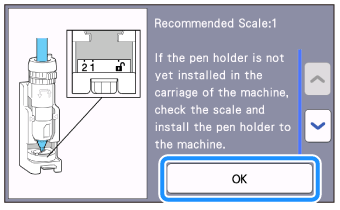
-
Touch
 .
.
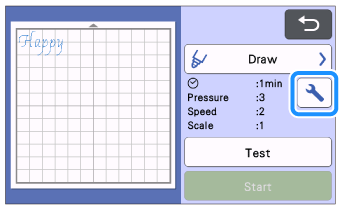
-
Adjust the Draw Speed and Draw Pressure, and then touch the OK.
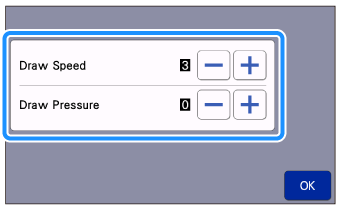
- If the drawing pressure is too high, the pen tip may become damaged or the material may tear. Do not increase the pressure too much.
- If the drawing speed is too high, the text or patterns may become faint. Do not increase the speed too much.
-
The appearance of the finished project differs depending on the specified drawing pressure setting.
Adjust the setting while checking the result of trial drawing using the same material as that used in your project.
Load the mat into the machine after checking the settings.
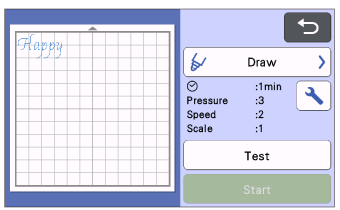
-
Touch the Start to start drawing.
Cause 4 : The pen is out of ink.
Solution
Is there enough ink for the pen? If a result of trial drawing by a hand is faint, replace the pen with a new one.
Cause 5 : There is loose paper debris on your paper or attached to the mat.
Solution
Are foreign substance such as cut edges of patterns attached to the surface of the mat?
Remove any foreign substance using the spatula or tweezers.

